bookmark_borderUses And Tips On How To Use It Water Testing

BOTTLED WATER GUIDE

How Often Do I Need to Sample?

Weekly – you must collect samples of each type of finished bottled water for fecal coliforms or E. coli testing.

Quarterly – you must randomly collect samples for aerobic plate count analysis of at least four containers and four closures. The containers and closures are sampled by either using a swab of the container and cap, or a rinse of the container before filling or sealing the bottle.

How Do I Submit a Water Sample?

Check with the laboratory that you will be working with for direction regarding the type of sample containers to use and how much water will need to be collected. For more information please see the Guidance for Quarterly Bottled Water Container and Closure Requirements.

What Are the Levels At Which My Samples Would Not Meet the Requirements?

Weekly samples must be free of coliforms.

Quarterly samples must be free of coliforms, and no more than one of the four samples may exceed:

one bacteria per milliliter of capacity (preferred and easiest method); or

one colony per square centimeter of surface area.

What Should I Do If I Get an Unacceptable Result?

If the results of weekly sampling are positive for coliforms you must:

immediately notify the department

submit additional samples from the same lot as the initial positive sample (or the next available lot if initial lot if not possible) for analysis within 24 hours or next business day of receiving notice that the initial sample was positive;

detain the product pending the results of the additional samples;

notify the department of results of the additional samples; and

keep a record of any actions taken.

If the results for quarterly bottle and closure samples exceed limits you must:

review your transportation, storage, and bottling procedures to find the source of the contamination;

immediately correct any deficiencies found; and

keep a record of your review.


Specialty Testing Packages

Problem Check- An informational testing package developed for people experiencing problems with iron and/or other aesthetic problems such as odor, taste or discoloration. This package can be used for well water and city water.

Corrosion Check – An informational testing package that was developed for people who are experiencing signs of corrosion in their plumbing fixtures.  This test analyzes contaminants that can specifically affect corrosion.  This package can be used for well water and city water.

Waterborne Pathogen Panel- This test focuses on pathogens in water systems that can cause illness. Several of these organisms are indicators of sewage contamination, making this a good test for anyone who suspects their water has been contaminated by sewage or animals waste.

Complete RO Screen- The Complete RO Screen was developed to be the most complete analysis available for reverse osmosis design. The Complete RO Screen offers a comprehensive, in-depth analysis of parameters necessary to determine the proper reverse osmosis system specification.

quick series testing provides water analysis in as quick as 2-3 business days from receipt of the water sample. These tests are an excellent tool for home inspectors or realtors involved with home sales. When time is critical, these tests can provide quick answers to very important questions about water quality in the home.


Beginner’s Guide to Pool Water Testing

have all heard of “testing the waters” but when comes to swimming pool maintenance, water testing is the best route to an easy to maintain pool. You have to do more than touch the water to test anything more than the temperature. Test kits, strips and readers are used to check pool water balance levels.

Why Test Pool Water?

A swimming pool is just a hole in the ground without water, and swimming is no fun if not experienced in clean, clear and healthy water. Since swimming pools are generally used by multiple people at any given time, it is imperative that pool water is tested and treated regularly to prevent the spread of infectious illness and enhance the pool experience.

What Water Tests are Needed?

In order for us to have a sparkling clean and well-balanced pool, we have to ensure that the levels of pool chemicals stay within the ideal range of:

pH: 7.2 – 7.6

Alkalinity: 80 – 120 ppm

Calcium Hardness: 180 – 220 ppm

Chlorine: 1-3 ppm

Bromine: 3-5 ppm

Cyanuric Acid: 30 – 50 ppm

How Often Should I Test Pool Water?

It is recommended to test your pool water at least weekly and add chemicals if you see an increase/decrease in ideal chemical levels. More precisely however, pH and chlorine levels should be tested more often, perhaps daily until you come to a good understanding of how they fluctuate.Other readings, for calcium, alkalinity and cyanuric acid, tend to move more slowly and can be tested weekly or even monthly in some cases.

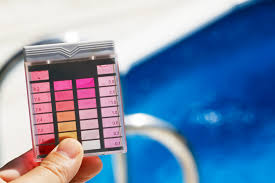
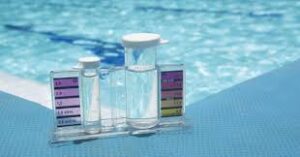
How Do I Test Pool Water?

There are several types of testing supplies available on the market varying in price and accuracy. Since I work for a company that sells pool supplies, it was fairly easy for me to get customer input via our amazing review program, and I was able to narrow down the bestselling water testing supplies to make it easier for you to make the selection to your liking.


Flushing and sampling for lead

Children up to six years old are more sensitive to the effects of lead because they are still developing and their small bodies can absorb it more easily than adults. Even small amounts of lead can be harmful to young children, infants and pregnant women.

The law

By law, if you own or operate a school, private school or child care centre, you must:

flush your plumbing regularly

sample your water to test for lead

The regulation requires the flushing of plumbing in schools, private schools and child care centres. Flushing has been shown to reduce lead levels in water at drinking water fixtures. The regulation also requires sampling and testing to measure the concentration of lead in drinking water against the provincial drinking water quality standard for lead.

In this guide, you will see the term “drinking water fixture”. For the purposes of this guide, this term means all drinking water fountains and every tap that provides drinking water or is used to prepare food or drink for children under the age of 18.

Remember, this guide is only a summary, and should not be relied upon for compliance purposes. You must refer to the text of O. Reg. 243/07 to be clear about your specific requirements for flushing, sampling and testing drinking water for lead


WATER TESTING GUIDE

What is in your dental unit waterlines? You’ve probably seen the pictures and you’ve probably read the news headlines – looking for the answer to this question is not without stress.

While dental waterline contamination has gotten more attention the last couple years, this is a danger that the dental industry has struggled to understand or control. In fact, at the Organization for Safety, Asepsis, and Prevention’s (OSAP) Annual Conference last year,

The tough part about maintaining dental waterlines – and infection control, in general – is that, dental professionals are not and should not be experts in waterline science. We, your patients, sit in your chairs every few months trusting you to be fantastically educated and skilled medical professionals, not water scientists.

WHY TEST YOUR DENTAL UNIT WATERLINES?

Because on average even treated waterlines fail testing nearly 1/3 of the time. And non-treated lines are likely to have counts 200 to 400 times the CDC guidelines of ≤ 500 CFU/mL. ProEdge completed a study of over 22,000 consecutive waterline tests from our water test clients measuring the effectiveness of all major products in real-world settings

While using a high-level disinfectant to “shock” your waterlines and adding a low-level antimicrobial treatment to continually maintain them are both necessary for every effective treatment protocol, no treatment product is perfect, instructions for use (IFUs) can be difficult to follow, and biofilm never quits entering the lines to multiply and spread.

bookmark_borderA Bit About Mold Inspection

How to Know if Mold Is in Your Walls

Mold often grows out of sight in wall cavities due to water problems like flooding or leaks. Before you know it, it creates a toxic environment in your home, compromising the indoor air. The good news is that even hidden mold leaves behind clues. You can find out if mold is growing in your walls in several ways.

Here is how to spot mold that grows inside your walls.

Moisture

If your home has suffered severe water damage, mold will grow in your walls if the water wasn’t removed within 24-48 hours. If water reached drywall, the best practice is to cut it one foot above the water line.

Other water problems like leaking pipes may also trap moisture inside your walls. Even in these cases where leaks are visible, moisture can get inside walls, providing mold a place to grow. Be aware of signs that drywalls are moist such as:

  • water stains
  • dark rings
  • discoloration
  • deterioration like peeling, bubbling or cracking of the paint or wallpaper

Moreover, if the walls are bowed, bulging or warped, they most likely contain moisture. Another clue is if the surface of walls feels wet or damp.

Visible Signs of Mold

First of all, if the wall is rotting, it likely has mold underneath it. In less severe cases, mold might not be that noticeable. Inspect the walls and check for mold on walls behind furniture and along baseboards too.

Mold can have different colors and textures, so be sure to recognize them. Mold can be black, green, gray, white, or brown. Mold can even appear orange, pink or purple when it grows behind vinyl wallpaper. Another sign of visible mold is discoloration of walls, even if it has been painted over. If the water damage inside the walls persists, mold will show signs on the surface.

Musty Smell

If you don’t see signs of mold but you can smell it, it may be hidden in your walls. A musty smell is a good indicator that mold is growing in your home. The smell of mold feels earthy, like rotting leaves or decaying wood in a dense, damp forest. If you think there’s mold in your walls, get on your hands and knees and smell the electrical outlets. This might sound silly, but it may help you sense mold if it’s growing within walls. Outlets have better access to the area behind walls. Thus, smelling them can help identify the mold problem.


Mold Warning Signs: Allergies and Other Health Issues

When someone has mold in their home, they usually show allergy-related symptoms. If you’re not sure whether your allergy-like symptoms are caused by mold in your home, then consider this question: do your symptoms get better once you go outdoors or leave your home? If so, then there is good chance that mold is the culprit.

Symptoms of mold allergies include:

  • Coughing
  • Sneezing
  • Sore, itchy throat
  • Congestion and runny nose
  • Sinus headaches
  • Wheezing and difficulty breathing
  • Itchy, watery eyes
  • Irritated, itchy skin

Some forms of household mold are toxic, causing serious, life-threatening illness. These highly-dangerous molds might cause symptoms such as bleeding, internal organ damage, mental impairment, cancer, and even death.


Are Home Mold Test Kits Reliable?

Mold is a common problem that most homeowners have to deal with from time to time. In a bid to rid their houses of this menace, some people result in using DIY home mold test kits. That being said, the question that bothers most people is how effective home mold test kits are. The truth is that a home mold test kit is not reliable since it only reveals the presence of mold in the house but fails to give you detailed information about the problem. Among the information that the kit will not provide you with is the source of moisture, the type of mold present, where the mold is located and what you can do to remediate and prevent future mold infestation.

Mold Type Information

There are two types of mold: harmful mold, which is mostly the black mold, and the non-harmful mold that grows on food that is spoiling. A home mold test kit will only confirm the presence of mold in your house, but will not tell you what type it is. This limited information can cost you lots of money since you may invite a professional to remove the mold, only to discover that the mold is not harmful. On the flipside, you may be tempted to think that the mold is the non-harmful type, only to find out that the mold is the harmful black mold, a time in which, it might be too late and the damage is too much.

Source of Moisture Information

Mold thrives where there is moisture and warmth, hence the need to identify the source of moisture. Unfortunately, home mold test kits do not identify the source of moisture, which is the start to mold remediation process. Contrary to a professional who goes to the root cause of the mold problem, home mold test kits only confirm the presence of mold in the house but do not tell the cause of the mold. For this reason, you have to call in professional mold services so that they can identify the source of moisture. This is a bit expensive since these are two different costs.


Levels of Mold

A home mold test kits is simply a dish that traps mold spores that are hovering in the atmosphere. Regardless of the high number of mold spores trapped in the jar, this does not tell how much the infestation is. The jar has to be transported to the lab where a professional analyses the spores to determine the levels of mold infestation. The analysis comes at an extra cost, rendering this type of mold test expensive. Failure to know the levels of mold is risky because you may never know how much damage the mold has caused, and by the time you realize, it might be too late.

Remediation of the Mold

Contrary to a mold professional who identifies the mold and goes ahead to remove it, a home mold test kit does not do this; it only confirms the presence of mold. After collecting the mold spores in a jar, the kit is transported to a test lab for analysis. You then have to find professional mold removal services at an extra cost. Foregoing a home mold test kit presents you with one package; testing and removal, something that saves you money and inconvenience of looking for a good professional. Most importantly, a professional does effective testing to uncover the location of the mold and the source of moisture.

Preventive Measures

The best thing with hiring professional mold removal services is that on top of removing the mold, they will offer expert advice on what you should and not do to prevent future infestation. By using the DIY home mold test kit, you miss a chance of getting this important piece of information. Without this information, you will spend so much on the remedying process and after a short while, you will spend even more money when the mold grows again. Only that this time around, the damage may be even worse than the previous time.

Although the role of a home mold test kit is very limited, its effectiveness cannot be ignored. However, for someone working on a budget, professional mold services are your best bet since they present you with testing and remediation as a single package. Even as you do that, vet the mold experts by checking for their customer reviews and rating. Mold is very risky to your health and can cause massive structural damage and so you do not want to chances.


How are mold allergies and exposure diagnosed?

There are no proven tests that show when or where you may have been exposed to mold. However, your doctor may check for mold allergies by reviewing your symptoms and performing one of the following tests:

  • Blood test. Your doctor takes a blood sample and then sends it to a laboratory to measure the number of certain antibodies, which can indicate your immune system’s sensitivity to different mold species.
  • Skin prick test. Your doctor takes small amounts of mold and applies it to your skin using a tiny needle. Your skin will break out in bumps, a rash, or hives if you’re allergic to that type of mold.

bookmark_borderThe Right Tips To Make Home Inspection

What Is A Home Inspection And How Do I Hire An Inspector?

Ask if you can be present for the inspection

A home purchase involves not only a lot of time involved, but a substantial amount of money as well. With so much on the line, it’s wise to be present for the inspection. You do have the right, but there are more benefits. The home inspector can point out certain things about the house and you can become educated about the property that you are buying. Double check before you hire a home inspector whether it’s sonalmitted for you to be present for the inspection.

Check to see if the home inspector is bonded and insured

A home inspector is not required to be bonded or insured. However, it’s very wise to look for a home inspector who is. This means that the company has insurance and has secured money to an insurance company in the case that they are sued by a client for their work. It provides an extra level protection for you as a client of the home inspector.

What experience should I look for In a home inspector?

The survey showed that over 75% of the real estate contracts contained contingencies based on home inspections. Thus, as such a pivotal step in the purchase a home, it’s important to check the training, education and qualification of the home inspector that will be used. For example, in Florida, an individual must comply and complete certain requirements that are regulated by the Florida Department of Business and Professional Regulation. Each state has their own requirements, its therefore important to ensure you hire a state certified home inspector.

What is a home inspection?

A home inspection is simply an assessment of the home. This inspection is conducted by a qualified and trained home inspector. Seventy-two percent of Americans believed that their home inspection before the purchase of their home helped them avoid potential issues with their home, according to a survey by the ASHI.


tips to find a home inspector

Get up to date on province-based home inspection regulations

Many homeowners assume that home inspectors are licensed and regulated across Canada. This is simply not the case. In the 1990s, the National Home Inspector Certification Council (NHICC) was put in place to oversee standards and to develop a national designation. Home inspectors who complete the program become National Home Inspectors in Canada. However, having this certification and designation is not mandatory. While the NHICC program is backed by multiple stakeholders, such as the Canadian Real Estate Association (CREA) and the Canada Mortgage and Housing Corporation (CMHC), there is nothing in place to prompt wide-spread adoption of this designation.

Ask about memberships and home inspection certifications

After you confirm that the home inspector has all required certifications, find out whether they are members of associations. A couple of examples include the Canadian Association of Home & Property Inspectors (CAHPI) or the Canadian National Association of Certified Home Inspectors, Inc. (CanNACHI). “If you’re in British Columbia or Alberta, those provinces have a web directory that you can go to and the directory provides the names of those that meet the licensing standards in B.C. and Alberta,” says Allen.

Interview multiple home inspectors and ask what they look for

When you go to buy a new car, you don’t walk into the first dealership and purchase the first vehicle you test — so what makes finding a home inspector any different? Ask as many questions as you want, keeping in mind that their expertise will result in the decision to purchase your most expensive asset. The key is to for you to feel comfortable with their skills and expertise. For instance, you could ask the following.

Expect and ask for a home walkthrough

Ask potential home inspectors if you can be there for the walkthrough, which takes anywhere from two hours in a condo to four or more hours in a single family detached home. If the inspector hesitates or tries to persuade you that your presence isn’t necessary isn’t the right person for you. On the flipside, if an inspector tries to coordinate a walkthrough so that you can attend, this is a great sign.

What to expect during a home inspection walkthrough

Inspectors look at everything from appliances to HVAC systems but he or she cannot inspect elements that are covered up or hidden. If a homeowner has stacked a dozen boxes in front of the electric panel, your inspector won’t get a chance to inspect that integral home component. As a result, it’s always a good idea to send a message to the seller (through your agent) to ask for easy access to all integral systems within the home.


The Home Inspection: Do’s and Don’ts for Home Buyers

Do get more than one home inspector

It’s in your best interest to choose a home inspector with care. Your real estate agent may recommend an inspector, or the seller might offer to show you a report from a home inspection they’ve had done. To avoid any conflict of interest and to get the most objective information on the home’s condition, you’ll want an independent home inspector. And because things move quickly after an offer is accepted, you may even want to research inspectors while you’re house hunting.

Do get a home inspection for new construction

Even if you’re buying new construction, a home inspection should still be on your to-do list. A home inspector may evaluate a home differently than a county or municipal inspector, whose job is to determine whether new construction complies with building codes. At a bare minimum, a home inspector is a new set of eyes double-checking that there aren’t any loose ends (or unconnected ducts).

Do be there for the home inspection

It’s recommended that buyers be present during the home inspection. Following the inspector from room to room will allow you to ask questions as they go. That will help you better understand the inspection report — which can feel pretty intense, especially if you’re a first-time home buyer — and learn more about your potential new home.

Don’t get in the home inspector’s way

While you’re encouraged to tag along and ask questions, don’t impede the home inspector. You should also stick with them, rather than heading off to other parts of the house. For example, if they’re checking the bathroom water pressure and you start running the kitchen sink, it could mess with the results.

Don’t be afraid to negotiate with the seller

You shouldn’t expect the seller to take care of every last item in an inspection report — a thorough home inspection can easily list dozens of separate defects — but you may want to negotiate the cost of major repairs that were not included in the seller’s disclosure.


Tips for Choosing A Reliable Home Inspector

Verify You Can Tag Along During the Home Inspection

While you are not required to go along for the inspection, it is in your best interest to do so. The home inspector can explain all the different things he or she is looking for while also giving you valuable insight into the state of the home. If you do choose to purchase the home, your trip with the home inspector will get you acquainted on where everything is in your new home, get you educated on general maintenance of the major components in the home, and take note of any areas that may give you trouble in the future even if they are not major issues right now.

Choose an ASHI certified or InterNACHI Inspector

Inspectors that receive certification with ASHI (American Society of Home Inspectors) or InterNACHI (International Association of Certified Home Inspectors) undergo rigorous technical examinations in addition to following a strict code of ethics. This is not to say there are not some fantastic home inspectors who do not hold these certifications, but it is just another level of confidence for you when selecting a home inspector.

Find Out What the Inspection Includes

The best home inspection will be a thorough one, where the inspector goes over every little detail of the home. You want an inspection that looks at every component of the home including: plumbing, electrical, structural condition, heating and AC, basement and foundation, roof and attic, appliances, pest evidence, and any environmental issues such as mold, radon, asbestos and lead paint. Most home inspections should take two to three hours to complete. If you are purchasing a larger home, a fixer-upper or an older home, the inspection will more than likely take even longer. Just make sure you know going in exactly what you are getting.

Is the Home Inspector Insured?

Finding out about insurance is one of the most important questions to ask when interviewing a home inspection. Climbing in attics and wandering through basements and crawl spaces does carry a certain amount of risk, which is why reputable home inspectors carry insurance. If the home inspector accidentally gets injured during the inspection, you don’t want to have to worry about liability.

Ask Your Realtor for References

One of the best resources for picking a home inspector should be your realtor. If your agent has been in business for any length of time, they have probably encountered quite a few home inspectors. By observation, your agent can see who does a thorough job and who does not.


Choosing the Right Home Inspector

Buying a home? It’s probably the most expensive purchase you’ll ever make. This is no time to shop for a cheap inspection. The cost of a home inspection is very small relative to the value of the home being inspected. The additional cost of hiring an InterNACHI-Certified Professional Inspector® is almost insignificant.

You have recently been crunching the numbers, negotiating offers, adding up closing costs, shopping for mortgages, and trying to get the best deals. Don’t stop now. Don’t let your real estate agent, a “patty-cake” inspector, or anyone else talk you into skimping here.  InterNACHI-certified inspectors  perform the best inspections by far.

InterNACHI-certified inspectors earn their fees many times over. They do more, they deserve more, and — yes — they generally charge a little more. Do yourself a favor… and pay a little more for the quality inspection you deserve.