bookmark_borderExplaining Types Of Commercial Painting And Rollers

Marketing for Commercial Painting Jobs

I hope you and your family are having the most awesome holiday season ever. Wouldn’t it be cool to start out 2018 with a big fat commercial repaint contract? The kind that could mean the difference of 10, 20 or 30% increase in sales and profits for your business. If so, I’ve got two great pieces of news for you.

First, let’s talk about timing. You could not be going after commercial repaints in a better time of the year. See, at the end of 2017 there are budget dollars being frantically spent, because so many maintenance directors, facility directors, if they fail to spend that commercial painting budget, then they just don’t get it again the next year. I know it’s counter intuitive to the way we think as small business owners, but when you’re running a huge company and you are managing hundreds of thousands of square feet, or tens of thousands of square feet, these things are done kind of mechanically, so they really need to spend that budget in order to have it renewed the next year.

Number two, as it relates to timing. A lot of people desperately need to do a project around the facility, but it’s been put off because funds have not been released. 2018 comes around, they’ve got quarter one funds now in the account, that they can spend and often it’s a great time to start talking with them. Additionally, a lot of people are submitting their 2018 plans to the higher ups. Sometimes the maintenance guy submits his plans to the facilities guy, sometimes the facilities guy is submitting his plans to the COO, and all of that information requires maintenance painting line items. If you can reach out to that community right now, they are very responsive.

Additionally, typically not as many things are going on this time of year, so they’re more receptive to your message and as an owner, you have time. So you’ve got three things that are working in your favor. It’s almost like if you were to pick a perfect time to fish in any given year, you would fish when they were on the bed right? Well right now, from a commercial repaint standpoint, your prospects are on the bed, so to speak. When you reach out to them make sure that you’ve got a good powerful offer, that you use multistep, multimedia marketing.

Number two, this is the second piece of really good news. When you’re reaching out to this market this Christmas, wouldn’t it be awesome if you knew exactly how to do it? Now, when you’re going out buying Christmas presents for others, there’s a good chance you probably picked up something for yourself. I did that recently, I picked up some Sonos speakers. I love music, I listen to it all the time in the house, and I felt that was a great gift for me, and I love it. Often we’ll spend money on something like that and it’s good to do. What if you could buy something for yourself this Christmas that would teach you how to go after commercial repaints for the rest of your career?


Commercial Painting Service & Contracting

We provide value added services by constantly looking at our work through the eyes of the client. A painting job will be a complete waste if it doesn’t address a decorative or maintenance problem. By first understanding the benefits of our services, implementing the scope of work becomes much easier. In our opinion, the customer wants peace of mind, knowing that they hired a qualified contractor

Peace of mind means different things to different people but at the very least, it should include the following:

Full documentation of Insurance and Safety.

Uniformed and trained painters.

Detailed proposals with clear specifications.

Daily communication and updates.

No workplace interference.

Facility Managers. The facility manager’s job is to make sure that buildings run efficiently. When it’s time to procure painting services they rely on the experience of contractors. Some of the facilities we painted include, private office buildings, public museums and colleges, even consulates and trade missions.

Property Managers. A property management company is hired to manage a real estate property. painted apartment and condominium buildings as well as the exterior of townhouse complexes.

Interior Designers. The job of the commercial interior designer is to design and create functional space in a building. A good designer is responsible in running entire renovation projects and managing all the trades and contractors. We love working with designers and over the years we have established great relationships with some of them


Residential Painting vs. Commercial Painting: Which Painting Service is Right for You?

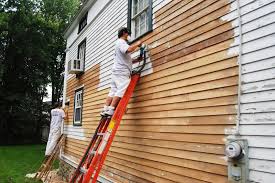
As you search for professional painters for your interior or exterior painting project, you will find that there are two main painting services available, residential and commercial painting. It can often be difficult for customers to determine which painters are right for them as both types provide similar services. If you’re wondering how to tell the difference between residential painting and commercial painting, then the following information will aid you in selecting professional painters that are perfect for your next project.

What is Residential Painting?

Residential painting is another term for house painting. Professional house painters are experts when it comes to painting the interior and exterior of single-family homes. When you hire a residential painting company, you can rest easy knowing that a team of painters will work hard to improve your house in terms of aesthetic and structure. Not only are house painters able to transform the look and feel of your home, but they can cater services to you and your family’s unique needs since you live in your home.

What Do House Painters Do?

Professional house painters offer the following interior and exterior painting services that can improve the appearance of your home quickly so you can get back to living in your home. Often, an experienced house painter can also provide an exact quote for your project with no deposit, so there are no surprises because they have painted many homes before.

What is Commercial Painting?

Commercial painting covers larger-scale paint jobs such as restaurants, office buildings, and stores. While apartment, condo and HOA’s are residential in nature, commercial painters also work on these multi-family residences. If you need to brighten up the interior or exterior of your business with fresh paint, or have an apartment building that needs an updated look, you can trust commercial painters to offer reliable, professional service.

What Do Commercial Painters Do?

Commercial painters are highly skilled at updating the interior and exterior of businesses, plus have experience working with general contractors and HOA’s. They can even provide accurate quotes off blueprints before the building is even erected. A commercial painting company can offer your office, apartment complex, retail store, restaurant, or church


Things to Consider for Commercial Painting Jobs

Communicate with Color

If you have a graphic designer or marketing manager, it may be a good idea to collaborate your building color with your logo color scheme. Don’t just wing it! Tailoring your building color to your brand communicates that you are intentional and are here to stay. MasterWorks Painting & Remodeling can you help you pick the perfect colors for your commercial project.
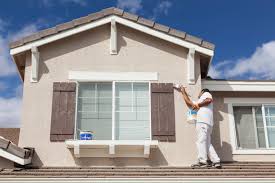
First Impressions

Don’t forget about the outside. A bland building can ward off potential customers and even bring down workplace morale. Freshening up your business’s exterior sends a bold statement to your community. After all, your building’s exterior is your first impression.

Thoughtful Design

If you are updating your paint colors, take this opportunity to be intentional about your color scheme and layout. Don’t paint everything the same one color. Use hues of your branding color, add bold accents, and use neutral colors tastefully. Plan out which colors will work best in each room.

Choose Quality

Our commercial painting contractors work within your budget and yield the results you want on time. Don’t trust just any painting company; MasterWorks Painting & Remodeling has years of experience in interior and exterior painting projects. You can count on superior quality that fits the small business budget.


Things to Watch for During a Painting Final Walkthrough

Your house is in upheaval. Before you usher your painters out, make sure you do a painting final walkthrough of the job; it will save you heartache in the end. The furniture is all over and packing a lunch for the kids is more than you can bare. That’s right, you’re living in a construction zone. A small painting project can really turn your home upside down. So when it’s completed, you may be excited to push your painters out the front door.
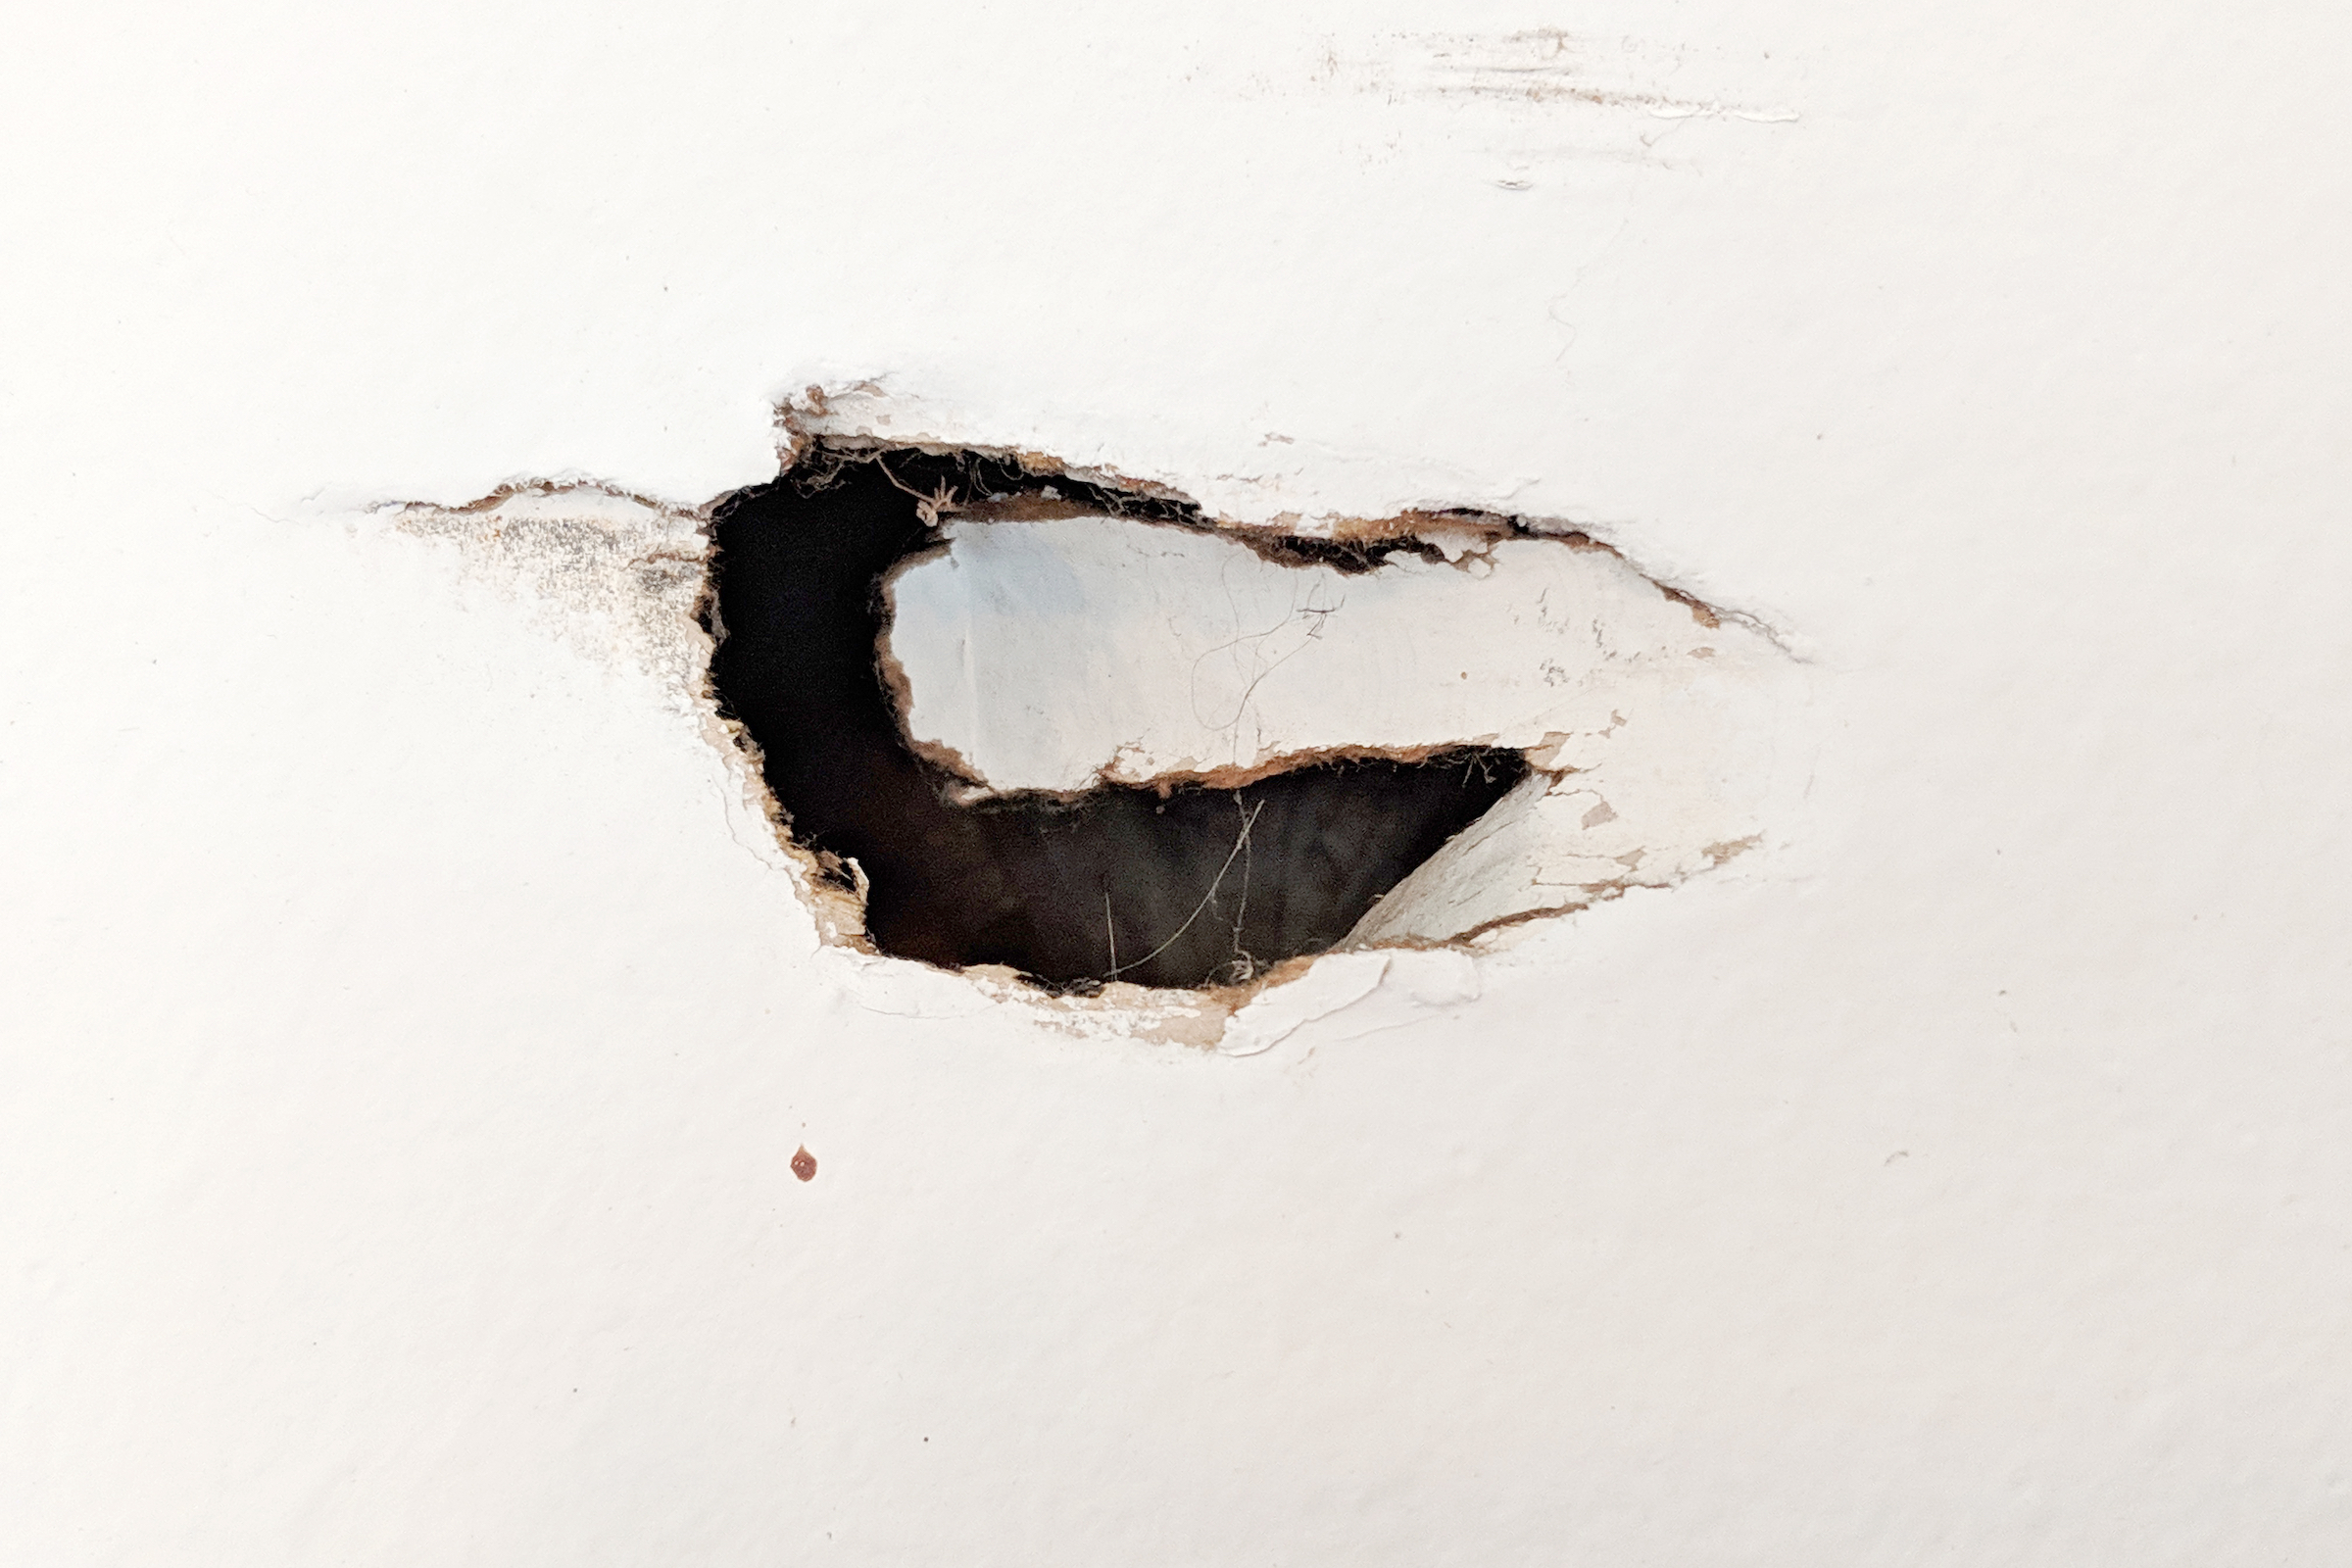
Inspection

It should be a last step of any project in your home. Do a final inspection of the work that was completed. Blemishes and minor repairs can be addressed before the contractors leave. If you neglect to take care of this while they are in your home, the company may be hesitant to set up another appointment to complete repairs. It’s best to bring up issues at the time of the work.
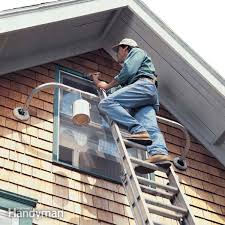
Foundations

Foundations are literally the foundation of the project. Minor preparations can make the difference in a project looking professional or messy. If the project is an exterior against the ground, the contractor should shovel rocks away from the wall so they do not get overspray on the rocks. In contrast, there should be no patches missed in painting to avoid the ground.
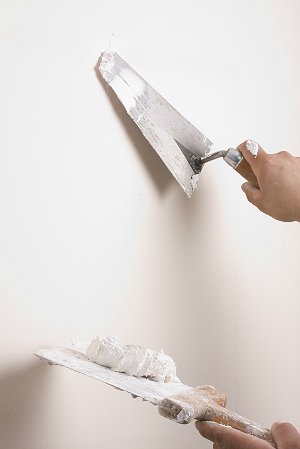
Peeling

Check the project area prior to the job and make a note of paint that is gouged or peeling. You’ll want to pay particular attention to these areas at the end of the project. Is the peeling still there? How about that divot? The imperfections should not have been painted over without prior repair. Good prep work means a good outcome in the end
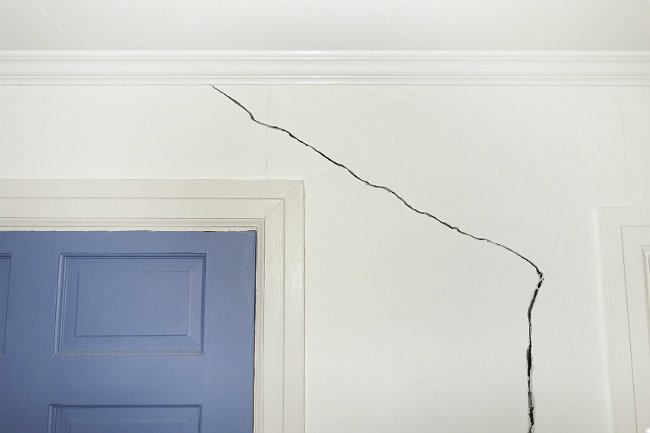
Cracked stucco

Any outside cracks in your home should be properly repaired prior to a paint job. Cracks in stucco should not be filled in with sealer, but with a full masonry patch. If it’s just painted over, you will be able to see the crack in the wall after painting.

bookmark_borderIntroduction To Drywall Repairs Materials

HOW TO REPAIR A HOLE IN DRYWALL

Drywall repair is a common home maintenance task that many homeowners can do themselves. The skill set, tools and techniques required for drywall repair depend on the size of the hole. If you can flip a fried egg, you can easily patch a small nick in your drywall, but it gets trickier as the holes get bigger. But don’t worry; Mr. Handyman is here to help! Download our Drywall Repair Guide for step-by-step instructions.

Drywall Repair Techniques

The size of the hole will determine what method of repair you’ll use. You may not need all of these tools – before you purchase anything, reference the guidelines below to see what you’ll need. You’ll find the required materials listed with each step. Drywall tape is available in paper or mesh, select mesh if you have a choice. The tools in bold are required for each step, regardless of hole size.

HOW TO PATCH A SMALL HOLE (ANYTHING SMALLER THAN A NICKEL)

Small holes in drywall are simple to fix. Any hole larger than a nickel should be repaired with the instructions under Medium or Large hole. Use spackle or joint compound to fill the hole. If you’re using joint compound, buy it pre-mixed for small DIY jobs. Spackle may shrink as it dries in larger holes and may require an extra application. Joint compound may run out or bulge as it sets and will require sanding and a second application.

HOW TO PATCH A MEDIUM HOLE (ANYTHING SMALLER THAN SIX INCHES)

For a professional finish follow the instructions under Large hole. This method requires finesse to feather the joint compound into the rest of the wall – if not done correctly, you will see a slight bulge in the wall. You must feather the repair area (gradually reduce the thickness outward) when applying the joint compound and in the sanding stage. Use a drywall patch that is slightly larger than the hole that needs to be repaired. You can purchase these at your local hardware store. Look for a kit, which will include everything you need.

HOW TO PATCH A LARGE HOLE (ANYTHING LARGER THAN SIX INCHES)

Take your time, and be careful not to nick any wires or plumbing during installation. Although this method requires more tools, the final result is more professional looking.


Tips for Hiring a Professional Drywall Contractor

The place called home must be truly made and designed to provide the deserved welcome any visitor and home owner desires when entering into the house. This and many other reasons was responsible for home design and decorations many years ago. One of the ways to design the wall or ceiling of a building is the installation of drywall which is usually very difficult and laborious work. Drywall installation involves a good knowledge of the techniques to ensure and guarantee a good outcome. The cutting, shaping and putting the panel into place and fastening as part of the sheetrock process does not give room for unprofessional practices which can mar and destroy the whole of the work while the plastering and sanding to ensure wall smoothness and elegance also require a high level of expertise and experience. Thus, installing drywall requires you find a professional installer for quality and reputable service. If you want a home renovation or improvement done or you need a residential drywall repair specialist. If you intend to install drywall for a new home or office, finding a professional installer may be difficult. However, below are some very useful tips to help find professional and reliable drywall installation contractor easily

Find a List of Contractors

Finding the perfect drywall contract for your residential drywall repair or for drywall installation for new homes or offices starts with you finding a list of drywall contractors within and around your location. You can go online, visit home building stores or just through word-of-mouth from friends and colleagues. Be sure the contractors you find offer the service you need. Once you have a good list of commercial drywall contractors, you then need to vet them.

Interview Contractors

Now that you have compiled a list of commercial drywall contractors, you have to be sure you are hiring the best out of many and doing this requires you set up an interview for them. Place a call to each of the drywall contractors and ask very good questions. If you find it hard to do this, ask these questions; ask about the company and years of service, all the services they offer, ask about how the company will finish the job if eventually hired, ask of time to complete the job and many other very important questions.

Licensing and Insurance

The drywall installation contractor must possess every necessary documents from government agencies and establishments that offer license and authorization. You must be sure that the installation company is duly registered, authorized and licensed to work. You should also be sure that the company is insured so that they can pay if any damage occurs during installation. Check the documents physically to be very sure.

Get References and Reviews

Reference and Reviews always help to avoid scams and stay safe when hiring a professional drywall installer as commercial drywall contractor for your residential drywall repair at home or in the office. Ask about reviews from neighbors, friends and colleagues. You can also get some reviews on their website.


Dos and Don’ts of Repairing Drywall

Drywall is tough, but it’s not indestructible. Over time, gypsum-board walls can sustain ugly cracks or holes. Fortunately, drywall is fairly easy to repair, but there is an art to it. Here’s what to do—and what to avoid—when fixing drywall damage so it’s indiscernible to landlords, homebuyers, or visitors.

DO use the right stuff.

When repairing minor scratches or dents smaller than ½ inch across, fill them with a thin layer of joint compound (also known as drywall mud). Apply using a 3- to 4-inch putty knife made for drywall work—rather than, say, the kind of narrow utility knife you’d use for wood putty—smoothing the filler till it’s flush with the wall. Cracks or holes larger than ½ inch require reinforcing mesh prior to spackling. If you apply joint compound directly to large gouges, the damage will reappear as the house settles and the joint compound dries and crumbles.

DON’T waste time.

Avail yourself of pre-made products designed to simplify repair tasks. Patch kits with reinforced center panels and self-adhesive tape work great for smaller holes. A drywall compound and primer combo (such as 3M Patch Plus Primer, available on Amazon) leaves a surface that’s ready to paint

DO remember neatness counts.

Use a box cutter or other sharp blade to cut random strands of mesh tape or frayed edges of wallboard paper around holes or cracks before applying joint compound. Otherwise your finished work will show bumps and other blemishes

DON’T cut the cords.

Be safe and don’t cut into a wall to repair a hole until you verify that electrical cords and plumbing lines aren’t running through the cabinet behind it. If the hole is just a few inches wide, shine a flashlight into it to see what’s there. If you must enlarge the hole, carefully cut horizontally with a drywall saw—but avoid going deeper than an inch. It’s safe to assume that hot wires will be present near an electrical outlet, but don’t bet your life—or life savings—that homebuilders or renovators followed all electrical and plumbing codes. Wires and pipes are often found where they don’t belong.


Drywall Repair Cost: What Is a Fair Price for Your Project?

Drywall is used in 96 percent of homes today, so there’s a pretty good chance your walls and ceilings are made of this highly popular material. Unfortunately, it’s quite susceptible to damage, so no matter how careful you are, there’s a good chance you’ll encounter some bumps and dents that will need to be repaired, especially if you’ve got kids and pets.

While the thought of doing drywall repairs yourself may seem daunting, handling minor damage can be fairly inexpensive and can generally be done in a couple of hours. More complicated repairs done by a handyman or contractor will be more expensive due to the labor-intensive nature of the job but can yield excellent results.

So, how can you decide who should do the job and if the drywall repair cost is fair? We’ve put together a guide to help you understand all the ins and outs of drywall repair costs, when you can DIY vs. hiring a pro, and how to find a good professional when you need one.

Average Cost of Drywall Repair

So how much does drywall repair cost? The answer is dependent on the severity of the damage, accessibility and who does the work.

Drywall Repairs You Can Do Yourself

If you’re handy, you should be able to tackle small holes, nail pops, chips, and stress cracks (less than 6-inches across) and it will only cost between $10 and $30 for basic supplies like drywall mud, sandpaper, and touch-up paint. A handyman can handle these types of repairs within a couple hours and it will cost you between $60 and $180


Top Drywall Repair Companies Near Your Area

Ask About Licensing and Insurance

Depending on your location, a business license could be the only thing required for drywall repair. Find out which licensing procedures are required in your area, and then make sure that prospective drywall repair contractors are properly licensed. The right contractors will also be properly insured, and they will happily provide proof of insurance when asked.

Make Sure to Get a Written Contract

Whether your drywall repair project is big or small, a written contract is something that you can’t do without. If your prospective drywall repair company prepares the contract themselves, make sure that you read it thoroughly to ensure that all of the points are satisfactory. If there are any issues with the contract, don’t be shy to ask for revisions

Follow the Rule of Three

Before you start with contracts, get three estimates from different pros to compare local prices for this service.

Ask About the Tools They Use

Ask for a rundown of the repair process from start to finish including information about the tools that your drywall repair contractors will use. It’s also important to make sure that your contractors will clean up their own mess.

bookmark_borderChoose The Right Time To Make Exterior Painting

Exterior Painting Preparation Ideas

There’s more to exterior painting than coming up with paint color schemes. Nearly half of the house painting process is preparation. Before you open that paint can, follow these steps to guarantee your exterior paint will look great and be sure to last.

  1. Before house painting, wash the exterior

Before you tackle painting your home, be sure to wash your house exterior from top to bottom, all around.

A thorough washing means a clean surface, maximizing the adhesion of the new paint to your home. Let your home dry for at least a day before moving on to Step 2.

  1. Scrape and let dry before you think about exterior paint

After the house has thoroughy dried, scrape away any flaking paint. A standard paint scraper, a little elbow grease and a lot of patience are all it takes.Scraping the house while it’s still wet will only result in more flaking paint once it dries.

  1. Apply caulk before you tackle exterior home painting

Caulk any cracked seams between clapboards or along vertical junctions. Fill voids and cracks with caulk until it overflows, then wipe away the excess with a damp rag or towel. Be careful not to caulk gaps between structures that are supposed to be there for ventilation purposes — for instance, between the edge of a soffit and a gutter.

  1. Make repairs … then consider your exterior paint colors

Repair any damaged or rotted areas first. In extreme instances, this may require the assistance of a carpenter or handyman. Don’t get in over your head with jobs that call for replacement of clapboard, stairs or overhangs.

  1. Apply primer first when house painting

Prime any bare or exposed areas on your home’s exterior with an exterior-grade oil-based primer. This will seal the bare wood and create an air- and moisture-tight barrier between the house and your new paint job. A light sanding by hand, or with a palm sander for especially rough bare spots, is highly recommended prior to priming

  1. Trim nearby plants and trees before applying exterior paint colors

Landscape and trim any trees, bushes or plants in close contact to your home.


Priming Your Home’s Exterior Before Painting

On most unpainted exterior surfaces, the standard procedure calls for a primer coat followed by two topcoats of paint. This procedure is also recommended for any painted surface that requires significant scraping and repairs. However, you may be topcoating only because the surface is dull or because you want a new color. If that’s the case and the existing paint is sound, a single coat of “one-coat” acrylic latex paint applied properly offers adequate protection and coverage in lieu of the two topcoats.

Be sure that your primer is appropriate for the surface you’re painting. Cedar and redwood, for example, usually require an oil-based primer to seal the surface so that tannin stains don’t bleed through the topcoat. Also make sure that the primer and topcoat are compatible. How do you know? By telling your supplier what you’re painting, reading the label, and (though not always necessary) using the same brand of primer and topcoat. To make it easier for a colored topcoat to cover primer, have your paint dealer tint the primer to the approximate color of the finish coat.


There are two basic types of exterior paint to choose from: oil-based and the more commonly used latex.

  • Oil-based paints are very durable and water-resistant. They result in hard finish and are often used by professional painters. Use an oil-based if the surface you are painting has already been painted with oil-based paint.
  • Stir oil-based paint frequently, as the oil in these types of paint tend to separate quickly.
  • If using oil-based paint, be sure to use a brush or roller specifically designed for use with oil-based paint.
  • Latex exterior paints have undergone many improvements, and some can be as durable as oil-based. They are also considerably easier to work with. Be sure, however, that you select an exterior latex for use on the outside of your home, not the same latex used on interior walls.
  • Latex is easy to apply, dries quickly, is durable and is resistant to the effects of direct sunlight. Cleanup is easy, and just requires water.
  • Acrylic latex is the highest-quality latex paint. It will cover just about any building material including masonry and properly primed metal.
  • Important: Never put a new coat of latex over an old coat of oil-based paint. It will almost certainly peel.


Getting Started

  • Complete exterior repair and preparation. See Prepare Your House for Exterior Painting below.
  • Check the weather forecast before starting the job. Rain or high wind can cut a day of painting short and ruin what’s already been applied. Exterior latex is fast drying, but it still needs time to dry before it gets hit by rain. Oil-based paint definitely needs curing time; check the manufacturer’s recommendations. Paint when temperatures are above 50 degrees Fahrenheit and below 85 degrees Fahrenheit. Heavy rain or high humidity on a newly painted uncured surface can cause blistering.
  • Set the ladder up on flat ground. For more about ladder safety.
  • Avoid painting in direct sun. Paint the west-facing side in the morning and the east in the afternoon.


Practice Good Maintenance

You can extend the life of a good paint job by:

  • Inspecting the caulk every year and replacing any that’s cracked or missing.
  • Removing mold or mildew.
  • Washing stains from nesting birds and pollen.
  • Touching up blisters and peels before they spread.