Exterior Painting Preparation Ideas
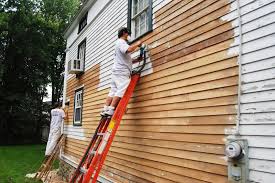
There’s more to exterior painting than coming up with paint color schemes. Nearly half of the house painting process is preparation. Before you open that paint can, follow these steps to guarantee your exterior paint will look great and be sure to last.
- Before house painting, wash the exterior
Before you tackle painting your home, be sure to wash your house exterior from top to bottom, all around.
A thorough washing means a clean surface, maximizing the adhesion of the new paint to your home. Let your home dry for at least a day before moving on to Step 2.
- Scrape and let dry before you think about exterior paint
After the house has thoroughy dried, scrape away any flaking paint. A standard paint scraper, a little elbow grease and a lot of patience are all it takes.Scraping the house while it’s still wet will only result in more flaking paint once it dries.
- Apply caulk before you tackle exterior home painting
Caulk any cracked seams between clapboards or along vertical junctions. Fill voids and cracks with caulk until it overflows, then wipe away the excess with a damp rag or towel. Be careful not to caulk gaps between structures that are supposed to be there for ventilation purposes — for instance, between the edge of a soffit and a gutter.
- Make repairs … then consider your exterior paint colors
Repair any damaged or rotted areas first. In extreme instances, this may require the assistance of a carpenter or handyman. Don’t get in over your head with jobs that call for replacement of clapboard, stairs or overhangs.
- Apply primer first when house painting
Prime any bare or exposed areas on your home’s exterior with an exterior-grade oil-based primer. This will seal the bare wood and create an air- and moisture-tight barrier between the house and your new paint job. A light sanding by hand, or with a palm sander for especially rough bare spots, is highly recommended prior to priming
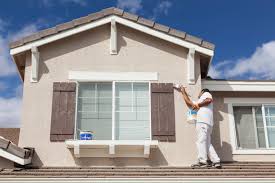
- Trim nearby plants and trees before applying exterior paint colors
Landscape and trim any trees, bushes or plants in close contact to your home.
Priming Your Home’s Exterior Before Painting
On most unpainted exterior surfaces, the standard procedure calls for a primer coat followed by two topcoats of paint. This procedure is also recommended for any painted surface that requires significant scraping and repairs. However, you may be topcoating only because the surface is dull or because you want a new color. If that’s the case and the existing paint is sound, a single coat of “one-coat” acrylic latex paint applied properly offers adequate protection and coverage in lieu of the two topcoats.
Be sure that your primer is appropriate for the surface you’re painting. Cedar and redwood, for example, usually require an oil-based primer to seal the surface so that tannin stains don’t bleed through the topcoat. Also make sure that the primer and topcoat are compatible. How do you know? By telling your supplier what you’re painting, reading the label, and (though not always necessary) using the same brand of primer and topcoat. To make it easier for a colored topcoat to cover primer, have your paint dealer tint the primer to the approximate color of the finish coat.
There are two basic types of exterior paint to choose from: oil-based and the more commonly used latex.
- Oil-based paints are very durable and water-resistant. They result in hard finish and are often used by professional painters. Use an oil-based if the surface you are painting has already been painted with oil-based paint.
- Stir oil-based paint frequently, as the oil in these types of paint tend to separate quickly.
- If using oil-based paint, be sure to use a brush or roller specifically designed for use with oil-based paint.
- Latex exterior paints have undergone many improvements, and some can be as durable as oil-based. They are also considerably easier to work with. Be sure, however, that you select an exterior latex for use on the outside of your home, not the same latex used on interior walls.
- Latex is easy to apply, dries quickly, is durable and is resistant to the effects of direct sunlight. Cleanup is easy, and just requires water.
- Acrylic latex is the highest-quality latex paint. It will cover just about any building material including masonry and properly primed metal.
- Important: Never put a new coat of latex over an old coat of oil-based paint. It will almost certainly peel.
Getting Started
- Complete exterior repair and preparation. See Prepare Your House for Exterior Painting below.
- Check the weather forecast before starting the job. Rain or high wind can cut a day of painting short and ruin what’s already been applied. Exterior latex is fast drying, but it still needs time to dry before it gets hit by rain. Oil-based paint definitely needs curing time; check the manufacturer’s recommendations. Paint when temperatures are above 50 degrees Fahrenheit and below 85 degrees Fahrenheit. Heavy rain or high humidity on a newly painted uncured surface can cause blistering.
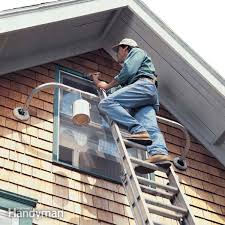
- Set the ladder up on flat ground. For more about ladder safety.
- Avoid painting in direct sun. Paint the west-facing side in the morning and the east in the afternoon.
Practice Good Maintenance
You can extend the life of a good paint job by:
- Inspecting the caulk every year and replacing any that’s cracked or missing.
- Removing mold or mildew.
- Washing stains from nesting birds and pollen.
- Touching up blisters and peels before they spread.