bookmark_borderWinter Home Electrical Safety Inspection

Electrical Home Safety Inspections

What You Need to Know About Electrical Home Safety Inspections

When was the last time your home had an electrical home safety inspection? Can’t remember? Not sure when you need to have one? According to the Electrical Safety Foundation, there are four major times when your home should be inspected by a licensed residential electrician

If you are purchasing a home (new or older)

If your home is more than 40 years old

If you are installing a new appliance (think washer, dryer, refrigerator, entertainment system, home office, etc.)

If your home is undergoing renovations

Apart from that, anytime you feel there are electrical problems in your home that could pose a safety hazard, you can always call us in for an electrical home safety inspection just to make sure. It is absolutely critical that these home electrical safety inspections be done by a licensed electrician because

electricians have years of experience solving common problems with residential electrical systems. Our first concern is maximizing the safety of your electrical system and preserving the level of safety it was engineered to provide.

Always have the electrical system assessed by a professional before purchasing a home. A professional electrician can accurately assess the strengths and weaknesses of your electrical system and provide a comprehensive plan to bring it up to optimum condition.

Most large electrical problems can be solved cheaply and easily if they are caught in the early stages. If you think you may have an electrical problem be sure to have it repaired immediately

An Electrical Home Safety Inspection: What We Look For

During an electrical home safety inspection, these are some of the important aspects of your home’s electrical system that we’ll examine
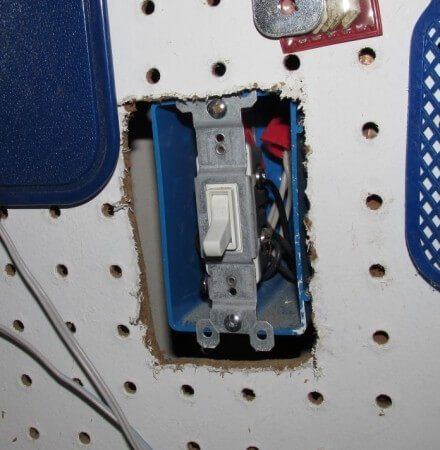
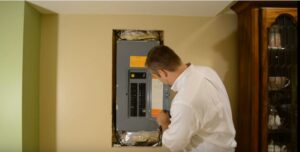
Electric Panels

This is the electrical nerve center of your home. Whether it’s in the garage, the basement, the utility room or somewhere outside, we will thoroughly examine the fuses and/or circuit breakers for proper connections, damage, age, rust, residue, smoke etc. We’ll check whether or not the panel is providing sufficient electrical capacity for your home’s needs too. We will also check whether or not your electrical panel is a brand that has been recalled or discontinued.


ELECTRICAL SAFETY INSPECTION

What is an Electrical Safety Inspection ?

An Electrical Safety Inspection is done by a licensed electrician to ensure that your home or office’s electrical system is up to code and that all electrical systems, including wires, electrical panels, and electrical components are working properly and hazard-free

To prevent fires and harmful accidents, it is important to make sure that all of your electrical systems meet legal safety and industry standards. Electric comes into your home or business to perform an electrical safety inspection, there are several key components we look for to give you a complete and accurate assessment of your entire existing electrical system

Once the thorough assessment has been completed, we can then provide you with information on what needs to be repaired or replaced to meet optimal standards.

Electrical Safety Inspection Benefits

Having the electrical system of your business or home inspected offers many critical safety benefits.

Electrical safety inspections:

Offer you with peace of mind knowing that your electrical systems, components, and appliances run efficiently and safely at all times.

Help to ensure that your electrical system meets all legal safety standards.

It can give you peace of mind about your overall safety and investment before purchasing a home.

Electrical inspections and corrections can actually help you reduce your annual electric bills and save on energy.

Having an inspection done can correct and greatly reduce the risk of fires and other electrical disasters.

Electrical inspections often find that certain components (like electrical panels) may be outdated or defective and need replacing before disasters occur.

Having an inspection done can also help to identify existing mistakes made by previous electricians and homeowners that may pose a threat to your home or building.

Inspections help to spot insufficient fuses and breakers before they start fires.

What We Inspect

We check to make sure that all electrical switches and outlets function properly.

We thoroughly check for shock/electrocution hazards so they can be eliminated.

GFCI protection where required

AFCI protection where required

Gas line bonding

Home electrical system grounding

Weather rated outdoor outlets

Breaker box inspection

Smoke detectors function and location

Loose or non-functional devices

Check for appropriate surge protection requirements.

When Do I Need an Electrical Safety Inspection?

Knowing when the right time to have an inspection done is a critical part of caring for your electrical system to ensure safety and efficiency. But how often should it be inspected, and are there certain instances where it definitely should be?

Before buying a home- Having an electrical inspection done before you purchase a home is a great way to prepare yourself to make educated decisions.

You have an older home- If your home or building is over 25 years old, it is a good idea to have an electrical inspection done due to equipment and key components becoming outdated or defective.

Renovation- If your home has undergone major renovations at any point in time, you should have your electrical system inspected to ensure all is in working order and installed properly.

DIY- DIY electrical work can be an absolute nightmare for your home’s safety, much less efficiency. If you know your home has gone through some questionable electrical work, you should have it inspected by a licensed electrician.

Old Wiring/Electrical work- If you can tell with the naked eye that your home’s electrical work may be outdated, get an inspection!

Noticeable Electrical Issues- If you have problems with lights flickering on and off in your home or the fuse blows when you turn on an appliance, it’s time to have an inspection done.

New Appliances- New appliances can strain your electrical system and cause many electrical issues if your home isn’t equipped for extra power usage.


Why & When To Get A Home Electrical Safety Inspection

Home safety is an important issue that not many homeowners think about, especially when it comes to the electrical system. electricians want everyone to have a safe and happy home so we want to help educate you on the importance of Electrical Safety Inspections, why you should get them, and when you should get them done.

How Often You Should Get An Electrical Safety Inspection

An annual electrical safety inspection will protect your home and family. The inspection should cover testing and visual inspection of every aspect of your home’s electrical system including the following.

Electrical Safety For Pool Owners

Water and electricity don’t mix, so safety around the pool is of paramount importance for any homeowner. Bad wiring and faulty pool lighting can threaten the life of your family and friends.

Electrical Safety Indoors

Main Service Panel – The main panel that houses the breakers will need to be upgraded about every 10 years for people who live in their homes and 5 for people who rent to a tenant. This panel supports the electrical load of the household, so for safety’s sake, find a residential electrician who is qualified to inspect it and upgrade it for you.

GFCI Outlets – Ground Fault Circuit Interrupters are a type of outlet that cuts off power to the outlet when it senses water. Your electrician can install those for you if your home is not up to code or if you feel you would like them throughout the house for safety.

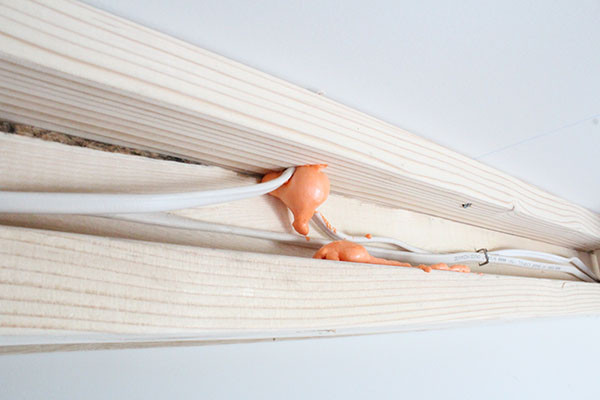
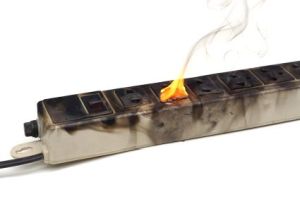
Loose Wiring – Faulty wiring is the number one cause of house fires, so make sure you get an electrical safety inspection which covers wiring, GFCI outlets, the service panel, and everything else.


Whole House Safety Inspection

With electrical wires running through the walls and ceilings of your home, you might not be aware of an issue before it causes larger problems in your house. To ensure there aren’t problems with your wiring and your home is as safe as possible, schedule an electrical safety inspection with an experienced electrician

What Electricians Check During a Whole House Safety Inspection?

Issues with your home’s wiring system can pose hidden dangers to your family. To protect your entire household, it’s important to schedule a whole house safety inspection.

During these appointments, you can expect an electrician to perform the following tasks:

Check the light bulbs to ensure the wattage is correct.

Examine the outlets to check their condition and prevent electrocution risks.

Inspect smoke and carbon monoxide detectors to ensure they’re fully functioning.

Ensure surge protectors are fully functioning.

Check outdoor lighting and electrical components to make sure they work as expected.

Benefits of Whole House Safety Inspections

Having a whole house safety inspection performed can offer many benefits for your family. While you might think your wiring and circuit breakers are functioning properly, there could be problems you can’t see that can cause larger issues later.

Some of the advantages of having an electrician perform a whole house electrical inspection can include:

Making sure electrical components are working properly and are up-to-date.

Finding and identifying outdated or damaged wiring.

Identifying potential fire hazards.

Looking for potential issues in a new home.

Finding ways to save energy and electrical costs.


Reasons Why You May Need A Home Electrical Inspection

You are asking “Is my wiring safe?”  When purchasing a century house, When purchasing a resale home, Before starting a Major Renovation Your insurance company is asking  “Is your wiring safe?”  Home Electrical Inspection for Insurance Purposes.

When Purchasing a Century Home

Electrical wiring whole house electrical inspection is important when purchasing a century home. It is sure that the original wiring cannot withstand the demand of modern living. Also, you should seriously question the number, and quality, of attempts to improve on the original wiring.

When Purchasing a Resale Home

A whole house electrical inspection is an excellent place to start when buying a resale home. Even though a house may have been meticulously wired when first built, unlicensed and unqualified work is often done as owners renovate, add equipment and build-on. The older the house, the bigger the risk that not only is the house not up to today’s standards.

Before Starting a Major Renovation

If you are adding to your existing wiring, an electrical inspection at the beginning will inform you if your existing system can support your renovation plans, If not, electrical upgrades can be addressed most cost-effective as part of the renovation process.

Home Electrical Inspection for Insurance

Occasionally your insurance provider may ask for a home safety electrical inspection. This may happen when you are switch insurance provider. It can also can happen when you have been with the same insurance company for a number of years, often after a claim

bookmark_borderWorking With Or Without Electrical Wiring

Bathroom Electrical Wiring: Issues and Safety Precautions

Make sure to have safe bathroom electrical wiring with these tips

According to the Consumer Product Safety Commission, tens of thousands of fires happen all over the United States every year that are caused by electrical issues. Besides the millions of property damage that are incurred, there is also the unfortunate loss of life that happens in hundreds of these kinds of cases. There are also hundreds of consumer products that can cause electrocution and death (especially with bathroom electrical wiring), so it is best that the appropriate safety precautions are done in order to prevent any sort of unfortunate incident to happen.

A Volatile and Dangerous Mix

It is a well known fact that water and electricity just do not mix. It is a very deadly combination. So you can just imagine the kinds of dangers you have with bathroom wiring systems. Of course, no one can eliminate entirely the need for bathroom electrical wiring systems – with outlets for dryers, heaters, lights, and all other electrical appliances you use in the bathroom, all you can really do is to observe the proper safety precautions and steps to make sure that the electrical system in your bathroom is safe for you and all who use the bathroom.

Some Safety Tips:

Have a GFCI device installed

The National Safety Code requires the installation of a Ground Fault Circuit Interrupter or GFCI to be able to deal with cases of having to install outlets in bathrooms. This is to minimize the incidence of electrocution or any other electrical incident that involves the mix of water and bathroom electrical wiring through sockets and outlets. GFCI units are designed to cut off the supply of electricity to an outlet when there is a loss of current in a circuit.

Have some exhaust fans installed

Imagine coming home from a long and hard day’s work to enjoy a relaxing time in the tub, or maybe just taking a long, warm shower. Your body dissipates heat during these times, so leaving a bathroom un-ventilated will cause moisture and humidity to accumulate inside. This poses danger to your bathroom electrical wiring, so it is best to install an exhaust fan so that air can circulate inside the bathroom space and no steam or moisture will build up inside.


Sockets

Sockets are not allowed in bathrooms or shower rooms (apart from shaver-supply units) unless they can be fitted at least three metres from the bath or shower. Electrical shaver points must be a safe distance (in meters) from the bath or shower to avoid splashes

Lights

Enclosed ceiling lights are preferable to the ones that hang down. All light fittings, that are not enclosed, should be out of reach of someone using, or still wet from using, the bath or shower.

Everyday light switches are a danger because of dampness and wet hands. A ceiling-mounted pull-cord switch is the safest option.


Address electrical issues immediately.

If you notice frequent flickering of lights or an abnormal electrical spark when you plug in a small appliance, have your electrical system checked by a professional home electrician. The same is true for exposed wires or busted bulbs.

Unplug or turn off unused electrical items.

Nothing is safer than unplugging appliances when they’re not in use. Moreover this prevents a potential electrical issue.

Don’t handle electrical appliances with wet hands.

Tap water is a good conductor of electricity. Make sure to keep your hands dry whenever you use your electrical razor or handheld hair dryer.


Water and Electricity is a Dangerous Combination

GFCIs are designed to cut off the flow of electricity in the presence of water, which is why they’re such valuable inclusions in every bathroom. Sensing danger and responding to it is the core function of GFCIs, and this function  could save your life.

However, GFCIs aren’t infalible; they can become damaged or simply wear out. And this is why Experts In Your Home has been urging readers to test their GFCIs every month – room by room and in every room. Like smoke detectors, they must be in good condition to respond to an emergency.

Moreover, it’s not wise to become lackadaisical about electricity and water – ever – and here’s why: When it’s dry, your skin is more resistant to electrical current than you may realize, especially if it’s thick, calloused and dry.

Water changes the equation entirely: water reduces your body’s natural resistance to water; total immersion eliminates it. This helps explain why accidents in which an appliance falls into a full bathtub while someone is bathing almost always results in electrocution.


Electrical safety tips homeowners should know

Electric maintenance is an important requisite in our household, but can be very dangerous if handled callously. Most of the electricity-related accidents that occur in homes are due to lack of knowledge on electrical safety & knowhow. Here are some tips to prevent accidents & electrical oversights:

  1. All electrical equipment should be in proper working condition

One of the primary causes for short circuits in the electrical system is equipment that is not working or plugged in properly. Hence, all the electrical equipment in the house should be checked for malfunctions.

  1. Main Power Off

Power switched on during any work on the home’s electrical system can be a major reason for shocks & accidents. Always switch off the main power during major electrical maintenance activities. In case of small power outlet related maintenance, always switch off the plug point and work.

  1. Warm & Cold Power Outlets

At times, warm power outlets can signal a variety of problems, from overloaded electrical circuit to shot up wiring. Hence, check all the outlets in the house once every month by placing your hand on the outlets in your home. Warm or hot outlets signal trouble.

  1. Fire Extinguisher

Always have a fire extinguisher handy in the house. Water is a good conductor of electricity & hence should never be used to put out any electric fire, big or small.

  1. Ground Older Appliances

Your old appliances might develop grounding issues as a result of normal wear & tear. This can put you at a risk of shock. Ensure all of your appliances have three-pronged plugs that can properly connect to a grounded outlet. Any kitchen appliances with just two-pronged plugs should be replaced.

  1. Expert Intervention

In case of any doubt, one should consider the help of an expert. Always reach out to a well-trained electrician if an issue seems out of hand and needs more intervention.

  1. Rooms with running water need to be equipped with Ground Fault Circuit Interrupters

GFCI’s shut off the electrical current from a circuit whenever it detects that the circuit has become a shock hazard. It is imperative that they are installed in the bathroom, kitchen and laundry room to avoid any mishaps.

bookmark_borderMost Frequent Electrical Home Inspections Problems

Five Tips to Get the Most From Your Electrical Inspection

just like your car, electrical systems can develop a host of problems that are best fixed sooner rather than later. Many contractors on Angie’s List offer electrical inspections to root out issues ranging from mismatched wires to major safety concerns.

Check the code

Christopher Voglund, owner of highly rated Artisan Electric in Lafayette, Indiana, says he charges an average of $600 for top-to-bottom inspections, but the cost varies depending on the level of detail a homeowner requests.

Focus on safety

Rob Gruen, owner of highly rated Brighter Connection in Milwaukee, says he focuses first and foremost on safety during his inspections, which tend to cost about $100 depending on house size. “I’m looking for junction boxes missing covers, outlets that aren’t grounded properly, and outlets that should have GFCI, which is required in rooms [located] near water like kitchens and bathrooms,” he says. “These things provide an important protection against shock.”

Match the wires

Gruen verifies that the circuit breakers, wires and outlets all match up to the correct kinds of amperage for that circuit. Otherwise, the risk of overloading one or more elements increases. “When the amperage and wire gauge don’t match up, that’s the very definition of a fire hazard,” he says.

Test the panel

Any electrical inspection should address the main panel and circuit breakers. “You want to make sure the cover is installed correctly and that breakers are tight on the main panel,” Gruen says. “If those things aren’t tight, you start having problems. I look for discoloration or signs of burn marks, rust and wear. It’ll take years, but you can see that kind of stuff going wrong.”


How To Inspect Your Own House

A few months ago I wrote a blog post about homeowner maintenance inspections, wherein I promoted the virtues of having a home inspector conduct maintenance inspections on existing homes every five years or so.  I promised to follow up with a post on how homeowners could conduct their own home inspections, but I don’t know what I was thinking when I said I’d follow up with a “post”.  I should have said I’d follow up with my longest “series” of posts ever.  For the first part of this series, I covered the inspection of the exterior.  I took a little break in this series because I had a few other things to discuss that were somewhat time sensitive, but I’m back on the homeowner inspection series again.

Overhead Wires

If your home has overhead wires bringing in power, check to make sure there are no tree branches rubbing on the wires.  It’s the homeowner’s responsibility to maintain / trim trees on the property that may interfere with the overhead wires coming from the utility pole to the house

Also, take a close look at the connection point between the overhead wires right before they disappear into the mast head.  One wire is the neutral wire; it’s normal for this wire to be exposed, but the other two wires shouldn’t have any exposed contacts.  If there are, these are serious shock / electrocution hazards that should be repaired by the utility company.  The photo below gives an example of an exposed ferrule at one of the hot wires.  Touch that thing with an aluminum ladder, roof rake, or something similar, and it’ll be lights out for you

Every once in a while you’ll get a different reading, such as all three lights lit up, or a bright middle light and dim lights on the left and right.  These readings indicate problems that should be looked into further by an electrician. If there are loose outlets, the repair is usually as simple as removing the cover plate and tightening the screws that hold the outlet in place.

Cover Plates

Not only do cover plates help to prevent accidental shocks, but they help to contain any arcing or sparking that might take place within an electrical box, thus potentially preventing a fire.  Go through your home and make sure there are cover plates installed for all of the outlets, switches, and junction boxes.  A few of the more common places for missing cover plates are in unfinished basement areas, behind refrigerators, inside kitchen cabinets, and at garage ceilings.

While this is usually a very simple DIY repair, the photo above shows a situation where the fix isn’t quite so simple; if a cover plate was installed over the pegboard, it would leave a gap between the box and the cover that could allow sparks to escape and potentially start a fire.  The fix for this situation would actually involve cutting away the pegboard a little more so that a cover plate could be installed tight against the box


Tips for Passing an Electrical Inspection

Just this morning, my local township electrical inspector stopped by and reviewed the electrical work I had performed for our home office improvement project.  He gave us a passing grade, which means I officially have approval to cover the framing with drywall and finish the room.  He pointed out a couple changes I need to make before he returns, so I do need to take care of those issues.  This is probably the third or fourth time he’s been out to our house for an inspection so I’ve learned to prepare for the things he likes to see

Ask the Inspector First.  When you schedule the inspector, try to actually have a conversation with him or her about what they expect to see and what pitfalls you can avoid.  All inspectors should be looking for the same checks, but some have additional requirements or pet-peeves that can fail you.  Checking with them first is a great way to establish a name to a face and get a sense of their general requirements.

Don’t Add Any Devices.  During the rough-in inspection, there can’t be any devices on the circuits you are adding. No outlets, no lights, no switches, nada, nunca.  If you are adding an outlet to an existing circuit, then the NEW outlet should also not be installed either.  The rest of the outlets on that circuit that were originally there are probably fine, but if you disturbed the wiring in any outlet, it shouldn’t have a device for the inspection

Tie Your Grounds Together.  In each outlet or electrical box location, the ground wires should be tied together.  This is something my inspector noted today.  Don’t tie anything else together though.  The hot and neutral leads should remain separate

Fire Block.  Any holes or penetrations from one floor to the next or from one wiring passage to the next needs to be blocked so as to prevent a fire using the hole as a breathing hole or chimney.  Typically, you can use fire block expanding foam (which is bright orange in color) or regular fiberglass insulation to fill or plug these kind of holes


How To Inspect Your Own House

A few months ago I wrote a blog post about homeowner maintenance inspections, wherein I promoted the virtues of having a home inspector conduct maintenance inspections on existing homes every five years or so.  I promised to follow up with a post on how homeowners could conduct their own home inspections, but I don’t know what I was thinking when I said I’d follow up with a “post”.  I should have said I’d follow up with my longest “series” of posts ever.  For the first part of this series, I covered the inspection of the exterior.  I took a little break in this series because I had a few other things to discuss that were somewhat time sensitive, but I’m back on the homeowner inspection series again.

Overhead Wires

If your home has overhead wires bringing in power, check to make sure there are no tree branches rubbing on the wires.  It’s the homeowner’s responsibility to maintain / trim trees on the property that may interfere with the overhead wires coming from the utility pole to the house.

Outlets

To test the outlets at your home, go buy yourself an outlet tester.  These are sold at all home improvement stores and hardware stores for about $5, or a little more if the tester comes with a GFCI tester.  A GFCI tester makes it a lot easier to verify that non-GFCI outlets in your home are GFCI protected, but it’s not a valid way to test GFCI outlets.  More on that topic below.  The tester shown at right currently sells for $7.49 on Amazon. So now that you have a tester, go around and test all of the outlets in your home.  The light codes displayed by the tester will tell you if the outlet is properly wired, or what the problem is if the outlet isn’t properly wired.

Open Ground – more commonly described as an ungrounded three-prong outlet.  Click this link for information about how to correct an ungrounded three-prong outlet.  This is a condition that should be repaired by an electrician.

Open Neutral – this is a very uncommon defect; it means there is power at the outlet, but whatever is plugged into the outlet won’t work.  Every once in a while, this is the result of a switched neutral wire.

Open Hot – there’s no “hot” wire at the outlet… or there’s a live hot and no neutral and no ground.  Whatever is plugged into the outlet won’t work.  Sometimes this might be the result of a switched outlet and the switch is just off, but in many cases it just means it’s a dead outlet.


Will my electrical wires pass a home inspection?

You’d be surprised by how many homes have electrical wires that aren’t up to code. Some of these wires are simply old or made of outdated material. Others are damaged, worn out, or even dangerous.

Of course, it’s difficult to tell whether wires are up to code just by looking at them. That’s where professional home inspections come in

How do home electrical inspections work?

A home electrical inspection is a thorough review of your home’s entire electrical system conducted by a professional. A proper electrical inspection follows a procedure stipulated in the National Electrical Code (NEC). The NEC is a set of electrical safety standards that the National Fire Protection Association constantly re-evaluates and updates with input from electrical professionals all over the country. When electricians determine whether something is “up to code,” the NEC is what they’re talking about

Why wouldn’t my wires pass an electrical inspection?

If any electrical feature doesn’t “pass” inspection, that means it fails to meet the minimum safety standards established by the NEC. Wires are among the most common electrical features to “fail” inspection because they’re hard for non-professionals to check on

Age

Wires may wear down over time, especially if you installed them a long time ago. Older wires are also more likely to be made of substandard material or installed with substandard methodologies like knob-and-tube wiring. The older your home, the more likely it is that your electrical wiring is old, too. If you can’t remember the last time you had your older home’s wires inspected, then it’s probably time.

bookmark_borderMust Know A Little About Electrical Maintenance

How to Build an Electrical Maintenance Program

Electrical control and distribution systems are generally complex and expensive assets that need to be effectively maintained so they operate at optimum performance over their serviceable life. It is common to find that there has been significant effort applied to managing mechanical assets, with less focus on electrical equipment.

There are many reasons as to why this is the case, but the reality is that the way asset management programs are developed should be applied equally to electrical and mechanical components of the asset.

But, where do you start? You can develop your own plan, tell people what they are now going to do and watch it all happen. Wrong! If you don’t manage the people side of the improvement, there is little hope of sustained improvement.

Acknowledge your current situation

You have to believe that there is a better way of doing things. If many of the above points apply to you, then you need to know that your situation requires improvement.

Develop a vision for your electrical maintenance program.

The vision is where you want to be in the future


Helpful Tips to find the Best Electrical Maintenance Services

No matter it is residential or commercial electrical breakout or upgrades the electric system, hiring an experienced and skilled electrical maintenance Service provider is important. A qualified electrical contractor will be skilled using latest tools and identify the exact faults or repairs required instantly. With several electrical maintenance services available across the city, selecting a reliable contractor is quite challenging.

Tips to Find Best Electrical Maintenance Service

Than just finding an electrician, it is important that you hire a licensed and certified electrician with proper field experience. Here follow a few tips to help you find best and reliable electrician for your home or office works

Is the electrician licensed and certified?: Make sure that the electrician you are hiring is certified and licensed. The license will be provided only to a trained and experienced electrical contractor. It guarantees that the contractor you are hiring is qualified and skilled in all types of electrical works for home or commercial.

Timely response: Unlike plumbing or house repair, electrical repairs are dangerous and they should be responded immediately. Therefore, the electrician you are approaching should respond your call immediately understanding the seriousness of instance attention to the electrical repairs.

Find through referrals: If you are unable to find reliable electrical maintenance services or individual contractor, then try to take referrals from your friends or known people. Moreover, the feedbacks provided by your friend will increase your confidence on hiring the contractor for electrical installation or repair needs. You can also search across websites and internet portals, choose, and compare the rates accordingly. This will give you a fair idea about how to approach different companies for your exact work.


ELECTRICAL INSTALLATION AND MAINTENANCE TECHNOLOGY

PROGRAM MISSION

The Electrical Installation & Maintenance Technology program’s mission is to serve the community as a learning-centered, open door program that provides technical training to meet the demands of the electrical industry and the needs of the individual. An open-exit option allows the students to identify their career objectives and participate in program exploration

PROGRAM DESCRIPTION

The curriculum is designed to prepare students with entry level knowledge and manipulative skills for employment in the electrical industry. The program combines theory with laboratory activities as an effective means of developing the skills essential to the electrical trade

The student begins with the fundamentals of electricity and wiring of simple circuits, then progresses to residential interior wiring, three phase alternating current power, and wiring of more complex circuits and equipment. Safety is stressed as an integral part of each shop task. Emphasis is placed on wiring in accordance with the provisions contained in the National Electrical Code


What is Electrical Maintenance?

Advances in the design and quality of electrical components have made it possible for electrical systems to run for years without noticeable problems. While wonderful feats of engineering, well-designed electrical systems can lull building owners and operators into a false sense of security—right up until the moment the system fails. It’s for this reason, among others, that electrical maintenance is such an important part of commercial building operations.

Electrical maintenance covers all aspects of testing, monitoring, fixing, and replacing elements of an electrical system. Usually performed by a licensed professional with a complete knowledge of the National Electric Code and local regulation

Preventative Electrical Maintenance

Early identification of problems is a key aspect of electrical maintenance. For instance, should a back-up generator sit idle until needed, it may not start due to a number of factors. Old fuel clogging a fuel filter, uncharged starting batteries, or start switches left in the wrong mode can all prevent a smooth transition to backup power. These are basic problems, easily identified and addressed through preventative maintenance

One of the major challenges to electrical maintenance is the nature of electrical wiring. It can be difficult to pinpoint the location of specific problems as the system is built into the building. Thermal imaging has become increasingly important in the industry for its ability to identify issues with both electrical connection points and equipment operation. By catching such problems early, electrical maintenance helps reduce unexpected power outages and protects equipment from damage

What is electrical maintenance? It’s an aspect of building operations no commercial facility should be without. While large scale operations may have their own on-staff electricians, smaller facilities may find it more financially viable to contract with a licensed professional for scheduled electrical maintenance and servicing


Tips for Maintaining Your Home’s Electrical System

There are several things that every homeowner needs to know, for example, it’s helpful to know how to fix a leaky faucet or repair a small hole in the wall. One of the more important things homeowners need to know is how to properly maintain their electrical system. The hardest part about electrical maintenance is learning the process. Here are a few ideas to help you out

Work Smart

All over the internet, there are stories of electricians who were thrown across factories by electrical surges because they forgot to turn off the electrical power to where they were working. Before you work on anything that has electricity running to it, shut off power to that area of your home. You can shut off the power to one area of your home by flipping the area’s switch in your breaker panel. Next, test that part of your homes electrical system by plugging something into it or turning it on to see if it’s still receiving power, and if it isn’t receiving power, you can start working.

Replace Old and Damaged Wiring

In older homes, it is important to regularly check your power outlets. A good inspection of your home’s electrical system once or twice a year should keep you informed about any potential electrical problems. You are looking for frayed or burnt wires. Note anything that looks out of place

Buy High-Quality Electrical Parts

There are plenty of cheap solutions to every problem in life. Often the off-brand solution is just as good as the name brand. However, when it comes to home electrical systems, you get what you pay for. One of the ways manufacturers lower prices is by lowering quality. This can be a problem because lower quality parts will wear out faster. The best way to avoid this problem to buy higher quality products.

Don’t Overload an Outlet

One of the most common problems with home electrical systems is the possibility of overloading an outlet. It is important to know how much power your utilities use and how much power your outlet will allow. Toasters, microwaves, toaster ovens and other appliances should have their own outlet because they draw a lot of power. If multiple appliances are plugged into the same outlet, you may trip your breaker

bookmark_borderTips The Best To Choose Led Electrical Lighting

LED Boat Lights – Improve Efficiency and Performance

Their high energy usage is just one reason why many governments have begun phasing out traditional light bulbs in favour of energy efficient alternatives like CFLs and LEDs. But for those who are unfamiliar with modern lighting options like LEDs, making the switch to a new style of light bulb can seem like a daunting prospect. Understanding what LEDs are and how they work can ease the process of finding the right bulb and switching to energy efficient lighting. Keep reading to learn more.

What is an LED?

“LED” stands for “light emitting diode”. The first two parts of this name are easy to understand – “light emitting” means that it gives off light – but what exactly is a “diode”, and what does it do? To answer that question, we have to get a bit scientific.

All diodes emit photons (particles of electromagnetic energy), but only certain types of diodes emit that electromagnetic energy as light instead of heat. A light emitting diode is a type of solid-state lighting (SSL) technology, meaning that it emits light from a piece of solid matter. In this case, that piece of solid matter is a two-lead semiconductor. We’ll explain how this works in the next section.

Types of LEDs

There are two basic types of LEDs:

  • Indicator– an inexpensive, low-power device that is used as indicator lights in cars, panels, and other electronic devices.
  • Illuminator– a high-power device that provides illumination. These are the type of LEDs you buy to illuminate rooms in your home or office. They can be found in a variety of styles, shapes and colours suitable for almost any application.


The Advantages of LED Lights for the Environment

Taking care of the environment is a responsibility that everyone should feel accountable for. Most of us are already aware of environmentally friendly processes such as recycling to minimise the amount of waste we produce and reduce our carbon footprint. However, a lot of people are unaware of new and upcoming technologies that we can use to help reduce carbon emissions. A good example of this is LED lighting, which provides many environmental advantages.

Energy Efficient

LED lights are up to 80% more efficient than traditional lighting such as fluorescent and incandescent lights. 95% of the energy in LEDs is converted into light and only 5% is wasted as heat. This is compared to fluorescent lights which convert 95% of energy to heat and only 5% into light! LED lights also draw much less power than traditional lighting; a typical 84 watt fluorescent can be replaced by a 36 watt LED to give the same level of light. Less energy use reduces the demand from power plants and decreases greenhouse gas emissions.

No Toxic Elements

LED lights contain no toxic elements. Most offices currently use fluorescent strip lights which contain noxious chemicals such as mercury. This will contaminate the environment when disposed of in landfill waste.  Disposal has to be arranged through a registered waste carrier so switching to LED avoids the cost and time implications required for compliant disposal – and helps to protect the environment from further toxic waste.

Less Lights Needed

LEDs have a better quality of light distribution and focus light in one direction as opposed to other types of lighting which waste energy by emitting light in all directions, often illuminating areas where light isn’t required (such as the ceiling). This means that less LED lights are needed to achieve the same level of brightness given off by fluorescents and incandescent lights. Fewer lights will reduce energy consumption and will therefore be a benefit to the environment.

Life span

A longer life span means lower carbon emissions. LED Lights last up to six times longer than other types of lights, reducing the requirement for frequent replacements. This results in using fewer lights and hence fewer resources are needed for manufacturing processes, packaging materials and transportation.


The lifetime cost of LED bulbs

Okay, this is why LEDs are really cool.

The first thing you need to realize about the lifetime cost of LEDs is that they are VERY energy efficient, as in 80% more efficient than incandescent bulbs. So, a 10 watt LED bulb is equivalent to a 60-watt incandescent bulb.

One LED light bulb will last 25,000 hours (there are some that last even longer), compared to the 1,200 hours one incandescent bulb will last. That means you’ll need 21 incandescent bulbs to get to 25,000 hours.

If an incandescent bulb costs $1, you’ll need to spend $21 to get as many hours of light as you’ll get from one $5 LED. This immediately equals a savings of $16 with LED bulbs.

But, lighting your home is more than the cost of your bulbs. You are paying the per kilowatt cost to power those bulbs, and this is where LED lights shine. See what I did there?

No doubt, LEDs are just more energy efficient – a 10 watt LED bulb does the same work as a 60-watt incandescent bulb. This is saving money and reducing your carbon footprint.

At an average of $0.12 per kWh, it will cost $30 to power an LED bulb for 25,000 hours.

Using that same per kilowatt average, it will cost $180 to power incandescent bulbs for the same length of time.


Understanding energy-efficient light bulbs

When considering a CFL vs. an LED bulb to replace an incandescent one, it helps to understand the basic differences in the three major light bulb technologies on the market today:

  • Incandescent bulbs are the familiar pear-shaped or round screw-in light bulbs that have been marketed since Thomas Edison perfected the carbon filament bulb in 1879.
  • CFL (compact fluorescent lamp) bulbs are commonly manufactured as a spiral tube connected to a screw-in ballast or base. Newer technology replaces the curly light bulb with one that looks like the traditional incandescent bulb. They also now come in round and flame shapes.
  • LED (light-emitting diode) bulbs are a newer technology. Once only available as a longish tube, bulbs now come in nearly every shape and size, including flexible ropes for decorating.


WHAT ARE THE DISADVANTAGES OF LEDS?

LED: DISADVANTAGES

  1. High up-front costs
  2. Transformer compatibility
  3. Potential color shift over lamp life
  4. Performance standardization has not yet been streamlined
  5. Overheating can cause reduced lamp life

bookmark_borderThe Good Way To Install Ceiling Fans Installation

How to Install a Ceiling Fan

A ceiling fan is a stylish and functional addition to any room. If you are planning to install a ceiling fan in a room that already has a ceiling outlet, wiring a ceiling fan is the same as wiring any ceiling fixture. If the room doesn’t have an overhead box, hire an electrician to install the box and fish the wires through the walls and across the ceiling. Save the fun of installing the actual fan for yourself.

If you can access the ceiling on which you want to attach the fan from the attic or from an overhead area, you have several choices in the type of box you install. If you can’t get to the area above the box, you have to use an adjustable hanger bar designed for installation through the hole left by the existing ceiling box.

To replace a ceiling fixture, follow these steps:

  1. Turn off the power at the fuse or circuit panel.

You may find several pairs of wires in the ceiling box. Some may be wired to circuits other than the one that the fixture you’re working on uses. Be safe: Use a circuit tester or turn off the power to the whole house before attempting to install a ceiling fan. That’s the only way to be sure that all wires in the box are dead.

  1. Remove any light bulb cover and bulbs from the fixture and then unscrew the screws or nuts holding the fixture base to the ceiling box.

Because ceiling fans are so heavy, the National Electrical Code (NEC) prohibits attaching a ceiling fan to a standard ceiling box. Before you purchase the fan, check the manufacturer’s installation instructions and purchase an approved electrical ceiling box.

  1. Lower the fixture base and remove the electrical tape or wire nuts.

The wires come in two or three colors: black (hot), white (neutral), and, if present, green (ground) wires.

  1. Disconnect the wires to the existing ceiling box and remove it.

First, loosen the cable clamp screw that secures the incoming cable to the box. Then remove the box, working from above, if possible. Otherwise, remove any accessible fasteners (nails or screws) that attach it to the framing or push it up into the cavity to pry it from the framing or bend its hanger bar, depending on how it is attached.

  1. Follow the manufacturer’s directions to install the adjustable hanger bar and ceiling box.

You install most hanger bars by pushing them through the hole in the ceiling left by the old electrical box. When you have the hanger bar completely through the hole, rotate it until it’s perpendicular to the ceiling joists. The bar expands until it engages the ceiling joists. The ends of the hanger bar are equipped with sharp steel pins that dig into the wood joists when the hanger bar is expanded. You then attach the special ceiling box to the hanger bar, locking it in place to provide a secure base for the fan.

  1. Assemble the fan according to the manufacturer’s instructions.

Ceiling fans are heavy, so they require support while you attach the wires. Most models provide a way for you to suspend them below the ceiling box while you attach the wires. If yours doesn’t, get a helper to support the fan assembly while you attach the wires.

Wiring schemes differ slightly from fan to fan, depending on whether they’re equipped with a light or speed control. The basic installation of a ceiling fan is no different from that of a standard light fixture. Use wire nuts to attach the fan’s black or colored wire and white wire to matching wires in the ceiling box. If the wiring has a green ground wire, attach it to the green or bare wire in the box.

  1. Complete the attachment of the fan assembly to the ceiling box.

This should just involve a few screws.

  1. Install the trim and fan blades according to the manufacturer’s directions.

Turn on the power and test the installation.


Ceiling Fan Capacitors- Diagnosis and Replacement

Most ceiling fans use a type of motor known as a “permanent split capacitor motor. These motors havetwo coils, a start and run winding. A capacitor is connected in series with the start winding to insert aphase shift, but once the motor is up to speed it becomes an auxiliary winding. In order to reverse themotor, the capacitor is applied to the run winding which then becomes the start winding. In some casesthe windings may have taps to provide different speeds, in others the value of the start/run capacitor islowered to provide different speeds. Other designs will have additional capacitors wired in series withthe motor as a whole to regulate speed.

Signs of a bad capacitor in a ceiling fan include:

  1. Fan runs slowly or not at all on all speeds
  2. Fan will not start but will spin if started by hand
  3. Certain speeds are slow or do not work
  4. The motor hums and turns freely by hand but will not spin

The capacitor is usually a black box inside the switch housing of the fan. If the case appears burnt or

melted in any way, that is also the sign of a bad capacitor and it should be replaced. Keep in mind thatthere may be other components in the circuit with the defective capacitor. These should also be

properly checked and replaced if found defective. Not doing say may simply render the replacement

capacitor defective upon power up.

How to Replace a Ceiling Fan Capacitor

Prepare by opening the case. Make sure you have the necessary tools, including a voltage tester, a

screwdriver that matches the screws on the fan, wire nuts, wire cutters and wire strippers. Switch offthe power to the room that contains the fan by opening the breakers at the electrical panel or removingthe corresponding fuses. Place a stepladder under the fan and make sure it is high enough for you toreach the fan without having to stand on the top two steps.

Replacing the actual capacitor is usually straight forward but first you need to determine the correct

value. If the marking on the case of the original part is obliterated or unreadable you should consult withthe fan manufacturer or check the schematic to determine the original value. Otherwise determine if 2wire or 3 wire. Two wire capacitors are easy as they only contain one capacitance value. Capacitorvalues are measured in “microfarads” (uf), ex: 4uf is a 4 microfarad capacitor. Fans that have more thanone speed will often use more than one capacitor for speed regulation. To save space quite oftencapacitors that contain more than one value will often be used. Three wire capacitors are a bit more difficult as they contain two different values. For example a three wire capacitor may contain a 2uf and a4uf capacitor in the same case with one common wire. One wire goes to the 2uf side and the other goesto the 4uf side.


Are Ceiling Fans Hard to Install?

One of the best ways to make your home an investment is to improve the property in simple but significant ways. The best projects to tackle are the ones that will bring more value to the home than the actual cost of completing the project. One fantastic DIY home improvement project to consider is installing a ceiling fan. Many have asked if ceiling fans are hard to install, and the answer is generally, no. This post will briefly cover the main steps for installing a ceiling fan in your home. It should be noted, however, that the process can differ slightly for each home and each ceiling fan.

  1. REMOVE THE LIGHT FIXTURE THAT IS THERE

The first step will be to take out the light fixture that is already there. You will need to remove the cover and take out the bulbs and brace that are there. Make sure that the power to that room is off before doing this. If it is dark in the room, use flashlights or lamps hooked to another circuit to aid you.

  1. INSTALL THE SUPPORT BRACKET

Most ceiling fan kits will come with their own support bracket, but some do not. Look at the box and check the section that lists all of the contents. If you do not see a support bracket there, purchase one that will work for that model. It should be listed on the box. If you have any questions, be sure to ask someone who works at the store you are at. They will be able to help you.

  1. PUT IN THE FAN MOUNTING DEVICE

In your ceiling fan kit, there will be a mounting device. This bracket needs to be put in place before any of the wiring can be done. The instructions will differ depending on the fan, so follow the instructions that come with the kit you purchased. You will be working kind of upside down to get this done, and it can help a lot to have someone else there to hold up the bracket while you screw it all in.

  1. HOOK UP THE WIRING

Now you will connect the wiring from the light fixture to the wiring in the fan. Again, there will be some clear-cut instructions in the fan kit. If you are still a little wary, try looking at some YouTube videos. These can give you a good visual of how it should all look. This is another step where it will be much easier to have someone supporting the fan so you can focus solely on the wiring.

This is the step that scares most people, but it really is a very simple process. Don’t be discouraged. It is safe and easy if you can follow directions.

  1. PUT ON FAN BLADES AND OTHER DECORATIVE PIECES

Now that you have everything in place, it is time to finish it off with all the little decorative pieces. This will change depending on which kit you buy but usually involves putting on the fan blades, attaching the light fixture, and hooking up the pull strings.

The final step will be to enjoy the new and useful feature in your home. The process is simple but can have a lot of great dividends in both the aesthetic and practical worlds.

How to Wire a Ceiling Fan When There Is No Ground Wire

If you like working with your hands, installing a new ceiling fan can be a fun and rewarding task. However, there are always safety precautions that you must take. Always make sure that the electricity is turned off before working with electrical wiring. Grounding is another safety mechanism that reduces the risk of serious electric shock. Most modern homes are equipped with a grounding system integrated into the electrical system. Some older homes may not have ground wires present in the electrical boxes. Assuming that you have already removed the old light fixture we’ll go straight to options for wiring the fan with no ground.

  • Step 1

Make sure that the junction box in your ceiling is one that is rated for a ceiling fan. If it isn’t, you could be setting yourself up for a bad accident if the ceiling fan falls.

  • Step 2

As far as the ground wire is concerned, there are two solutions to this problem. The first solution, which is the better one but may turn out to be costly, is to have your home rewired, replacing all of the wiring with ROMEX® wires that include a ground wire. Also have a ground rod installed outside of your house. The second solution to the problem is to wire the ceiling fan without the ground. The ground wire doesn’t carry any electrical current (unless there is a problem in your electrical system). The ground wire carries displaced electricity away to reduce the risk of electrical shock if, let’s say, the metal parts of the ceiling fan or any other appliance or part attached to your electrical system becomes accidentally charged with electricity. So if you wire your fan without the ground wire, it will still work properly. However, the added safety of the ground wire will not be present. If you decide to wire your fan without the ground proceed to the next step.

  • Step 3

Mount any brackets necessary to hang the ceiling fan.

  • Step 4

Assemble the fan according to the manufacturer’s instructions and hang the fan (without the blades) from the mounting bracket.

  • Step 5

Wire your fan using wire nuts to connect the white wire from your fan to the white wire in your ceiling. Next connect the two black wires in the same fashion. Don’t worry about the ground wire for now, but having your electrical system grounded should be a priority.

  • Step 6

Continue assembling and installing your ceiling fan according to the manufacturer’s instructions.


Ceiling Fans: Fact or Fiction?

As much as most of us love summer, there’s one big downside that comes with the heat: more use of air conditioning and fans equals higher utility bills.

If you have central air, you probably already know that the air conditioner is one of the most energy-hungry appliances in your home. It costs, on average, $0.36 per hour to operate – which accounts for about 25 percent of all home energy consumption.

So, what about using ceiling fans? Do they really help cool the home and lower air conditioning costs, or do new ultra-efficient HVAC systems make such fans unnecessary?

Let’s take a closer look at the benefits and drawbacks of ceilings fans.

Fact or Fiction: Ceiling Fans Are Low Cost

Fact. Compared to air conditioners, ceiling fans are downright cheap. The average cost of running a ceiling fan is about one cent per hour—a fraction of the cost to run an air conditioner.

So, it’s true, but…should you compare these two types of cooling? The answer is, no. That’s because ceiling fans don’t actually cool a room. Instead, they create a wind-chill effect that can make it seem cooler. They can also lower humidity levels, which makes the room more comfortable without actually lowering the temperature. Unfortunately, if the room is hot in the first place, a ceiling fan will do little to change the temperature.

Fact or Fiction: Ceiling Fans Make A Good AC Supplement

Fact. Ceiling fans can help save energy costs and increase comfort if they’re used in conjunction with an efficient air conditioner. With both your ceiling fans and AC operating, you can increase the thermostat by four degrees without losing any comfort. In turn, the air conditioner will come on less often, so your energy bills could be lower overall.

Fact or Fiction: Fans Are Not Just A Summertime Tool

Fact. (Sounds odd, but it’s true). As long as you have ceiling fans with reversible motors, ceiling fans can help save money in the wintertime. With the flip of a small switch found on the side of their motor housing, most ceiling fans can rotate in the opposite direction (clockwise). This reverse motion creates an updraft in the room, moving the hot air around without the wind-chill effect.


Fact or Fiction: Ceiling Fans Without LED Lights Aren’t Worthwhile

Fact and fiction. While it’s true that in general, ceiling fans can help lower energy use in your home, they can also require considerable energy to operate. How much depends on how the fans are used and the type of lights the fans include. Some fan lights can use more electricity than the fan motors themselves. In fact, the type of light a fan uses can account for up to 80 percent of your potential savings from a more efficient model. Be sure to select an ENERGYSTAR® LED lighting fixtures if you want to get the most energy savings out of your ceiling fans.

So, Are Ceiling Fans Worth the Investment?

Let’s do the math. An air conditioner costs $0.36 per hour, and a ceiling fan only $0.01 per hour. If air conditioning costs are lowered even by a few cents per hour, fans could still be worth it. On average, ceiling fans can help save four to eight percent on cooling costs when combined with an air conditioner.

If you live in a climate where you can use fans instead of air conditioning on marginally hot days, then ceiling fans could be a very worthwhile investment.

While ceiling fans provide better circulation of cool air and a wind-chill effect, they can still amount to wasted money and energy if no one is enjoying these benefits. For example, don’t:

Install fans in rooms that aren’t used very often;

Keep fans running after everyone leaves a room; and

Turn on fans whenever the lights are on, even if the fan is not needed.