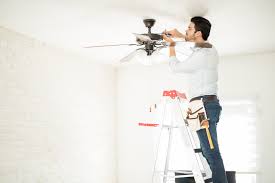
How to Install a Ceiling Fan
A ceiling fan is a stylish and functional addition to any room. If you are planning to install a ceiling fan in a room that already has a ceiling outlet, wiring a ceiling fan is the same as wiring any ceiling fixture. If the room doesn’t have an overhead box, hire an electrician to install the box and fish the wires through the walls and across the ceiling. Save the fun of installing the actual fan for yourself.
If you can access the ceiling on which you want to attach the fan from the attic or from an overhead area, you have several choices in the type of box you install. If you can’t get to the area above the box, you have to use an adjustable hanger bar designed for installation through the hole left by the existing ceiling box.
To replace a ceiling fixture, follow these steps:
- Turn off the power at the fuse or circuit panel.
You may find several pairs of wires in the ceiling box. Some may be wired to circuits other than the one that the fixture you’re working on uses. Be safe: Use a circuit tester or turn off the power to the whole house before attempting to install a ceiling fan. That’s the only way to be sure that all wires in the box are dead.
- Remove any light bulb cover and bulbs from the fixture and then unscrew the screws or nuts holding the fixture base to the ceiling box.
Because ceiling fans are so heavy, the National Electrical Code (NEC) prohibits attaching a ceiling fan to a standard ceiling box. Before you purchase the fan, check the manufacturer’s installation instructions and purchase an approved electrical ceiling box.
- Lower the fixture base and remove the electrical tape or wire nuts.
The wires come in two or three colors: black (hot), white (neutral), and, if present, green (ground) wires.
- Disconnect the wires to the existing ceiling box and remove it.
First, loosen the cable clamp screw that secures the incoming cable to the box. Then remove the box, working from above, if possible. Otherwise, remove any accessible fasteners (nails or screws) that attach it to the framing or push it up into the cavity to pry it from the framing or bend its hanger bar, depending on how it is attached.
- Follow the manufacturer’s directions to install the adjustable hanger bar and ceiling box.
You install most hanger bars by pushing them through the hole in the ceiling left by the old electrical box. When you have the hanger bar completely through the hole, rotate it until it’s perpendicular to the ceiling joists. The bar expands until it engages the ceiling joists. The ends of the hanger bar are equipped with sharp steel pins that dig into the wood joists when the hanger bar is expanded. You then attach the special ceiling box to the hanger bar, locking it in place to provide a secure base for the fan.
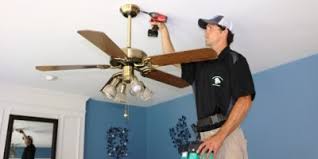
- Assemble the fan according to the manufacturer’s instructions.
Ceiling fans are heavy, so they require support while you attach the wires. Most models provide a way for you to suspend them below the ceiling box while you attach the wires. If yours doesn’t, get a helper to support the fan assembly while you attach the wires.
Wiring schemes differ slightly from fan to fan, depending on whether they’re equipped with a light or speed control. The basic installation of a ceiling fan is no different from that of a standard light fixture. Use wire nuts to attach the fan’s black or colored wire and white wire to matching wires in the ceiling box. If the wiring has a green ground wire, attach it to the green or bare wire in the box.
- Complete the attachment of the fan assembly to the ceiling box.
This should just involve a few screws.
- Install the trim and fan blades according to the manufacturer’s directions.
Turn on the power and test the installation.
Ceiling Fan Capacitors- Diagnosis and Replacement
Most ceiling fans use a type of motor known as a “permanent split capacitor motor. These motors havetwo coils, a start and run winding. A capacitor is connected in series with the start winding to insert aphase shift, but once the motor is up to speed it becomes an auxiliary winding. In order to reverse themotor, the capacitor is applied to the run winding which then becomes the start winding. In some casesthe windings may have taps to provide different speeds, in others the value of the start/run capacitor islowered to provide different speeds. Other designs will have additional capacitors wired in series withthe motor as a whole to regulate speed.
Signs of a bad capacitor in a ceiling fan include:
- Fan runs slowly or not at all on all speeds
- Fan will not start but will spin if started by hand
- Certain speeds are slow or do not work
- The motor hums and turns freely by hand but will not spin
The capacitor is usually a black box inside the switch housing of the fan. If the case appears burnt or
melted in any way, that is also the sign of a bad capacitor and it should be replaced. Keep in mind thatthere may be other components in the circuit with the defective capacitor. These should also be
properly checked and replaced if found defective. Not doing say may simply render the replacement
capacitor defective upon power up.
How to Replace a Ceiling Fan Capacitor
Prepare by opening the case. Make sure you have the necessary tools, including a voltage tester, a
screwdriver that matches the screws on the fan, wire nuts, wire cutters and wire strippers. Switch offthe power to the room that contains the fan by opening the breakers at the electrical panel or removingthe corresponding fuses. Place a stepladder under the fan and make sure it is high enough for you toreach the fan without having to stand on the top two steps.
Replacing the actual capacitor is usually straight forward but first you need to determine the correct
value. If the marking on the case of the original part is obliterated or unreadable you should consult withthe fan manufacturer or check the schematic to determine the original value. Otherwise determine if 2wire or 3 wire. Two wire capacitors are easy as they only contain one capacitance value. Capacitorvalues are measured in “microfarads” (uf), ex: 4uf is a 4 microfarad capacitor. Fans that have more thanone speed will often use more than one capacitor for speed regulation. To save space quite oftencapacitors that contain more than one value will often be used. Three wire capacitors are a bit more difficult as they contain two different values. For example a three wire capacitor may contain a 2uf and a4uf capacitor in the same case with one common wire. One wire goes to the 2uf side and the other goesto the 4uf side.
Are Ceiling Fans Hard to Install?
One of the best ways to make your home an investment is to improve the property in simple but significant ways. The best projects to tackle are the ones that will bring more value to the home than the actual cost of completing the project. One fantastic DIY home improvement project to consider is installing a ceiling fan. Many have asked if ceiling fans are hard to install, and the answer is generally, no. This post will briefly cover the main steps for installing a ceiling fan in your home. It should be noted, however, that the process can differ slightly for each home and each ceiling fan.
- REMOVE THE LIGHT FIXTURE THAT IS THERE
The first step will be to take out the light fixture that is already there. You will need to remove the cover and take out the bulbs and brace that are there. Make sure that the power to that room is off before doing this. If it is dark in the room, use flashlights or lamps hooked to another circuit to aid you.
- INSTALL THE SUPPORT BRACKET
Most ceiling fan kits will come with their own support bracket, but some do not. Look at the box and check the section that lists all of the contents. If you do not see a support bracket there, purchase one that will work for that model. It should be listed on the box. If you have any questions, be sure to ask someone who works at the store you are at. They will be able to help you.
- PUT IN THE FAN MOUNTING DEVICE
In your ceiling fan kit, there will be a mounting device. This bracket needs to be put in place before any of the wiring can be done. The instructions will differ depending on the fan, so follow the instructions that come with the kit you purchased. You will be working kind of upside down to get this done, and it can help a lot to have someone else there to hold up the bracket while you screw it all in.
- HOOK UP THE WIRING
Now you will connect the wiring from the light fixture to the wiring in the fan. Again, there will be some clear-cut instructions in the fan kit. If you are still a little wary, try looking at some YouTube videos. These can give you a good visual of how it should all look. This is another step where it will be much easier to have someone supporting the fan so you can focus solely on the wiring.
This is the step that scares most people, but it really is a very simple process. Don’t be discouraged. It is safe and easy if you can follow directions.
- PUT ON FAN BLADES AND OTHER DECORATIVE PIECES
Now that you have everything in place, it is time to finish it off with all the little decorative pieces. This will change depending on which kit you buy but usually involves putting on the fan blades, attaching the light fixture, and hooking up the pull strings.
The final step will be to enjoy the new and useful feature in your home. The process is simple but can have a lot of great dividends in both the aesthetic and practical worlds.
How to Wire a Ceiling Fan When There Is No Ground Wire
If you like working with your hands, installing a new ceiling fan can be a fun and rewarding task. However, there are always safety precautions that you must take. Always make sure that the electricity is turned off before working with electrical wiring. Grounding is another safety mechanism that reduces the risk of serious electric shock. Most modern homes are equipped with a grounding system integrated into the electrical system. Some older homes may not have ground wires present in the electrical boxes. Assuming that you have already removed the old light fixture we’ll go straight to options for wiring the fan with no ground.
- Step 1
Make sure that the junction box in your ceiling is one that is rated for a ceiling fan. If it isn’t, you could be setting yourself up for a bad accident if the ceiling fan falls.
- Step 2
As far as the ground wire is concerned, there are two solutions to this problem. The first solution, which is the better one but may turn out to be costly, is to have your home rewired, replacing all of the wiring with ROMEX® wires that include a ground wire. Also have a ground rod installed outside of your house. The second solution to the problem is to wire the ceiling fan without the ground. The ground wire doesn’t carry any electrical current (unless there is a problem in your electrical system). The ground wire carries displaced electricity away to reduce the risk of electrical shock if, let’s say, the metal parts of the ceiling fan or any other appliance or part attached to your electrical system becomes accidentally charged with electricity. So if you wire your fan without the ground wire, it will still work properly. However, the added safety of the ground wire will not be present. If you decide to wire your fan without the ground proceed to the next step.
- Step 3
Mount any brackets necessary to hang the ceiling fan.
- Step 4
Assemble the fan according to the manufacturer’s instructions and hang the fan (without the blades) from the mounting bracket.
- Step 5
Wire your fan using wire nuts to connect the white wire from your fan to the white wire in your ceiling. Next connect the two black wires in the same fashion. Don’t worry about the ground wire for now, but having your electrical system grounded should be a priority.
- Step 6
Continue assembling and installing your ceiling fan according to the manufacturer’s instructions.
Ceiling Fans: Fact or Fiction?
As much as most of us love summer, there’s one big downside that comes with the heat: more use of air conditioning and fans equals higher utility bills.
If you have central air, you probably already know that the air conditioner is one of the most energy-hungry appliances in your home. It costs, on average, $0.36 per hour to operate – which accounts for about 25 percent of all home energy consumption.
So, what about using ceiling fans? Do they really help cool the home and lower air conditioning costs, or do new ultra-efficient HVAC systems make such fans unnecessary?
Let’s take a closer look at the benefits and drawbacks of ceilings fans.
Fact or Fiction: Ceiling Fans Are Low Cost
Fact. Compared to air conditioners, ceiling fans are downright cheap. The average cost of running a ceiling fan is about one cent per hour—a fraction of the cost to run an air conditioner.
So, it’s true, but…should you compare these two types of cooling? The answer is, no. That’s because ceiling fans don’t actually cool a room. Instead, they create a wind-chill effect that can make it seem cooler. They can also lower humidity levels, which makes the room more comfortable without actually lowering the temperature. Unfortunately, if the room is hot in the first place, a ceiling fan will do little to change the temperature.
Fact or Fiction: Ceiling Fans Make A Good AC Supplement
Fact. Ceiling fans can help save energy costs and increase comfort if they’re used in conjunction with an efficient air conditioner. With both your ceiling fans and AC operating, you can increase the thermostat by four degrees without losing any comfort. In turn, the air conditioner will come on less often, so your energy bills could be lower overall.
Fact or Fiction: Fans Are Not Just A Summertime Tool
Fact. (Sounds odd, but it’s true). As long as you have ceiling fans with reversible motors, ceiling fans can help save money in the wintertime. With the flip of a small switch found on the side of their motor housing, most ceiling fans can rotate in the opposite direction (clockwise). This reverse motion creates an updraft in the room, moving the hot air around without the wind-chill effect.
Fact or Fiction: Ceiling Fans Without LED Lights Aren’t Worthwhile
Fact and fiction. While it’s true that in general, ceiling fans can help lower energy use in your home, they can also require considerable energy to operate. How much depends on how the fans are used and the type of lights the fans include. Some fan lights can use more electricity than the fan motors themselves. In fact, the type of light a fan uses can account for up to 80 percent of your potential savings from a more efficient model. Be sure to select an ENERGYSTAR® LED lighting fixtures if you want to get the most energy savings out of your ceiling fans.
So, Are Ceiling Fans Worth the Investment?
Let’s do the math. An air conditioner costs $0.36 per hour, and a ceiling fan only $0.01 per hour. If air conditioning costs are lowered even by a few cents per hour, fans could still be worth it. On average, ceiling fans can help save four to eight percent on cooling costs when combined with an air conditioner.
If you live in a climate where you can use fans instead of air conditioning on marginally hot days, then ceiling fans could be a very worthwhile investment.
While ceiling fans provide better circulation of cool air and a wind-chill effect, they can still amount to wasted money and energy if no one is enjoying these benefits. For example, don’t:
Install fans in rooms that aren’t used very often;
Keep fans running after everyone leaves a room; and
Turn on fans whenever the lights are on, even if the fan is not needed.