How to Install a New Toilet
TOOLS
- hacksaw
- slip-joint pliers
- putty knife
- rubber gloves
- adjustable wrench
- rag
- plunger
MATERIALS
- wax seal
- toilet
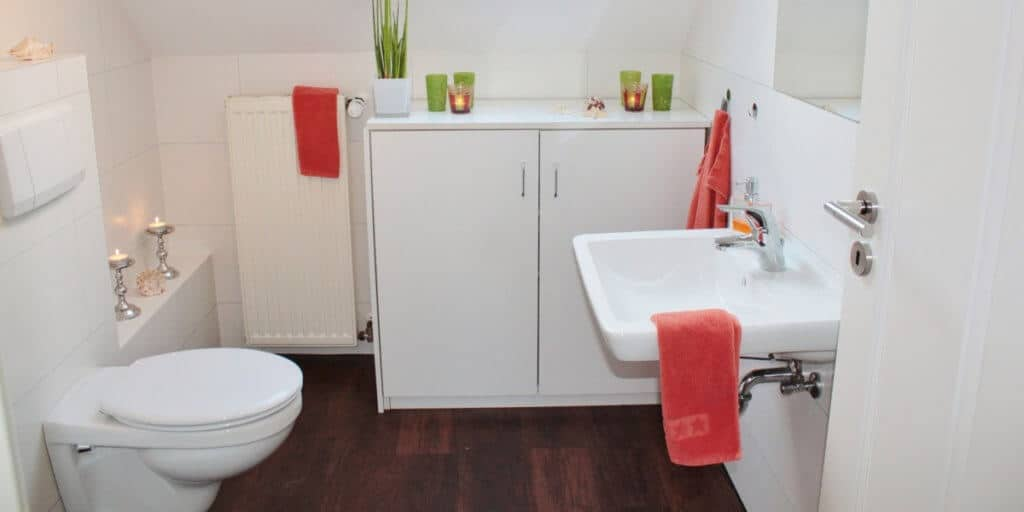
INTRODUCTION
Disconnect the Supply Line
After turning off the water at the shutoff, flush the toilet to remove most of the water from the tank and bowl. A little water will be left in the bowl. Use a force-cup plunger to force it down the drain line. Remove the remaining water from the tank with a sponge and a bucket.
Disconnect the supply line from the base of the tank.
STEP 1
Remove the Old Toilet
To remove the old toilet, pop off the trim caps at the base of the toilet. Next, loosen and remove the nuts and washers on the closet bolts securing the bowl to the floor. If the nuts are rusted, you may need to cut them off with a hacksaw.
Note: If you’re working alone, disconnect the tank from the bowl before disconnecting and removing the bowl. Lifting the two pieces separately will be a lot easier.
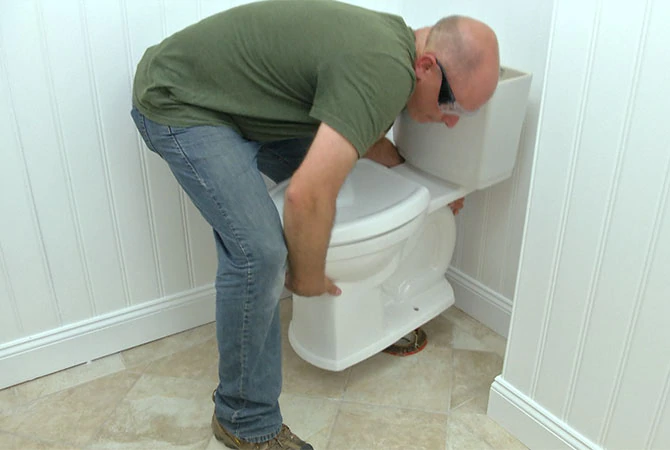
Now that you’ve removed the nut and washer on each side of the bowl, gently rock the toilet back and forth until you can lift it free. Once you’ve removed the toilet, there will be an open line to the sewer system. Stuff a rag into the hole to prevent sewer gases from backing up into your home and to prevent tools from falling into the hole.
STEP 2
Install a New Wax Seal
Use a putty knife to pry up and remove the old wax seal (Image 1). Inspect the flange beneath the seal to make sure it’s not cracked. Once you’ve inspected the flange, remove the rag from the hole. If the flange is damaged, get help from a plumber. If the flange is OK, remove the rag from the hole and take the closet bolts out of the flange. Install the new wax seal, and hook the new closet bolts into their slots on the flange (Image 2). Important: Remove the rag before installing the new wax seal. Leaving it in is a common and costly mistake.
STEP 3
Attach the Tank and Bowl
With the closet bolts and seal in place, you can attach the tank and bowl to assemble the new toilet. Slide the tank bolts through the opening in the bottom of the tank. Line up the shank of the bolts with the holes in the bowl, and drop the tank into place. Secure the tank to the bowl by tightening a nut onto each tank bolt. Evenly tighten all the nuts until the tank rests firmly on the bowl.
STEP 4
Secure the Toilet and Finish Installation
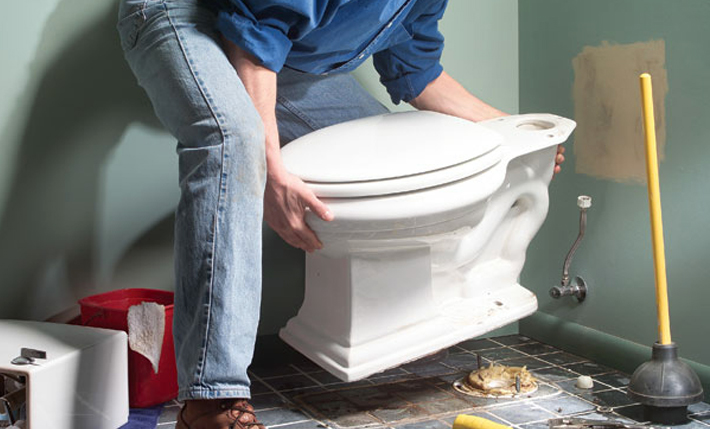
Set the assembled toilet onto the flange assembly, making sure that the closet bolts protruding from the floor line up with the holes in the base. Lightly press the toilet in place to form a good seal with the wax ring.
Place a couple of washers and a nut on each bolt. Secure the nuts with a small wrench, but don’t over tighten them. If the bolts extend too far over the top of the washers and nuts, cut off the excess with a hacksaw.
Pop the trim caps in place to cover the ends of the bolts.Secure the new seat and lid to the bowl with mounting bolts.
Use slip-joint pliers to reconnect the supply line to the bottom of the tank.
Pro Tip
Keeping toilets in good repair will save you money. Even a small leak may waste as much as 40 gallons of water per day.
Why You Should Caulk Your Toilet to The Floor
It seems that caulking your toilet to the floor has drawn quite a debate among clients, plumbers and DIYers of the like. Is it smart to caulk your toilet to the floor, or just leave it be? Turns out, caulking your toilet to the floor is actually smart.
The debate has to do with leaking water. According to Structure Tech, people will bring up the argument that not caulking a toilet to the floor can help you identify a leak. These clients say that caulking around the base of the toilet would trap water from a leaking toilet, causing damage below and around the toilet since it has no place to leak onto the floor.
Although that theory makes sense, it is, in fact, a false statement. A toilet would actually never leak right onto the floor. If there is any leaking that occurs in a toilet, it would happen through the floor and not on the floor. Toilets tend to leak below (typically into a basement), and seeing cases where a toilet is actually leaking on to the floor is quite rare. Plus if you’re dealing with a leaking toilet, simply wiping up the leaking mess won’t do it. There’s so much more that goes into repairing a leaking toilet.
However, this doesn’t cover the reasoning behind caulking a toilet to the floor in the first place. There are two important things to consider when it comes to caulking a toilet to the floor.
Caulk prevents smell
Yes, the bathroom is a place to get clean, but it can easily be a place to trap some pretty foul smells. If you don’t caulk a toilet to the floor, you could find yourself smelling leftover residue from smelly mop water, tub water, or even worse, the remnants of your son’s potty training.
Caulk keeps the toilet secure
Didn’t think you needed to worry about the toilet moving around? Think again! Caulk keeps your toilet secure the floor, and avoids any chance of injury or toilet malfunctioning.
5 Signs Your Toilet Is Leaking
A leaky toilet is the last thing you want, but it can happen at any time. A leaky toilet can cause water damage in your home. If it goes undetected, it can end up costing you extra money on your water bill. Many leaks don’t show signs at all, but there are still a few indicators that your toilet needs repair. Many of these signs can be the result of multiple problems but they are all common in leaking toilets.
There are a few easy ways to determine whether or not you have a leaking toilet.
- Your Toilet Makes Noise
If your toilet makes noise after you flush it means that the water is still running. This can often be the result of a slight disruption in the tank. There could be a problem with the toilet flush or fill valve in your tank, and it could be the result of a leak.
- The Floor Is Stained Around The Toilet
If you notice a yellow, brown or grey stain around the base of your toilet, it could be a sign that there is a leak. Generally, if there is a stain, it is a sign that the leak is older, and there has been water damage over time.
- The Toilet Leaks From The Bottom Of The Tank
If you notice water collecting at the base of your toilet, it’s likely that you have a leaky toilet tank. This often occurs in older models or toilets that are used heavily.
- The Floor Is Damp Around The Toilet
The easiest way to determine whether or not your toilet is leaking is to feel for signs of dampness. If there is rippling or stains around the base of the toilet, accompanied by dampness, it’s a sure sign you have a leak.
- There Is A Smell Of Sewage
A general smell of sewage is a clear indicator that there is something wrong with your plumbing. Your toilet bowl could be leaking. Additionally, the pipes could be leaking as well. Often the smell does not come from leaking raw sewage as many suspect, but rather a leak in the vent pipe behind your toilet. It can release the natural gasses from the sewer into your home. This type of leak should be dealt with immediately by your plumber, as some gasses from sewage, such as methane can be harmful.
Installing Peel-&-Stick Tile Under a Toilet
Peel-and-stick vinyl tile is an inexpensive and easy way to change the look of your bathroom. These tiles have glue applied at the factory; all you have to do is remove the plastic backing and press down on the tile. Working your way under the toilet takes a little trial and error, because the base is curved, but it’s a project that any novice do-it-yourself homeowner can tackle.
Vinyl Advantages
Vinyl flooring is an affordable and fast way to update your bathroom flooring. Installing vinyl tile doesn’t require mortar or special trowels like ceramic tile does. It cuts with a utility knife or tin snips; there’s no need to buy or rent a tile cutter. Some types are forgiving as well; if you put it in the wrong place or need to remove a damaged tile, heat it for a few minutes with a hair dryer to loosen the glue, then peel it off the floor. Vinyl is also easy to clean and maintain.
Removing the Toilet
With peel and stick tile, there’s no need to remove the toilet. You can tile under the toilet bowl all the way to the edge of the base, then edge it with silicone caulk to create a waterproof seal. Some harder flooring materials, such as ceramic tile and hardwood, make bathroom floors more difficult. They aren’t as easy to cut into rounded shapes as vinyl tile is, so they often require that you remove the toilet. Removing the toilet opens the door for problems such as breaking the porcelain base, not securing the water line properly leading to later leaks, or reinstalling the toilet so that it’s not level and wobbles. It’s better to leave the toilet where it is and work around it if you can.
Using a Template
Tracing paper or old pieces of cardboard can help you cut your tile under the toilet to the right shape. If you lay several pieces around the base of the toilet, you can trace the base’s shape and tape the pieces together in an open section of your floor. Once you’ve laid as many whole tiles as you can close to your toilet, measure the open spaces on the floor or trace them on more tracing paper or cardboard. Use the measurements or the tracings of open spaces together with your tracing of the rounded base of the toilet as a guide to cut your remaining tile to fit around the base. You can lay the cut tile beside the toilet before removing the backing to make sure the tile matches one of the open spaces. Even with templates, it may take a little trial and error to make every piece fit. It’s best to buy a few extra tiles at the beginning in case you ruin a few while cutting; most stores let you return unused tiles with a receipt.
Waterproofing
Toilets occasionally drip or leak, so it’s important to waterproof next to the toilet. Run a bead of silicon caulk along the base of the toilet where it meets the tile. If there’s a small gap between the tile and the toilet, fill in the entire gap with caulk. The caulk can be clear or white, or it can match the toilet or the tile color. A downside of peel-and-stick tile is that it’s difficult to make a true waterproof seal between each tile like you can with ceramic tile or vinyl sheeting. However, if you press the tiles as close together as possible, not much water is likely to get through. Some peel-and-stick tile is designed to be used with grout. If you’re expecting large amounts of water on your floor, this variety might be a better option for you.
Is my toilet leaking without me knowing?
Toilets are notorious for leaking. However, a leaking toilet often goes unnoticed until a water bill shows up that is higher than usual. The first thing that many people do when they have a higher water bill is think about using the dishwasher and clothes washer less to save money on the water bill.
Most people don’t realize it, but a leaking toilet is the most common cause for a water bill that gets out of control. There are a number of signs that a toilet needs some repairs, but many toilets still leak without any obvious signs of trouble. This is what makes a leaking toilet problematic for homeowners.
Most homeowners will notice if there is water around the base of the toilet, but here are some signs to look for if you have a larger than normal water bill because you suspect that you may have a leaking toilet:
- If you have to jiggle the handle to make a toilet stop running.
- If you have any sounds coming from a toilet that is not being used.
- If you have to hold down the handle to allow the tank to empty.
- If you can see water trickling down the sides of the toilet bowl long after it has been flushed.
- If a toilet turns the water on for 15 seconds or so without you touching the handle, you may have what is known as a phantom flusher.
The problem with leaking toilets is they can eventually result in outrageous water bills. This is especially true if you aren’t home a lot or aren’t paying attention to your plumbing. In effect, some of these kinds of water bills can run up to 300% higher than your average monthly bill. Leaking toilets are easy to fix, and the cost for a plumber to assess the situation and repair it is usually much cheaper than letting the problem go on and then pay for an-out-of-control water bill.