bookmark_borderThe Best Kitchen Garbage Disposal

How to Properly Use Your Garbage Disposal

First of all, while it may not seem too picky, your garbage disposal is made for biodegradable food only. Remember – when using your disposal, run water the entire time and for at least 20 seconds after you turn it off. Feed food slowly into the disposal and avoid dumping large amounts in at one time. Also, be sure to read the manual carefully and avoid things that are known to cause problems. If you find yourself with a clog, know that unclogging your garbage disposal doesn’t have to be draining.

How to Quickly Clean your Garbage Disposal

Having a wretched odor emanating from your sink is a surefire tip-off that your disposal is in dire need of a good cleaning. Don’t worry – there are plenty of thrifty ways you can resolve this issue. No need for special cleaners or chemicals, you can eliminate this problem with a variety of items you have laying around the house:

  • Ice
  • Ice and rock salt
  • Baking soda and vinegar
  • Citrus
  • Borax
  • Hot water and dish soap
  • Dish soap and baking soda
  • Boiling water

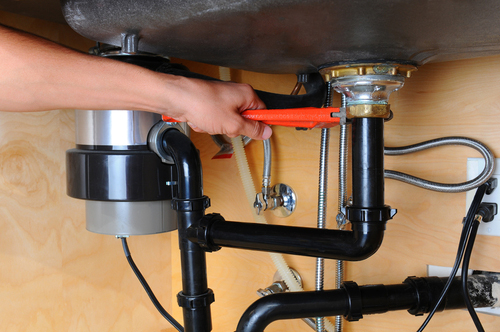
Know When It’s Repair Time

You gave it your best shot. You tried a variety of troubleshooting tips and still, the issue persists. Here are some telltale signs that it’s time to replace your garbage disposal:

  • It clogs frequently even though you are taking good care of it
  • You have to press the reset button a lot
  • You can’t get rid of odors
  • The blades have become dull
  • You have a leak that can’t be easily fixed


Garbage Disposal Maintenance Tips

Garbage Disposal Daily Maintenance: Normal use is enough to help reduce accumulation as the garbage disposal is rinsed with soapy waste water after washing dishes.

Garbage Disposal Weekly Maintenance: On a weekly basis, the garbage disposal should be flushed with cold water. Fill the sink with clean cold water, pull the drain stop and allow the water to drain. The flushing action of the water leaving the sink through the drain will purge the drain line of any loose food waste.

Garbage Disposal Monthly Maintenance:

  • Once a month empty a tray of ice cubes into the sink and turn on the garbage disposal to grind up the ice cubes. After the ice cubes are ground into a slushy mixture, rinse with a light stream of cold water. The ground ice will clog the drain line and water will backup into the sink, however after a few minutes the ice will melt away and the water will drain. Grinding ice helps to sharpen the shredding blades and remove the accumulation of food waste.
  • If you have a removable drain baffle, remove it and clean the surface thoroughly with an old toothbrush, water, and detergent. Be sure to place the baffle back in it’s original location prior to operating the garbage disposal.
  • Place a half cup of baking soda and one cup of vinegar in the grind chamber. Allow the mixture to foam and fizz while you boil a pot of water. Once the water has boiled, pour it down the drain. In lieu of baking soda and vinegar, you can also mix one gallon of water with one tablespoon of liquid chlorine bleach and slowly pour the mixture into the grind chamber. Allow it to sit for several minutes and then flush with cold water. These mixtures will sanitize the garbage disposal and remove any foul odor. If you would prefer to not experience the smell of bleach or vinegar emanating from the garbage disposal you can freshen the smell with citrus rinds. Lemon, lime, orange, and grapefruit rinds can be placed in the garbage disposal and ground-up to provide a fresh citrus scent.


Using a Garbage Disposal Correctly

Run cold water into the disposal as you turn it on.

Before you put any food in, turn the disposal on and let cold water from your sink flow into it. Keep this going for about 30 seconds to lubricate the blades inside of the disposal first.

  • Always use cold water, not hot, when using your disposal to avoid melting any fat or grease on the food as you dispose of it.
  • Keep the cold water running the entire time you use your disposal.

Avoid pouring grease, starch, or non-food items into your disposal.

Garbage disposals are made for food scraps only, meaning you should never pour anything inedible down them. Similarly, grease and fat can solidify inside of the disposal, causing it to clog or jam. And, starchy foods like corn husks, artichokes, and large amounts of vegetable peels can also cause clogs and jams. Foods to avoid putting down your disposal include:

  • Oyster shells
  • Clam shells
  • Large amounts of egg shells
  • Coffee grounds
  • Expandable foods, like pasta
  • Grease or fat
  • Animal bones
  • Corn husks
  • Celery stalks
  • Onion skins


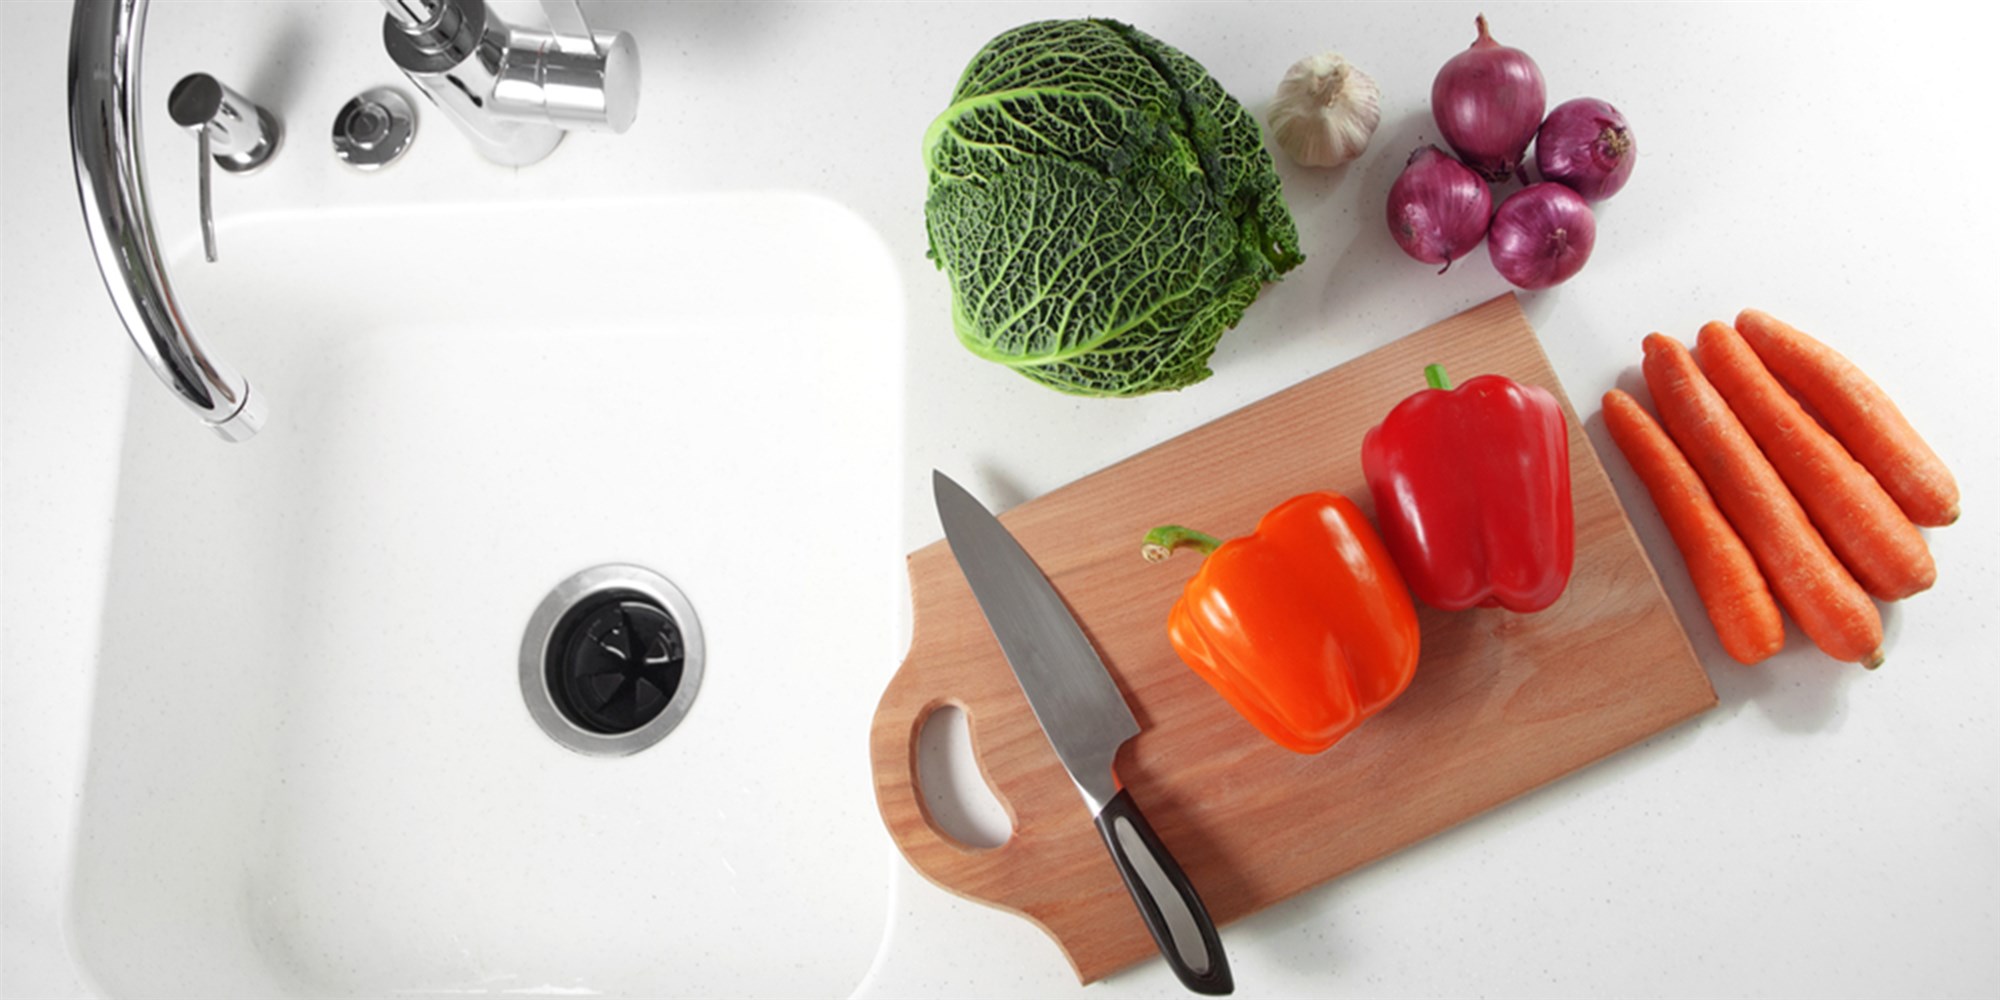
Put bite-sized pieces of food down the disposal.

Garbage disposals are meant to handle food scraps, not full pieces of food. If you’re trying to dispose of anything larger than bite-sized, use a sharp knife to cut it up until all the pieces are about 1 in (2.5 cm) long.

  • If you can’t cut up your food, consider composting it instead.

Drop the food down the disposal slowly.

Grab your food scraps and drop them into the disposal one handful at a time. Try to avoid overloading the disposal, as that can clog the blades and cause expensive repairs.

  • Wait until you stop hearing a grinding noise in the disposal to drop another handful in.

Keep the disposal on for 30 seconds after you’re done putting food in.

Once you’ve put your last handful of food scraps in the disposal, wait for about 30 seconds to let the disposal finish working. If you don’t, you could leave food scraps in the blades, causing it to jam up the next time you use it.

Turn the disposal off, but let the water run for 15 more seconds.

Flip the switch to turn your disposal off, but keep using cold water from your sink for a little bit longer. This will help to flush out any remaining food that might be stuck in the disposal.

  • Remember to always use cold water, even when the disposal is off, to avoid heating up any grease or fat stuck on the blades.


How to get rid of garbage disposal smells:

If you have a nasty smell coming from the disposal, there could be two causes: the drain and/or the rubber splash guard.

To clean the garbage disposal drain: Pour a ½ cup of baking soda into the drain, add a cup of hot white distilled vinegar (just heat it in the microwave), then watch it foam, says Reichert. “Let it sit for a few minutes, then pour a quart of boiling water down the disposal to flush everything down the drain. That will leave the chopping part of the disposal lovely and fresh!”

To clean the garbage disposal splash guard: Cleaning the rubber splash guard takes a bit more work, but it’s worth the effort. Slime and gunk that accumulate on the underside of the splash guard are a major source of odors and a breeding place for germs. To tackle the chore, you’ll need rubber gloves, an old toothbrush and hot, soapy water.

  • For removable splash guards: While wearing gloves, remove the splash guard, then scrub the top and bottom of the rubber guard with a toothbrush and soapy water. Rinse and replace.
  • For non-removable splash guards: While wearing gloves, first scrub the top side of the guard. Rinse. Then, lifting up the rubber guard a section at a time, scrub the underside of the splash guard until all slime and gunk are gone. Rinse.


Ice Cubes And Salt

Ice cubes with salt is used to remove tough sludge and debris that is stuck to the blades and other elements of the unit.

What you need: 2 cubes of ice cubes and 1 cup of rock salt/sea salt

Time: 7-8 minutes

Directions

  • Turn on the garbage disposal and pour the ice cubes into it. Follow it with 1 cup of rock salt. You could improvise and use sea salt
  • Run some cold water and let the the salt and ice get crushed by the blades
  • The ice and salt will loosen the grime and dirt that is stuck to the impeller blades
  • Continue to run the water for a few seconds after the noise from the machine stops

The combination of ice and salt not only cleans the unit but it also removes any unpleasant odor that stems up from the garbage disposal.

bookmark_borderHow To Clear A Clogged Toilet With A Toilet Auger

Tips For Preventing Toilet Troubles

DO clean your toilet regularly with a mild cleaner. Vinegar, baking soda, or a mild soap are all great for regular porcelain cleaning. Not only does cleaning your toilet help you keep a more hygienic, better smelling bathroom, it also gives you the opportunity to spot a leak or a problem with your bathroom’s plumbing fairly quickly. If you never really clean up around the toilet area, how will you know if that water on the floor is from your shower, your toilet, or the sleepwalking male members of your household?

DON’T use chemical drain cleaners to unclog your toilet. While some plumbers say ‘yea’ and others say ‘nay’ when it comes to using these products, we say it’s just not worth the risk. Not only are these products harmful to your health if accidentally splattered on your skin, consumed, or even inhaled too much, they can damage older fixtures and pipes, and really aren’t something anyone wants in our water systems. They can also cause a lot of trouble for homes with septic systems if they kill off the good bacteria in there.

DO inspect your toilet’s inner workings about every 6 months to make sure the components are still in good shape and functioning properly. Take the tank lid off and flush the toilet. Watch the components work, making sure the flapper is sealing well and the fill valve stops running at an appropriate water level.

DO fix a running or leaking toilet right away. Toilet leaks are typically “silent”, in that you won’t necessarily find a puddle of water on the floor since the water is usually leaking out from the tank into the bowl (and down the drain). This makes it fairly easy to overlook the leak, or to keep putting off fixing it. Toilet leaks are generally slow leaks too, so you might not even notice a small increase in your bills each month until you look back and realize you’re paying $100 more for water this month than you did at the same time last year.

DON’T use a brick to save water in your tank. Unless your toilet is older than the mid-90’s, you’re using 1.6 gallons per flush (or less), and most sewage systems really do need that much water to effectively move the waste. If your toilet is older and you want to save water, we recommend filling a water bottle with sand or small rocks and using that to displace some of the water. Bricks can break down and clog your pipes.


The Right Way to Use a Plunger

If your toilet’s overflowing or your sink’s stopped up, it’s time to take the plunge! About 90 percent of the time, a clog can be cleared with just a couple of thrusts of a plunger. To make the messy job easy, though, it’s important to have the right kind of plunger and the proper technique. As it turns out, not all plungers are created equal; some are best suited for sinks and showers, while others are appropriate for use on toilets. Once you’ve determined the best tool for the job, success is all about form. Contrary to popular practice, repeatedly flushing while frantically pumping won’t release the blockage any faster—instead, it will break the plunger’s seal and ruin the suction. To keep the water flowing freely down your pipes, avoid those amateur mistakes and learn to plunge like a pro with these valuable tips.

Pick the Perfect Plunger

Start at the very beginning: While there’s probably a shelf full of plungers available for purchase at your grocery or home improvement store, the two most common styles are the cup plunger and the flange. It’s smart to stock one of each and be familiar with their strengths so you can determine which one’s right for your mini-emergency.

he Cup: When you think of a plunger, the image that comes to mind most often is that of a simple wooden handle attached to a rubber cup. It’s this cup that gives the tool the name “cup plunger.” This design is most effective on flat-surface drains, which are found in the sink and bathtub. While it works well for a sink, shower, or bathtub clog, the cup plunger can’t create a sufficiently airtight seal in the curve of a toilet drain to produce adequate suction

The Flange: A toilet clog calls for a different type of plunger entirely: the flange plunger, which has an extra ring of rubber (the flange) around the cup. The flange is inserted into the toilet drain, sealing in the air and increasing the suction power. In a pinch, you can fold the rubber ring back into the bell of the plunger and use it to unclog a tub or sink drain, but a true cup plunger will be more effective

Plunging a Sink, Shower, or Tub

When using a standard cup plunger, start by covering the overflow drain, if there is one, with a wet towel. Doing so prevents air from escaping and decreasing the suction power. While you’re at it, it’s a good idea to seal off any nearby drains in sinks or tubs to ensure better results. To further improve the plunger’s suction power, create a tighter seal by lining the rim of the cup with a small amount of petroleum jelly.


Unclog your toilet with this simple and ingenious trick — no plunger required

Over the course of many years, I’ve practiced and honed the ancient art of unclogging a clogged toilet without needing to use a plunger. Why not just buy a plunger? Simply put, I never needed to on account of this particular bit of washroom wizardry. This technique is especially handy if you ever find yourself staring down a stopped-up commode in someone else’s bathroom with no plunger in sight — a situation in which you might be understandably reluctant to call for backup.

I didn’t invent this particular process for plunging without a plunger — the same basic technique can be found all across the web on plumbing and DIY blogs, both mainstream and obscure — but I can attest to its power and might

Most bathrooms have everything you’ll need

To perform this trick, you’ll need three things that can be found in almost any bathroom: soap, hot water and a vessel for transferring the water to the toilet bowl. Dish soap and a 5-gallon bucket work best, but if secrecy is paramount and leaving the lavatory would blow your cover, a small plastic waste bin and a few pumps from a hand soap dispenser will do just fine.

Mixing the magical potion

The objective is to get the liquid in the toilet bowl as hot and soapy as possible without letting it overflow. You can either pour (or pump) soap directly into the bowl and then add hot water, or you can mix the soap with the hot water before you add it to the bowl.

Carefully and gently add the hot water

Mixing everything up in the toilet bowl is the step requiring the most finesse. You want to raise the average water temperature and get the soap into every crevice, but you don’t necessarily want to create a slurry with what’s already in there.


HOW TO PICK THE RIGHT PLUNGER

Sinks, showers and toilets can often become clogged for many different reasons. For many such jobs, a plunger can do the trick and get things rolling again. However, in order to ensure a job well done, you must think like a professional plumber and make sure you are choosing the right plunger

GET THE RIGHT TOOL FOR THE JOB

There are two main types of plungers, and each type serves a unique purpose. The classic flat-bottomed plunger is meant, perhaps quite naturally, for flat surfaces like sinks. In contrast, the more curved bottom of a toilet requires a protruding flange plunger, which looks like a flat plunger just with an extra bit coming out the bottom.

MAKE SURE IT CAN FORM A TIGHT SEAL

Plungers work by creating a vacuum within the drain, and then allowing you to use this vacuum to your advantage to unclog things. In order for this to happen, however, the plunger needs to be able to make a tight seal around the drain in question. This is why older plungers with cracks or holes in them don’t work very well. Before getting a new plunger, be sure it is able to create a good seal both today and well into the future.

IS IT COMFORTABLE TO USE?

Sometimes, plungers don’t work unless you put a little elbow grease behind them. Be sure you buy a plunger with good grip that is comfortable to use, as you don’t want to strain yourself while clearing a drain.


How to Unclog a Toilet Like a Plumber

It’s every man’s worst fear. You’re at someone’s house, you  finish doing your business and flush the toilet, but instead of going down, the water comes up along with whatever you just deposited in the bowl. Would you be paralyzed with panic in that moment? Or do you know what to do?

Thankfully, unclogging a toilet isn’t hard at all. Even the most gnarliest of clogs can be taken care of with ease. To help us learn how to effectively unclog a toilet, I called up Rod from Roto-Rooter and got the scoop

top the Toilet Bowl From Filling Up.

If it looks like the water might overflow out of the toilet, Rod suggests taking the lid off the tank as quickly as possible and closing the toilet flapper. The flapper releases water from the tank and into the bowl. It looks like, well, a flapper. If you’re worried that your flush has a good chance of turning into a flood, take off the top before you pull the trigger. Then you can keep one hand close to the flapper while the other hands pushes the flusher. The minute it appears the water is rising, you’re ready to stop the deluge

Get the Right Plunger

Once disaster has been averted, it’s time to unsheathe your plunger. To effectively use a plunger, you need a good seal between it and the toilet bowl. Funnel-cup plungers are the best plungers for this. They’re the ones with a flange, or added piece, extending off the bottom of the rubber cup

Warm Up Your Plunger

Stiff, hard plungers don’t work as well as soft and pliant ones. Run your plunger under some hot water before you use it. This will soften up the rubber, which will help you get a better seal on the toilet bowl.

bookmark_borderMake A Good Setting Of Toilet Installation

How to Install a New Toilet

TOOLS

  • hacksaw
  • slip-joint pliers
  • putty knife
  • rubber gloves
  • adjustable wrench
  • rag
  • plunger

MATERIALS

  • wax seal
  • toilet

INTRODUCTION

Disconnect the Supply Line

After turning off the water at the shutoff, flush the toilet to remove most of the water from the tank and bowl. A little water will be left in the bowl. Use a force-cup plunger to force it down the drain line. Remove the remaining water from the tank with a sponge and a bucket.

Disconnect the supply line from the base of the tank.

STEP 1

Remove the Old Toilet

To remove the old toilet, pop off the trim caps at the base of the toilet. Next, loosen and remove the nuts and washers on the closet bolts securing the bowl to the floor. If the nuts are rusted, you may need to cut them off with a hacksaw.

Note: If you’re working alone, disconnect the tank from the bowl before disconnecting and removing the bowl. Lifting the two pieces separately will be a lot easier.

Now that you’ve removed the nut and washer on each side of the bowl, gently rock the toilet back and forth until you can lift it free. Once you’ve removed the toilet, there will be an open line to the sewer system. Stuff a rag into the hole to prevent sewer gases from backing up into your home and to prevent tools from falling into the hole.

STEP 2

Install a New Wax Seal

Use a putty knife to pry up and remove the old wax seal (Image 1). Inspect the flange beneath the seal to make sure it’s not cracked. Once you’ve inspected the flange, remove the rag from the hole. If the flange is damaged, get help from a plumber. If the flange is OK, remove the rag from the hole and take the closet bolts out of the flange. Install the new wax seal, and hook the new closet bolts into their slots on the flange (Image 2). Important: Remove the rag before installing the new wax seal. Leaving it in is a common and costly mistake.

STEP 3

Attach the Tank and Bowl

With the closet bolts and seal in place, you can attach the tank and bowl to assemble the new toilet. Slide the tank bolts through the opening in the bottom of the tank. Line up the shank of the bolts with the holes in the bowl, and drop the tank into place. Secure the tank to the bowl by tightening a nut onto each tank bolt. Evenly tighten all the nuts until the tank rests firmly on the bowl.

STEP 4

Secure the Toilet and Finish Installation

Set the assembled toilet onto the flange assembly, making sure that the closet bolts protruding from the floor line up with the holes in the base. Lightly press the toilet in place to form a good seal with the wax ring.

Place a couple of washers and a nut on each bolt. Secure the nuts with a small wrench, but don’t over tighten them. If the bolts extend too far over the top of the washers and nuts, cut off the excess with a hacksaw.

Pop the trim caps in place to cover the ends of the bolts.Secure the new seat and lid to the bowl with mounting bolts.

Use slip-joint pliers to reconnect the supply line to the bottom of the tank.

Pro Tip

Keeping toilets in good repair will save you money. Even a small leak may waste as much as 40 gallons of water per day.


Why You Should Caulk Your Toilet to The Floor

It seems that caulking your toilet to the floor has drawn quite a debate among clients, plumbers and DIYers of the like. Is it smart to caulk your toilet to the floor, or just leave it be? Turns out, caulking your toilet to the floor is actually smart.

The debate has to do with leaking water. According to Structure Tech, people will bring up the argument that not caulking a toilet to the floor can help you identify a leak. These clients say that caulking around the base of the toilet would trap water from a leaking toilet, causing damage below and around the toilet since it has no place to leak onto the floor.

Although that theory makes sense, it is, in fact, a false statement. A toilet would actually never leak right onto the floor. If there is any leaking that occurs in a toilet, it would happen through the floor and not on the floor. Toilets tend to leak below (typically into a basement), and seeing cases where a toilet is actually leaking on to the floor is quite rare. Plus if you’re dealing with a leaking toilet, simply wiping up the leaking mess won’t do it. There’s so much more that goes into repairing a leaking toilet.

However, this doesn’t cover the reasoning behind caulking a toilet to the floor in the first place. There are two important things to consider when it comes to caulking a toilet to the floor.

Caulk prevents smell

Yes, the bathroom is a place to get clean, but it can easily be a place to trap some pretty foul smells. If you don’t caulk a toilet to the floor, you could find yourself smelling leftover residue from smelly mop water, tub water, or even worse, the remnants of your son’s potty training.

Caulk keeps the toilet secure

Didn’t think you needed to worry about the toilet moving around? Think again! Caulk keeps your toilet secure the floor, and avoids any chance of injury or toilet malfunctioning.


5 Signs Your Toilet Is Leaking

A leaky toilet is the last thing you want, but it can happen at any time. A leaky toilet can cause water damage in your home. If it goes undetected, it can end up costing you extra money on your water bill. Many leaks don’t show signs at all, but there are still a few indicators that your toilet needs repair. Many of these signs can be the result of multiple problems but they are all common in leaking toilets.

There are a few easy ways to determine whether or not you have a leaking toilet.

  • Your Toilet Makes Noise

If your toilet makes noise after you flush it means that the water is still running. This can often be the result of a slight disruption in the tank. There could be a problem with the toilet flush or fill valve in your tank, and it could be the result of a leak.

  • The Floor Is Stained Around The Toilet

If you notice a yellow, brown or grey stain around the base of your toilet, it could be a sign that there is a leak. Generally, if there is a stain, it is a sign that the leak is older, and there has been water damage over time.

  • The Toilet Leaks From The Bottom Of The Tank

If you notice water collecting at the base of your toilet, it’s likely that you have a leaky toilet tank. This often occurs in older models or toilets that are used heavily.

  • The Floor Is Damp Around The Toilet

The easiest way to determine whether or not your toilet is leaking is to feel for signs of dampness. If there is rippling or stains around the base of the toilet, accompanied by dampness, it’s a sure sign you have a leak.

  • There Is A Smell Of Sewage

A general smell of sewage is a clear indicator that there is something wrong with your plumbing. Your toilet bowl could be leaking. Additionally, the pipes could be leaking as well. Often the smell does not come from leaking raw sewage as many suspect, but rather a leak in the vent pipe behind your toilet. It can release the natural gasses from the sewer into your home. This type of leak should be dealt with immediately by your plumber, as some gasses from sewage, such as methane can be harmful.


Installing Peel-&-Stick Tile Under a Toilet

Peel-and-stick vinyl tile is an inexpensive and easy way to change the look of your bathroom. These tiles have glue applied at the factory; all you have to do is remove the plastic backing and press down on the tile. Working your way under the toilet takes a little trial and error, because the base is curved, but it’s a project that any novice do-it-yourself homeowner can tackle.

Vinyl Advantages

Vinyl flooring is an affordable and fast way to update your bathroom flooring. Installing vinyl tile doesn’t require mortar or special trowels like ceramic tile does. It cuts with a utility knife or tin snips; there’s no need to buy or rent a tile cutter. Some types are forgiving as well; if you put it in the wrong place or need to remove a damaged tile, heat it for a few minutes with a hair dryer to loosen the glue, then peel it off the floor. Vinyl is also easy to clean and maintain.

Removing the Toilet

With peel and stick tile, there’s no need to remove the toilet. You can tile under the toilet bowl all the way to the edge of the base, then edge it with silicone caulk to create a waterproof seal. Some harder flooring materials, such as ceramic tile and hardwood, make bathroom floors more difficult. They aren’t as easy to cut into rounded shapes as vinyl tile is, so they often require that you remove the toilet. Removing the toilet opens the door for problems such as breaking the porcelain base, not securing the water line properly leading to later leaks, or reinstalling the toilet so that it’s not level and wobbles. It’s better to leave the toilet where it is and work around it if you can.

Using a Template

Tracing paper or old pieces of cardboard can help you cut your tile under the toilet to the right shape. If you lay several pieces around the base of the toilet, you can trace the base’s shape and tape the pieces together in an open section of your floor. Once you’ve laid as many whole tiles as you can close to your toilet, measure the open spaces on the floor or trace them on more tracing paper or cardboard. Use the measurements or the tracings of open spaces together with your tracing of the rounded base of the toilet as a guide to cut your remaining tile to fit around the base. You can lay the cut tile beside the toilet before removing the backing to make sure the tile matches one of the open spaces. Even with templates, it may take a little trial and error to make every piece fit. It’s best to buy a few extra tiles at the beginning in case you ruin a few while cutting; most stores let you return unused tiles with a receipt.

Waterproofing

Toilets occasionally drip or leak, so it’s important to waterproof next to the toilet. Run a bead of silicon caulk along the base of the toilet where it meets the tile. If there’s a small gap between the tile and the toilet, fill in the entire gap with caulk. The caulk can be clear or white, or it can match the toilet or the tile color. A downside of peel-and-stick tile is that it’s difficult to make a true waterproof seal between each tile like you can with ceramic tile or vinyl sheeting. However, if you press the tiles as close together as possible, not much water is likely to get through. Some peel-and-stick tile is designed to be used with grout. If you’re expecting large amounts of water on your floor, this variety might be a better option for you.


Is my toilet leaking without me knowing?

Toilets are notorious for leaking. However, a leaking toilet often goes unnoticed until a water bill shows up that is higher than usual. The first thing that many people do when they have a higher water bill is think about using the dishwasher and clothes washer less to save money on the water bill.

Most people don’t realize it, but a leaking toilet is the most common cause for a water bill that gets out of control. There are a number of signs that a toilet needs some repairs, but many toilets still leak without any obvious signs of trouble. This is what makes a leaking toilet problematic for homeowners.

Most homeowners will notice if there is water around the base of the toilet, but here are some signs to look for if you have a larger than normal water bill because you suspect that you may have a leaking toilet:

  • If you have to jiggle the handle to make a toilet stop running.
  • If you have any sounds coming from a toilet that is not being used.
  • If you have to hold down the handle to allow the tank to empty.
  • If you can see water trickling down the sides of the toilet bowl long after it has been flushed.
  • If a toilet turns the water on for 15 seconds or so without you touching the handle, you may have what is known as a phantom flusher.

The problem with leaking toilets is they can eventually result in outrageous water bills. This is especially true if you aren’t home a lot or aren’t paying attention to your plumbing. In effect, some of these kinds of water bills can run up to 300% higher than your average monthly bill. Leaking toilets are easy to fix, and the cost for a plumber to assess the situation and repair it is usually much cheaper than letting the problem go on and then pay for an-out-of-control water bill.