bookmark_borderMain Job Description Of Camera Operator

Random Tips from a Professional Camera Operator

My childhood dream was to be a camera operator. I wanted to be the person looking through the camera and framing a shot. While I would have enjoyed having a long career as an operator, I entered the business at a time when operators were a dying breed, and the only people guaranteed careers as operators were Steadicam operators. I wasn’t particularly interested in doing that, so I moved towards being a director of photography faster than I had expected. Most of the shoots I do don’t require, or won’t hire, an operator, so in a way I’m still a career operator. I just get to light the shots as well as operate them

No one taught me how to be an operator. At a young age I found myself drawn to strong compositions in certain TV shows and movies, and I sought to emulate those compositions with my Regular 8mm film camera. Over time I learned, through trial and error and the occasional tip from those more experienced than I, how to move the camera predictably and repeatedly

LEARN THE GEARED HEAD

I really enjoy working with geared heads, although I rarely get to use them anymore. Most of my projects can’t afford to rent one for me. Hopefully this will change with the advent of the Gearnex geared head, which I’ve now used on several shoots

Buy, rent or borrow a geared head and strap a laser pointer to it: learn to write your name in light on a wall.

Although this is the most commonly recommend way of learning the wheels, I’m skeptical of this method as it teaches you to write your name in light on a wall–which is something you’ll never do. In my career–approaching 23 years in the film industry–I’ve only once had to follow text with a geared head, while operating second camera on a feature called “No Way Back.” A gang member spray painted words onto the side of a tunnel, and I had to follow his writing in third gear, with no rehearsal, on an 85mm lens. I nailed it, and I’d never done anything like that before.

Buy, rent or borrow a geared head and strap camera to it: follow people around.

Learning to read, and react to, body language is a huge part of operating a camera. You’ll get a lot farther faster if you learn to follow people around and interpret body movement and language through the wheels than you will simply learning the craft of moving the wheels, which is what the laser pointer technique teaches


Tips for being an Outstanding Camera Assistant

Being a professional Camera Assistant can be the hardest job on the crew. It carries more responsibility than most people think and even worse… while everyone else is on a tea break, the Camera Assistant is usually working, loading magazines, filling out Camera Report Sheets or organizing the camera equipment for the next set-up.

The stuff I’ve written here is based on film camera assistants but the rules apply for video assistants too. So, without further ado… let us begin! All experienced camera crews working at the top end of the film and TV industry such as   Cinematographers, Lighting Camera men/women, Camera Operators and Focus Pullers, have all done their time as Camera Assistants.

Always be a good time keeper and turn up at least 15 minutes before you are expected to start work. General rule of thumb: “If you’re on time… you’re late!”

Strive to be efficient and organized – Your aim is to be an outstanding Assistant. (Never aim for mediocrity, it won’t get you anywhere.)

When the camera is not in use keep it low on the tripod or preferably keep it in a safe place on the ground. Always place it on a groundsheet and protect it from moisture or dust with the rain cover.  Remember: “If it’s on the ground, it can’t fall any further!”


How To Be a Better Camera Operator

Welcome back to part 3 of my “How To Be A Better Camera Operator” series (if you haven’t read part 1 and part 2… what are you waiting for?! Haha). In this post we’ll be looking at Camera Equipment – there’s lots of information flying around all over the place about gear, so sometimes it can be very tough to see what’s really important about the kit you use. In this post I’ll try to cover what you need, why you need it and how to make sure it keeps doing what you want it to do!

Cameras

As there are so many different cameras out there I’m not going to discuss the ‘right’ camera to choose or use, as this largely depends on the type of work you do and anyway, as I’m sure you’ve already discovered there’s so much stuff online now about all the various cameras that are available, their pros and cons, special features and …well the internet groans under the strain of it all!

One thing I will say though is that having the latest, all singing all dancing camera with the brand new bells and whistles doesn’t make you a better camera operator. Similarly just because you have Microsoft Word on your computer doesn’t make you a better writer than William Shakespeare. I think you’ll all agree that even though good old Will had nothing but an unpretentious sharpened goose feather to work with… he kind of managed ok!!!

Camera Care

Looking after your camera is number one. It’s simple…Look after your equipment and your equipment will look after you.

DO: Always have a rain cover handy if you are filming outdoors. Also use a lens cap ready for the lens. Pretty obvious really, water and electrics don’t mix! To protect the lens from rain a great tip used by loads of camera assistants is to use disposable shower caps (the sort you sometimes find in hotels) because they are elasticated it only takes a second to snap one over the lens: it’ll protect it between Takes from those potentially damaging and annoying rain droplets.


qualities to look for when hiring a cameraman or crew

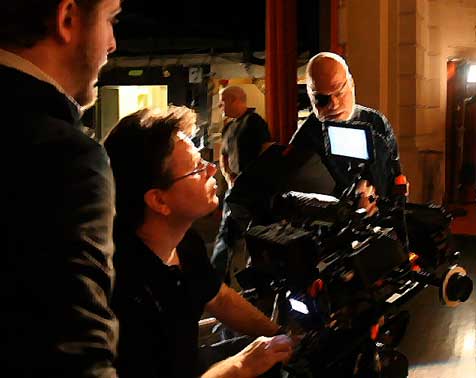
Great attention is given to actors, directors and producers, but what about the guy (or gal) you never see – the one on the other side of the lens? The one who holds a 25 lb. piece of equipment on their shoulder, while walking along a bumpy road with their vision tunneled into a small 1 inch rectangle, trying to get “the shot”….the cameraman

Easy to work with/Flexible

Finding someone who is flexible and easy to work with is always nice to have, but it is especially true when selecting a camera operator. You want someone who can: put those being filmed at ease; be patient when working on set during unavoidable delays; and be understanding about reshooting if you’re not getting what you had envisioned. You may be able to step in and do an “okay job” at other tasks, but shooting with a $50,000 camera and lens takes technical skills learned through school and years of practice

Honed technical skills/Tech savvy

Operating a camera, maintaining composition and adjusting camera angles is no easy feat. Learning, understanding and honing the technical skills required to become an operator takes many years – and then several more to hone a specialty. For instance, to be good at news requires a cameraman who is quick thinking and fast on their feet.  Others may be good at sports production and following the ball, or an expert in EFP (Electronic Field Production) which requires precise lighting and composition.  Still others specialize in multi-cam for meetings and the like, and then some can do it all.  Camera operators also need to stay up-to-date on shooting techniques, lighting, new equipment, and a plethora of formats, frame rates and resolutions

Physical stamina and strength

While keeping abreast of the latest news through industry associations, forums and journals is important for honing technical skills, the camera operator must also possess physical stamina, strength and manual dexterity. Shooting, although lots of fun, can also be very demanding – with long hours, challenging conditions, and the need to be on your feet all day

Creativity: they have a “good eye”

Creativity is something that cannot be taught. A good camera operator will be able to spot a good opportunity and have an artistic eye for framing shots. Having the ability to look through the lens and picture how all of the elements come together – visual composition, perspective, lighting and movement – is crucial so that the images captured will reinforce your message and tell your story in the way you want it to and one that is consistent with your brand image


A GUIDE TO BECOMING A CAMERA OPERATOR

Director of Photography Etienne Sauret’s Viewpoint

Experienced camera operators possess unique combinations of skills. They all seem to have artistic sensibilities – facile perception, a keen eye and the ability to compose balance and beauty in a frame; they also have impressive technical skills – a solid understanding of lighting, audio equipment, electrical requirements and even the physics required to produce the right shot with efficient timing. Due to the rigorous demands of the job, and the un-repetitious nature of the work, most camera operators build a career with a blend of education and on-the-job training. They also tend to be confident, lifelong learners willing to take on new challenges and learn new technologies to develop their craft.

The Camera Operator Job

A camera operator is someone who sets up a camera and records images that will later be edited for an audience. Camera operators are employed to film TV shows, motion pictures, music videos, documentaries, news segments, corporate meetings and sports events. In the US, most operators work in the motion picture industry or in television broadcasting, but the number of operators working in corporate video production is increasing. Some camera operators are employed by production houses, corporations and institutions such as churches with in-house studios; and others work as freelancers or owner operators. The median annual Camera Operator salary in the US is $38,938, as of November 07, 2016, with a range usually between $31,958-$47,334, however this can vary based on geography and industry. For example, the mean income for the motion picture industry is $64,810 and the mean income for Broadcast and Radio is $51,970.

Assess Your Physical, Technical and People Skills

Your path to becoming an operator starts with taking a self-assessment. Since a camera operator does indeed operate camera equipment and its related accessories (which can add up to over 100 lbs with the most sophisticated camera packages), there is a level of comfort with the physical and technical nature of the work that you must be able and willing to develop. Learning about the highly technical specifications and capabilities of cameras, audio equipment and lighting is the foundation of becoming an operator. If you are fascinated with gadgets and new technology and you can’t keep yourself from experimenting with your camera settings and the video editing software on your computer, you might have what it takes for the multi-year process to learn the craft.

Commit to Lifelong Learning

After you develop a basic understanding of the concepts and equipment camera operators use, you must put them into practice with an internship or camera assistant position with a film or video production crew. In such positions, you will be shadowing, moving equipment around, running errands, performing administrative tasks and occasionally adjusting a camera. Eventually after a year or two, you will work your way to running a camera or jib. It is important that you volunteer to do everything you have permission to do as an assistant to understand how a crew works and how each person impacts the production process. It is important to take these tasks seriously as they are all essential for a production to be successful. You will also establish your reputation as hard worker who is eager to learn, shows up on time and gets the job done.

A Very Rewarding Career

A camera operator’s career is one that truly gives back. If you put the work into it, you will get amazing rewards. These rewards start with the aesthetics and social impact of the films and video you help create but they don’t end there. As you build your reputation in this industry, you will stand out and be appreciated among a select group of people that chose this work. The sky is the limit if you stay focused and seize every opportunity

bookmark_borderHow To Clear A Clogged Toilet With A Toilet Auger

Tips For Preventing Toilet Troubles

DO clean your toilet regularly with a mild cleaner. Vinegar, baking soda, or a mild soap are all great for regular porcelain cleaning. Not only does cleaning your toilet help you keep a more hygienic, better smelling bathroom, it also gives you the opportunity to spot a leak or a problem with your bathroom’s plumbing fairly quickly. If you never really clean up around the toilet area, how will you know if that water on the floor is from your shower, your toilet, or the sleepwalking male members of your household?

DON’T use chemical drain cleaners to unclog your toilet. While some plumbers say ‘yea’ and others say ‘nay’ when it comes to using these products, we say it’s just not worth the risk. Not only are these products harmful to your health if accidentally splattered on your skin, consumed, or even inhaled too much, they can damage older fixtures and pipes, and really aren’t something anyone wants in our water systems. They can also cause a lot of trouble for homes with septic systems if they kill off the good bacteria in there.

DO inspect your toilet’s inner workings about every 6 months to make sure the components are still in good shape and functioning properly. Take the tank lid off and flush the toilet. Watch the components work, making sure the flapper is sealing well and the fill valve stops running at an appropriate water level.

DO fix a running or leaking toilet right away. Toilet leaks are typically “silent”, in that you won’t necessarily find a puddle of water on the floor since the water is usually leaking out from the tank into the bowl (and down the drain). This makes it fairly easy to overlook the leak, or to keep putting off fixing it. Toilet leaks are generally slow leaks too, so you might not even notice a small increase in your bills each month until you look back and realize you’re paying $100 more for water this month than you did at the same time last year.

DON’T use a brick to save water in your tank. Unless your toilet is older than the mid-90’s, you’re using 1.6 gallons per flush (or less), and most sewage systems really do need that much water to effectively move the waste. If your toilet is older and you want to save water, we recommend filling a water bottle with sand or small rocks and using that to displace some of the water. Bricks can break down and clog your pipes.


The Right Way to Use a Plunger

If your toilet’s overflowing or your sink’s stopped up, it’s time to take the plunge! About 90 percent of the time, a clog can be cleared with just a couple of thrusts of a plunger. To make the messy job easy, though, it’s important to have the right kind of plunger and the proper technique. As it turns out, not all plungers are created equal; some are best suited for sinks and showers, while others are appropriate for use on toilets. Once you’ve determined the best tool for the job, success is all about form. Contrary to popular practice, repeatedly flushing while frantically pumping won’t release the blockage any faster—instead, it will break the plunger’s seal and ruin the suction. To keep the water flowing freely down your pipes, avoid those amateur mistakes and learn to plunge like a pro with these valuable tips.

Pick the Perfect Plunger

Start at the very beginning: While there’s probably a shelf full of plungers available for purchase at your grocery or home improvement store, the two most common styles are the cup plunger and the flange. It’s smart to stock one of each and be familiar with their strengths so you can determine which one’s right for your mini-emergency.

he Cup: When you think of a plunger, the image that comes to mind most often is that of a simple wooden handle attached to a rubber cup. It’s this cup that gives the tool the name “cup plunger.” This design is most effective on flat-surface drains, which are found in the sink and bathtub. While it works well for a sink, shower, or bathtub clog, the cup plunger can’t create a sufficiently airtight seal in the curve of a toilet drain to produce adequate suction

The Flange: A toilet clog calls for a different type of plunger entirely: the flange plunger, which has an extra ring of rubber (the flange) around the cup. The flange is inserted into the toilet drain, sealing in the air and increasing the suction power. In a pinch, you can fold the rubber ring back into the bell of the plunger and use it to unclog a tub or sink drain, but a true cup plunger will be more effective

Plunging a Sink, Shower, or Tub

When using a standard cup plunger, start by covering the overflow drain, if there is one, with a wet towel. Doing so prevents air from escaping and decreasing the suction power. While you’re at it, it’s a good idea to seal off any nearby drains in sinks or tubs to ensure better results. To further improve the plunger’s suction power, create a tighter seal by lining the rim of the cup with a small amount of petroleum jelly.


Unclog your toilet with this simple and ingenious trick — no plunger required

Over the course of many years, I’ve practiced and honed the ancient art of unclogging a clogged toilet without needing to use a plunger. Why not just buy a plunger? Simply put, I never needed to on account of this particular bit of washroom wizardry. This technique is especially handy if you ever find yourself staring down a stopped-up commode in someone else’s bathroom with no plunger in sight — a situation in which you might be understandably reluctant to call for backup.

I didn’t invent this particular process for plunging without a plunger — the same basic technique can be found all across the web on plumbing and DIY blogs, both mainstream and obscure — but I can attest to its power and might

Most bathrooms have everything you’ll need

To perform this trick, you’ll need three things that can be found in almost any bathroom: soap, hot water and a vessel for transferring the water to the toilet bowl. Dish soap and a 5-gallon bucket work best, but if secrecy is paramount and leaving the lavatory would blow your cover, a small plastic waste bin and a few pumps from a hand soap dispenser will do just fine.

Mixing the magical potion

The objective is to get the liquid in the toilet bowl as hot and soapy as possible without letting it overflow. You can either pour (or pump) soap directly into the bowl and then add hot water, or you can mix the soap with the hot water before you add it to the bowl.

Carefully and gently add the hot water

Mixing everything up in the toilet bowl is the step requiring the most finesse. You want to raise the average water temperature and get the soap into every crevice, but you don’t necessarily want to create a slurry with what’s already in there.


HOW TO PICK THE RIGHT PLUNGER

Sinks, showers and toilets can often become clogged for many different reasons. For many such jobs, a plunger can do the trick and get things rolling again. However, in order to ensure a job well done, you must think like a professional plumber and make sure you are choosing the right plunger

GET THE RIGHT TOOL FOR THE JOB

There are two main types of plungers, and each type serves a unique purpose. The classic flat-bottomed plunger is meant, perhaps quite naturally, for flat surfaces like sinks. In contrast, the more curved bottom of a toilet requires a protruding flange plunger, which looks like a flat plunger just with an extra bit coming out the bottom.

MAKE SURE IT CAN FORM A TIGHT SEAL

Plungers work by creating a vacuum within the drain, and then allowing you to use this vacuum to your advantage to unclog things. In order for this to happen, however, the plunger needs to be able to make a tight seal around the drain in question. This is why older plungers with cracks or holes in them don’t work very well. Before getting a new plunger, be sure it is able to create a good seal both today and well into the future.

IS IT COMFORTABLE TO USE?

Sometimes, plungers don’t work unless you put a little elbow grease behind them. Be sure you buy a plunger with good grip that is comfortable to use, as you don’t want to strain yourself while clearing a drain.


How to Unclog a Toilet Like a Plumber

It’s every man’s worst fear. You’re at someone’s house, you  finish doing your business and flush the toilet, but instead of going down, the water comes up along with whatever you just deposited in the bowl. Would you be paralyzed with panic in that moment? Or do you know what to do?

Thankfully, unclogging a toilet isn’t hard at all. Even the most gnarliest of clogs can be taken care of with ease. To help us learn how to effectively unclog a toilet, I called up Rod from Roto-Rooter and got the scoop

top the Toilet Bowl From Filling Up.

If it looks like the water might overflow out of the toilet, Rod suggests taking the lid off the tank as quickly as possible and closing the toilet flapper. The flapper releases water from the tank and into the bowl. It looks like, well, a flapper. If you’re worried that your flush has a good chance of turning into a flood, take off the top before you pull the trigger. Then you can keep one hand close to the flapper while the other hands pushes the flusher. The minute it appears the water is rising, you’re ready to stop the deluge

Get the Right Plunger

Once disaster has been averted, it’s time to unsheathe your plunger. To effectively use a plunger, you need a good seal between it and the toilet bowl. Funnel-cup plungers are the best plungers for this. They’re the ones with a flange, or added piece, extending off the bottom of the rubber cup

Warm Up Your Plunger

Stiff, hard plungers don’t work as well as soft and pliant ones. Run your plunger under some hot water before you use it. This will soften up the rubber, which will help you get a better seal on the toilet bowl.

bookmark_borderIntroduction To Drywall Repairs Materials

HOW TO REPAIR A HOLE IN DRYWALL

Drywall repair is a common home maintenance task that many homeowners can do themselves. The skill set, tools and techniques required for drywall repair depend on the size of the hole. If you can flip a fried egg, you can easily patch a small nick in your drywall, but it gets trickier as the holes get bigger. But don’t worry; Mr. Handyman is here to help! Download our Drywall Repair Guide for step-by-step instructions.

Drywall Repair Techniques

The size of the hole will determine what method of repair you’ll use. You may not need all of these tools – before you purchase anything, reference the guidelines below to see what you’ll need. You’ll find the required materials listed with each step. Drywall tape is available in paper or mesh, select mesh if you have a choice. The tools in bold are required for each step, regardless of hole size.

HOW TO PATCH A SMALL HOLE (ANYTHING SMALLER THAN A NICKEL)

Small holes in drywall are simple to fix. Any hole larger than a nickel should be repaired with the instructions under Medium or Large hole. Use spackle or joint compound to fill the hole. If you’re using joint compound, buy it pre-mixed for small DIY jobs. Spackle may shrink as it dries in larger holes and may require an extra application. Joint compound may run out or bulge as it sets and will require sanding and a second application.

HOW TO PATCH A MEDIUM HOLE (ANYTHING SMALLER THAN SIX INCHES)

For a professional finish follow the instructions under Large hole. This method requires finesse to feather the joint compound into the rest of the wall – if not done correctly, you will see a slight bulge in the wall. You must feather the repair area (gradually reduce the thickness outward) when applying the joint compound and in the sanding stage. Use a drywall patch that is slightly larger than the hole that needs to be repaired. You can purchase these at your local hardware store. Look for a kit, which will include everything you need.

HOW TO PATCH A LARGE HOLE (ANYTHING LARGER THAN SIX INCHES)

Take your time, and be careful not to nick any wires or plumbing during installation. Although this method requires more tools, the final result is more professional looking.


Tips for Hiring a Professional Drywall Contractor

The place called home must be truly made and designed to provide the deserved welcome any visitor and home owner desires when entering into the house. This and many other reasons was responsible for home design and decorations many years ago. One of the ways to design the wall or ceiling of a building is the installation of drywall which is usually very difficult and laborious work. Drywall installation involves a good knowledge of the techniques to ensure and guarantee a good outcome. The cutting, shaping and putting the panel into place and fastening as part of the sheetrock process does not give room for unprofessional practices which can mar and destroy the whole of the work while the plastering and sanding to ensure wall smoothness and elegance also require a high level of expertise and experience. Thus, installing drywall requires you find a professional installer for quality and reputable service. If you want a home renovation or improvement done or you need a residential drywall repair specialist. If you intend to install drywall for a new home or office, finding a professional installer may be difficult. However, below are some very useful tips to help find professional and reliable drywall installation contractor easily

Find a List of Contractors

Finding the perfect drywall contract for your residential drywall repair or for drywall installation for new homes or offices starts with you finding a list of drywall contractors within and around your location. You can go online, visit home building stores or just through word-of-mouth from friends and colleagues. Be sure the contractors you find offer the service you need. Once you have a good list of commercial drywall contractors, you then need to vet them.

Interview Contractors

Now that you have compiled a list of commercial drywall contractors, you have to be sure you are hiring the best out of many and doing this requires you set up an interview for them. Place a call to each of the drywall contractors and ask very good questions. If you find it hard to do this, ask these questions; ask about the company and years of service, all the services they offer, ask about how the company will finish the job if eventually hired, ask of time to complete the job and many other very important questions.

Licensing and Insurance

The drywall installation contractor must possess every necessary documents from government agencies and establishments that offer license and authorization. You must be sure that the installation company is duly registered, authorized and licensed to work. You should also be sure that the company is insured so that they can pay if any damage occurs during installation. Check the documents physically to be very sure.

Get References and Reviews

Reference and Reviews always help to avoid scams and stay safe when hiring a professional drywall installer as commercial drywall contractor for your residential drywall repair at home or in the office. Ask about reviews from neighbors, friends and colleagues. You can also get some reviews on their website.


Dos and Don’ts of Repairing Drywall

Drywall is tough, but it’s not indestructible. Over time, gypsum-board walls can sustain ugly cracks or holes. Fortunately, drywall is fairly easy to repair, but there is an art to it. Here’s what to do—and what to avoid—when fixing drywall damage so it’s indiscernible to landlords, homebuyers, or visitors.

DO use the right stuff.

When repairing minor scratches or dents smaller than ½ inch across, fill them with a thin layer of joint compound (also known as drywall mud). Apply using a 3- to 4-inch putty knife made for drywall work—rather than, say, the kind of narrow utility knife you’d use for wood putty—smoothing the filler till it’s flush with the wall. Cracks or holes larger than ½ inch require reinforcing mesh prior to spackling. If you apply joint compound directly to large gouges, the damage will reappear as the house settles and the joint compound dries and crumbles.

DON’T waste time.

Avail yourself of pre-made products designed to simplify repair tasks. Patch kits with reinforced center panels and self-adhesive tape work great for smaller holes. A drywall compound and primer combo (such as 3M Patch Plus Primer, available on Amazon) leaves a surface that’s ready to paint

DO remember neatness counts.

Use a box cutter or other sharp blade to cut random strands of mesh tape or frayed edges of wallboard paper around holes or cracks before applying joint compound. Otherwise your finished work will show bumps and other blemishes

DON’T cut the cords.

Be safe and don’t cut into a wall to repair a hole until you verify that electrical cords and plumbing lines aren’t running through the cabinet behind it. If the hole is just a few inches wide, shine a flashlight into it to see what’s there. If you must enlarge the hole, carefully cut horizontally with a drywall saw—but avoid going deeper than an inch. It’s safe to assume that hot wires will be present near an electrical outlet, but don’t bet your life—or life savings—that homebuilders or renovators followed all electrical and plumbing codes. Wires and pipes are often found where they don’t belong.


Drywall Repair Cost: What Is a Fair Price for Your Project?

Drywall is used in 96 percent of homes today, so there’s a pretty good chance your walls and ceilings are made of this highly popular material. Unfortunately, it’s quite susceptible to damage, so no matter how careful you are, there’s a good chance you’ll encounter some bumps and dents that will need to be repaired, especially if you’ve got kids and pets.

While the thought of doing drywall repairs yourself may seem daunting, handling minor damage can be fairly inexpensive and can generally be done in a couple of hours. More complicated repairs done by a handyman or contractor will be more expensive due to the labor-intensive nature of the job but can yield excellent results.

So, how can you decide who should do the job and if the drywall repair cost is fair? We’ve put together a guide to help you understand all the ins and outs of drywall repair costs, when you can DIY vs. hiring a pro, and how to find a good professional when you need one.

Average Cost of Drywall Repair

So how much does drywall repair cost? The answer is dependent on the severity of the damage, accessibility and who does the work.

Drywall Repairs You Can Do Yourself

If you’re handy, you should be able to tackle small holes, nail pops, chips, and stress cracks (less than 6-inches across) and it will only cost between $10 and $30 for basic supplies like drywall mud, sandpaper, and touch-up paint. A handyman can handle these types of repairs within a couple hours and it will cost you between $60 and $180


Top Drywall Repair Companies Near Your Area

Ask About Licensing and Insurance

Depending on your location, a business license could be the only thing required for drywall repair. Find out which licensing procedures are required in your area, and then make sure that prospective drywall repair contractors are properly licensed. The right contractors will also be properly insured, and they will happily provide proof of insurance when asked.

Make Sure to Get a Written Contract

Whether your drywall repair project is big or small, a written contract is something that you can’t do without. If your prospective drywall repair company prepares the contract themselves, make sure that you read it thoroughly to ensure that all of the points are satisfactory. If there are any issues with the contract, don’t be shy to ask for revisions

Follow the Rule of Three

Before you start with contracts, get three estimates from different pros to compare local prices for this service.

Ask About the Tools They Use

Ask for a rundown of the repair process from start to finish including information about the tools that your drywall repair contractors will use. It’s also important to make sure that your contractors will clean up their own mess.

bookmark_borderMost Frequent Electrical Home Inspections Problems

Five Tips to Get the Most From Your Electrical Inspection

just like your car, electrical systems can develop a host of problems that are best fixed sooner rather than later. Many contractors on Angie’s List offer electrical inspections to root out issues ranging from mismatched wires to major safety concerns.

Check the code

Christopher Voglund, owner of highly rated Artisan Electric in Lafayette, Indiana, says he charges an average of $600 for top-to-bottom inspections, but the cost varies depending on the level of detail a homeowner requests.

Focus on safety

Rob Gruen, owner of highly rated Brighter Connection in Milwaukee, says he focuses first and foremost on safety during his inspections, which tend to cost about $100 depending on house size. “I’m looking for junction boxes missing covers, outlets that aren’t grounded properly, and outlets that should have GFCI, which is required in rooms [located] near water like kitchens and bathrooms,” he says. “These things provide an important protection against shock.”

Match the wires

Gruen verifies that the circuit breakers, wires and outlets all match up to the correct kinds of amperage for that circuit. Otherwise, the risk of overloading one or more elements increases. “When the amperage and wire gauge don’t match up, that’s the very definition of a fire hazard,” he says.

Test the panel

Any electrical inspection should address the main panel and circuit breakers. “You want to make sure the cover is installed correctly and that breakers are tight on the main panel,” Gruen says. “If those things aren’t tight, you start having problems. I look for discoloration or signs of burn marks, rust and wear. It’ll take years, but you can see that kind of stuff going wrong.”


How To Inspect Your Own House

A few months ago I wrote a blog post about homeowner maintenance inspections, wherein I promoted the virtues of having a home inspector conduct maintenance inspections on existing homes every five years or so.  I promised to follow up with a post on how homeowners could conduct their own home inspections, but I don’t know what I was thinking when I said I’d follow up with a “post”.  I should have said I’d follow up with my longest “series” of posts ever.  For the first part of this series, I covered the inspection of the exterior.  I took a little break in this series because I had a few other things to discuss that were somewhat time sensitive, but I’m back on the homeowner inspection series again.

Overhead Wires

If your home has overhead wires bringing in power, check to make sure there are no tree branches rubbing on the wires.  It’s the homeowner’s responsibility to maintain / trim trees on the property that may interfere with the overhead wires coming from the utility pole to the house

Also, take a close look at the connection point between the overhead wires right before they disappear into the mast head.  One wire is the neutral wire; it’s normal for this wire to be exposed, but the other two wires shouldn’t have any exposed contacts.  If there are, these are serious shock / electrocution hazards that should be repaired by the utility company.  The photo below gives an example of an exposed ferrule at one of the hot wires.  Touch that thing with an aluminum ladder, roof rake, or something similar, and it’ll be lights out for you

Every once in a while you’ll get a different reading, such as all three lights lit up, or a bright middle light and dim lights on the left and right.  These readings indicate problems that should be looked into further by an electrician. If there are loose outlets, the repair is usually as simple as removing the cover plate and tightening the screws that hold the outlet in place.

Cover Plates

Not only do cover plates help to prevent accidental shocks, but they help to contain any arcing or sparking that might take place within an electrical box, thus potentially preventing a fire.  Go through your home and make sure there are cover plates installed for all of the outlets, switches, and junction boxes.  A few of the more common places for missing cover plates are in unfinished basement areas, behind refrigerators, inside kitchen cabinets, and at garage ceilings.

While this is usually a very simple DIY repair, the photo above shows a situation where the fix isn’t quite so simple; if a cover plate was installed over the pegboard, it would leave a gap between the box and the cover that could allow sparks to escape and potentially start a fire.  The fix for this situation would actually involve cutting away the pegboard a little more so that a cover plate could be installed tight against the box


Tips for Passing an Electrical Inspection

Just this morning, my local township electrical inspector stopped by and reviewed the electrical work I had performed for our home office improvement project.  He gave us a passing grade, which means I officially have approval to cover the framing with drywall and finish the room.  He pointed out a couple changes I need to make before he returns, so I do need to take care of those issues.  This is probably the third or fourth time he’s been out to our house for an inspection so I’ve learned to prepare for the things he likes to see

Ask the Inspector First.  When you schedule the inspector, try to actually have a conversation with him or her about what they expect to see and what pitfalls you can avoid.  All inspectors should be looking for the same checks, but some have additional requirements or pet-peeves that can fail you.  Checking with them first is a great way to establish a name to a face and get a sense of their general requirements.

Don’t Add Any Devices.  During the rough-in inspection, there can’t be any devices on the circuits you are adding. No outlets, no lights, no switches, nada, nunca.  If you are adding an outlet to an existing circuit, then the NEW outlet should also not be installed either.  The rest of the outlets on that circuit that were originally there are probably fine, but if you disturbed the wiring in any outlet, it shouldn’t have a device for the inspection

Tie Your Grounds Together.  In each outlet or electrical box location, the ground wires should be tied together.  This is something my inspector noted today.  Don’t tie anything else together though.  The hot and neutral leads should remain separate

Fire Block.  Any holes or penetrations from one floor to the next or from one wiring passage to the next needs to be blocked so as to prevent a fire using the hole as a breathing hole or chimney.  Typically, you can use fire block expanding foam (which is bright orange in color) or regular fiberglass insulation to fill or plug these kind of holes


How To Inspect Your Own House

A few months ago I wrote a blog post about homeowner maintenance inspections, wherein I promoted the virtues of having a home inspector conduct maintenance inspections on existing homes every five years or so.  I promised to follow up with a post on how homeowners could conduct their own home inspections, but I don’t know what I was thinking when I said I’d follow up with a “post”.  I should have said I’d follow up with my longest “series” of posts ever.  For the first part of this series, I covered the inspection of the exterior.  I took a little break in this series because I had a few other things to discuss that were somewhat time sensitive, but I’m back on the homeowner inspection series again.

Overhead Wires

If your home has overhead wires bringing in power, check to make sure there are no tree branches rubbing on the wires.  It’s the homeowner’s responsibility to maintain / trim trees on the property that may interfere with the overhead wires coming from the utility pole to the house.

Outlets

To test the outlets at your home, go buy yourself an outlet tester.  These are sold at all home improvement stores and hardware stores for about $5, or a little more if the tester comes with a GFCI tester.  A GFCI tester makes it a lot easier to verify that non-GFCI outlets in your home are GFCI protected, but it’s not a valid way to test GFCI outlets.  More on that topic below.  The tester shown at right currently sells for $7.49 on Amazon. So now that you have a tester, go around and test all of the outlets in your home.  The light codes displayed by the tester will tell you if the outlet is properly wired, or what the problem is if the outlet isn’t properly wired.

Open Ground – more commonly described as an ungrounded three-prong outlet.  Click this link for information about how to correct an ungrounded three-prong outlet.  This is a condition that should be repaired by an electrician.

Open Neutral – this is a very uncommon defect; it means there is power at the outlet, but whatever is plugged into the outlet won’t work.  Every once in a while, this is the result of a switched neutral wire.

Open Hot – there’s no “hot” wire at the outlet… or there’s a live hot and no neutral and no ground.  Whatever is plugged into the outlet won’t work.  Sometimes this might be the result of a switched outlet and the switch is just off, but in many cases it just means it’s a dead outlet.


Will my electrical wires pass a home inspection?

You’d be surprised by how many homes have electrical wires that aren’t up to code. Some of these wires are simply old or made of outdated material. Others are damaged, worn out, or even dangerous.

Of course, it’s difficult to tell whether wires are up to code just by looking at them. That’s where professional home inspections come in

How do home electrical inspections work?

A home electrical inspection is a thorough review of your home’s entire electrical system conducted by a professional. A proper electrical inspection follows a procedure stipulated in the National Electrical Code (NEC). The NEC is a set of electrical safety standards that the National Fire Protection Association constantly re-evaluates and updates with input from electrical professionals all over the country. When electricians determine whether something is “up to code,” the NEC is what they’re talking about

Why wouldn’t my wires pass an electrical inspection?

If any electrical feature doesn’t “pass” inspection, that means it fails to meet the minimum safety standards established by the NEC. Wires are among the most common electrical features to “fail” inspection because they’re hard for non-professionals to check on

Age

Wires may wear down over time, especially if you installed them a long time ago. Older wires are also more likely to be made of substandard material or installed with substandard methodologies like knob-and-tube wiring. The older your home, the more likely it is that your electrical wiring is old, too. If you can’t remember the last time you had your older home’s wires inspected, then it’s probably time.

bookmark_borderSimple Bed Bug Elimination Plan

How to Detect Bed Bugs

Detecting bed bugs can be difficult, as they are small in size and able to hide in tiny cracks and crevices. However, evidence of a bed bug infestation may be found in bedding and on mattresses. Live bed bugs leave clusters of dark brown or black spots of dried excrement on infested surfaces. Bed bugs also exude a subtle, sweet, musty odor.

Where to Check for Bed Bugs

Bed bugs usually are found close to where people spend much of their time, and since bed bugs have flattened bodies, they like to get into small cracks and crevice near where people sleep. Examples include mattresses, box springs, headboards, footboards, bed frames and other furniture that is within 5-8 feet of the bed. Other common locations are cracks and gaps behind wall outlets, floor molding, window and door molding and where carpet edges meet the wall. Bed bugs have been known to occur in many different locations if their population is large and they have dispersed from their more common areas to areas where they are normally less likely to be found.

Bed bugs are easily transported into previously non-infested dwellings. If you have detected a bed bug infestation within your home, contact a pest control professional to discuss treatment options.

Bed Bug Control & Removal Service

Bed bugs are troublesome household pests. They’re sneaky, hard to find, and can pose potential health risks for you and your family. Armed with pest control capabilities backed by science, over 100 years of experience, and state-of-the-art tools and products, Orkin is well-equipped to assess your bed bug problem and mount a strategic response to rid your home of the pest and provide maximum protection.

Inspection & Treatment For Active Infestations

To the untrained eye, rooting out a bed bug infestation can prove difficult, and even if discovered, home remedies and over-the-counter deterrents are often ineffective. Utilizing our A.I.M. protection process, a highly-trained Orkin specialist will assess your home, implement a solution, and monitor activity to ensure the effectiveness of our efforts and offer added peace of mind


Things That Bed Bugs Attracted

Bed bugs attracted to carbon dioxide

Generally bed bugs attracted to human beings, it’s simply because we produce carbon dioxide. This pesky little pest are also tend to settle down in areas with a high concentration of carbon dioxide.

Bed bugs attracted to warmth

Bed bugs aren’t attracted to dirt and grime, they attracted to the warmth of our bodies instead! Since human beings generate heat and warmth, bedtime is like a gold mine of warmth for bed bugs.

Bed bugs attracted to dark bed sheets

Bed bugs are accustomed to a dark environment! A recent research revealed that bed bugs attracted to certain colours, especially for red and black colours. Because these colours mimics two things that they will always go for: darkness and blood

Bed bugs attracted to dirty laundry

In the absence of a human host, bed bugs tend to seek soiled laundry as a hive. The stack of dirty laundry on your bedroom floor can be the starting point of a bed bug’s journey across the entire room. Do you know what? Bed bugs love the smell of your dirty laundry!

How do you stop bedbugs from biting you?

Bed bugs prevention is a lot easier than eliminating the existing infestation at home. These are the list of bed bugs prevention tips that you can do according to the things bed bug attracted to!


How To Get Rid of Bed Bugs

Bed bugs infestation can spread easily and it’s very difficult to treat especially when a Cimex Lectularius infestation increases in epidemic proportions, as they thrive in any weather and environment. The key to eradicating bed bugs is early detection and quick treatment by an expert pest controller.

Identify Your Pest

Bed bugs hiding in the tiniest creak and crevice makes it a challenge to spot these flat and brown crawling bloodsuckers. Sometimes, bed bugs have been mistaken as cockroach nymphs or even beetles.

In this case, you would need to be sure if your place has been infested with bed bugs to quickly take action and prevent an infestation that can get out of control in a matter of just 10 weeks!

DIY or Professional?

When it comes to getting rid of bed bugs, you have two basic options: DIY or hire a professional. The DIY option typically prove to be ineffective and risk re-infestations. This is because bed bugs shelter in the narrowest of gaps such as seams of mattresses, bedframes or behind furniture. Most of the time, many of them faced hassles and stresses dealing with an infestation.

The professional option requires you to find your local pest control company in Indonesia to get rid of bed bugs problem for you. Expert advices by trained pest specialists help you to understand control methods best suited for each individual pest biology.


TIPS FOR FINDING BED BUGS

Bug Identification

Hopefully, you will see bed bugs before they start to bite you–and before they have infested your home; but in order to see bed bugs, you have to know what they look like. These insects go through five development stages before they get to adult size. When they are first born, they are transparent and about the size of the tip on a pen. As they go through each stage, they become more reddish brown in color.

Feces

If you have bed bugs in your home, you may see their feces before you see them. These pests leave black streaks on sheets, pillowcases, and near areas they are infesting. Look for it on baseboards, outlet covers, electronics, and the backboards of beds

Insect Shells

When bed bugs develop to the next stage, they will shed their cuticle. You can find these shed skins stuck to infested areas, such as on upholstered furniture and mattress seams. You may also find these skins in your bed.

Blood Stains

When bed bugs come to feed, they often leave blood staining. This staining will often look brown on sheets and pillowcases because it will usually be found after it has had time to dry and decay. Blood staining will also be found around areas of infestation.

Bites

If you, or someone in your home, are finding mysterious bites on your skin, they may be bed bug bites. Look to see if they are in a row or cluster and whether or not there is a significant rash around them. The rash doesn’t always accompany a bed bug bite, but when it does, it makes these bites hard to miss.

HOW TO FIND AND GET RID OF BED BUGS IN YOUR HOME

Most summer bugs are a nuisance, but bed bugs are among the most persistent pests you could ever deal with. A bed bug infestation can be hard to detect at the early stages, which is when you really need to tackle it.

How Do You Get Bed Bugs?

Bed bugs can hitchhike their way into your home from just about anywhere. Most homeowners want to know how to get rid of bed bugs before this happens, especially when they’re trying to sell a property. If they get a foothold, they can spread throughout the house and even travel into neighboring homes

How to Find Bed Bugs: Why Is It Difficult?

Detecting the presence of bed bugs in your home is a little more challenging than you’d expect. A visual inspection is rarely reliable, unless it’s performed by an expert. These insects may be mistaken for other summer bugs, such as carpet bugs, and may have spread throughout your property by the time they’re correctly identified.

Feeding, Life Stages and Other Habits of Bed Bugs

If you want to know how to kill bed bugs or even find them, you have to understand how do bed bugs look like, their eating habits, preferred living conditions, reproductive cycles and behavior.

Feeding and Excretion

Bed bugs usually come out to feed at night, but will also seek a meal in daylight if they’re hungry. It can anywhere from 3 to 12 minutes for bed bugs to feed, and large nymphs or adults will often drop feces from earlier blood meals while feeding. This is what leads to the telltale dark spots on bedsheets and mattresses.Do bed bugs bite animals? Their meal of choice is generally human blood. However, they will also feed on dogs, cats and other mammals or even birds, travelling between 5 and 20 feet from their hiding spots to find a host.

bookmark_borderYou Should Do Your Own Bathroom Remodelling

Bathroom Remodel Tips and Advice

Bathrooms are the number one place that homeowners love to remodel, even more than kitchens. The space is smaller, making the job a bit easier. Plus, this reduced space means reduced cost: less flooring and paint, fewer cabinets and countertop. Follow these tips to make your bathroom remodel more attractive while keeping the process smooth, efficient, and cost-effective

Recess For Extra Room

When space is extremely tight, built-ins such as recessed soap dishes, medicine cabinets, and even toilet roll holders pry out as much available room as possible from tiny bathrooms. You can even flatten the ceiling light by converting your ceiling light into a recessed light

Address Bathroom Ventilation

All bathrooms need some type of ventilation, by code, either in the form of a properly sized window or a bathroom exhaust fan. For bathroom fans, look at both their exhaust capacity (or how many cubic feet of air per minute they can move) in conjunction with their noise levels

Add Plants for Living Color

Plants in the bathroom should not be an afterthought. Plants bring much-needed color into sterile bathrooms. Consider adding a floating shelf expressly for the purpose of giving your trailing plants a cozy home.

Pick the Right Flooring

Solid wood floors, while they do infuse bathrooms with great character, are not the best type of flooring material for bathrooms, from a practical standpoint. Instead, pick flooring that is hardy enough to stand up against the rigors of daily bathroom use. Bathroom flooring favorites include ceramic and porcelain tile, luxury vinyl plank, vinyl tiles, and sheet vinyl flooring


Tips for Hiring a Bathroom Remodeling Contractor

A bad contractor could sink your bathroom remodel.

Installing a shower door or replacing a faucet or toilet seat are minor improvements many homeowners can do themselves, but extensive bathroom remodeling requires a higher level of skills and should be left to the professionals

A bad remodeling job can be costly to fix, so the best bet is to hire a remodeling contractor who will do the job right the first time. A professional remodeler has the necessary training and acquired skills to remodel your bathroom to your specifications

Brainstorm bathroom remodeling ideas

You’ve probably looked at pictures in magazines or online for remodeling ideas. If you know how you want your new bathroom to look and have compiled some pictures, save them to show the remodeling contractor. Likewise, if you already know what types of fixtures you want, or you have ideas for wallpaper, keep a list of these items to share with the remodeling contractor.

How Much Does a Bathroom Remodel Cost?

Average bathroom remodels fall between $9,600 to $11,000 in costs. A low-end remodels typically cost around $2,500 while high-end remodels cost around $23,000.

Hiring a bathroom remodeling contractor

Referrals and word of mouth are still the best ways to track down a reputable bathroom remodeling contractor. When the renovations are done on a professional level, and the customers are happy, this is how service industry businesses grow and prosper. So, if your neighbor, friend, coworker or family member was satisfied with a recent remodeling job, ask them for the service contractor’s contact information so that you can get in touch to get an estimate


Bathroom Design & Remodeling Ideas on a Budget

So you’re ready to redecorate and redesign your bathroom. But dropping $20,000 on a deluxe spa retreat is light years away from what you can afford to spend. Here’s the good news: You don’t need mega-bucks to transform your bathroom into a relaxing, cool space. There are plenty of ways to renovate and redesign on a budget.

According to Remodeling Magazine’s Cost vs. Value report, an average bathroom remodel costs around $10,500 while an upscale remodel is going to run you a hefty $26,000. However, if you do the work yourself and get creative, This Old House estimates that you can do a remodel for $1,000 to $3,000, or even less, depending on how much you want to change

Moreover, updating or adding a bathroom to your home is a home improvement project that adds value. In other words, you’ll recoup a significant portion of costs when you sell your home, as much as 100%

Limit Your Tile

Tile gets expensive, especially when you hire a contractor to lay it all out for you. To save money, limit the amount of tile and focus on high-impact areas like the floor (instead of the floor and inside the shower stall walls). Alternatively, you could tile one horizontal strip along the wall and paint the rest.

Save on Counter Tops

A popular trend is to splurge on granite countertops. Because the bathroom counter is so small, the investment is often fairly low compared to what you’d spend on kitchen counters, for example.


The Pros’ Guide to Renovating Your Bathroom

Let there be no confusion: A bathroom redo is going to cost you time, money, and maybe even a few gray hairs. The price can range from “a few thousand dollars to spruce up an existing bathroom to six figures for a gut renovation of a high-end master bath,” says Dan DiClerico of HomeAdvisor. But if you’re smart about spending, the investment will likely prove worth it.

The trick is to choose upgrades that jibe with your lifestyle and routines—maybe you need a tub, because you’ll literally get into it every day; a wall niche if there’s nowhere to store shampoo; two sinks because teeth brushing should not be an elbow war. “We ask lots of questions about daily routine and storage needs, and emphasize function first,” explains Britt Zunino of Studio DB. Happiness is the end goal: According to a 2019 remodeling report from the National Association of Realtors, 70 percent of consumers “have a greater desire to be home” after a bathroom renovation, so read on and soak up the secrets

Ask Questions Before You Start

First things first—before you even start mood-boarding or falling in love with a bathroom design you want to recreate—ask yourself the boring questions. You may not even realize they impact your bathroom needs, but they do! Any designer worth hiring would run these past their clients before getting started. So get your answers ready, talk to your designer, and then start gathering inspo photos

Understand the Shower/Tub Basics

A freestanding tub—if you have room for one—is great for resale value in a kid-friendly neighborhood. But if your space isn’t big enough for both a spacious walk-in shower and a bath (and you don’t have small children to bathe), a shower/tub combo is best. “Back in the McMansion era, Jacuzzi-style bathtubs were all the rage, but the pendulum has swung back towards showers, especially in master bathrooms. At the high-end, there might also be a nice soaking tub in there, but the walk-in shower is the top priority,” says DiClerico.

Know Your Materials

Natural Stone: Easily the most sophisticated and formal, natural stone is a bathroom surface favorite. With the right sealant, any natural stone will do well in a wet environment, so it’ll mostly come down to price and aesthetic


Bathroom remodeling guide

good ideas

When you’re investing in a home remodeling project, you want to make sure that the results not only please you but add value to your home and save you money on energy and water as well. These seven steps will help you take advantage of the latest design trends, technologies and products

Budget for the unexpected

Hidden water damage is a common problem in bathrooms, whether from a leaky shower pan or running toilet. “If the floor feels spongy, that’s a sign of serious water damage,” says John Petrie, owner of Mother Hubbard’s Custom Cabinetry in Mechanicsburg, Pa. Other issues are truly hidden, for example a vent stack inside a wall that you thought you were going to knock down

hide the toilet

A master bath that’s stylish and functional can also be discreet. That’s why it’s nice to hide this fixture away, either in its own “room-within-the-room” or behind a half wall. A piece of furniture—an armoire or dresser, say—can create the necessary barrier without the expense of a framed wall

Do choose appropriate surfaces

Your master bathroom’s surfaces do more than just contribute to the overall aesthetic. They also take lots of abuse. Porcelain tile is a favorite among designers, for use on the floors and walls alike. “You can find some versions in the $5 per square foot range that look like natural stone,” says Petrie. He recommends larger tile sizes to minimize grout lines, easing the upkeep. That might mean 18-by-18-inch tile on the floors and 12-by-12-inch on some or all of the walls, perhaps transitioning to 6-by-6 tiles on the diagonal with a glass mosaic transition strip.

Splurge on the shower

The empire of the Roman tub is officially over. “People started to realize that they could count on one hand how many times they actually used the tub,” says Petrie. “We’re now using that space to create larger showers, often with his and her showerheads, body sprays, and even steam generators.”

bookmark_borderMust Learn How To Do Roof Installation

Tips for Finding the Best Roofing Company

You want the best when it comes to every aspect of your home. Why should your roof be any different? Your roof makes up a large part of the home’s visible exterior and protects your family from the elements. To get the best roof, you need to find the best roofing company.

Ask Friends

Your local friends and family are an excellent source for references. Find out if anyone you know has recently had their roof repaired or replaced, and find out what they thought about the work they had done

Look for a Locally Established Company

Make sure any company you choose will be around to honor warranties or perform repairs by choosing local. Some larger companies will set up in areas temporarily and pack up after just a few years

Don’t Choose Based on Price Alone

Going with the lowest bid can be tempting. No one wants to spend more money on a project than they have to. High-quality materials, experienced installers, and insurance cost money, and any company whose estimate is too low is probably cutting corners somewhere

How Well Do They Communicate?

Find a roofing company that will be responsive to your needs and requests. If getting the company to respond to phone calls or emails is like pulling teeth, it may be time to look elsewhere


tips to prepare for a home roof replacement

Getting a brand new roof can be an exciting experience. Kids and pets may watch in awe as they observe roofers ripping, tearing, hauling, and nailing – they may even want to sneak as close as possible to the action. That, of course is extremely dangerous. Once the roofing company arrives, your house is a work zone. Work zones, as you can imagine, pose unexpected hazards.

Think about kids and pets

Loud noises coming from the home may increase anxiety or disturb sleep habits. While it may be exciting to watch from a safe distance, work zones are extremely unsafe for children and pets

Relocate your vehicles.

Contractors need quick access to their tools and trucks throughout the day. They need a place to load shingles and debris. You’ll want to keep your vehicles a safe distance from this area until work is completed.

Remove wall decorations

The vibrations from hammers and machinery on your roof may travel through some walls of your home, especially if repairs to the existing deck are needed

Cover belongings in the attic

During a roof replacement, numerous installers will be walking on your roof, pounding it with hammers. Dust or small debris will fall in attic spaces during a new roof installation


tips for choosing the best roofing contractor

Go local

Choose a roofing company local to your area, so if you need any further assistance down the line, they’re on hand to help. Avoid giving work to roofers that come cold calling at your door, as they may just be passing through, and may vanish once the work is done.

Choose specialists

Look for roofing contractors that specialise in the type of work you require. If you’re a business, choose an experienced commercial roofer. If you seek a tiled roof, find a contractor specialising in tiled roofs. If you demand specific work, such as a heritage roof or repairing of leaks, find out what credentials the roofing company has in these areas before making your decision

Testimonials

Many good roofing contractors get lots of their work through word of mouth, so ask around and choose a company that comes with rave reviews and solid testimonials. Ask to see examples of work and roofing projects already undertaken. Find out what accreditations the roofing company has. These are all examples that demonstrate high quality standards

Quality of service

A quality roofer will provide you with a free consultation and quote, so you should never be charged for these. A good roofing company will also talk through all the different options with you for your roof, without putting you under any pressure to make a decision. Importantly, if the roofer turns up on time, answers and returns your calls, and does what they say they’re going to do, this is a positive indication of reliability and trustworthiness

Don’t be swayed by price

Inevitably, you’ll want good value for money from a roofing company, but a cheap quote alone shouldn’t be the determining factor. The important thing is the quality of workmanship and materials used, because a cheap job done badly using shoddy materials will prove a false economy in the long run


Steps to Hiring the Right Roofer

Roofing ranks among the largest and most expensive projects a homeowner can undertake, so take the time to be certain you find a roofing contractor you trust to put a roof over your head

Whereas other home upgrades are purely elective, roof repairs aren’t a choice; they’re essential. Besides being critically important to personal comfort, structural integrity, and the resale value of your home, roofing ranks among the largest and most expensive projects a homeowner can undertake. The significant costs involved motivate some ambitious do-it-yourselfers to do the work on their own. But for the majority of us, a roofing job means hiring a professional. So if you’re at an early stage of the process, take control by finding a qualified contractor with a solid reputation. Hire well, and you can expect the roofer not only to get the job done on time and on budget, but also to offer valuable insight on the best materials for your house style and the climate where you live. So rather than flip open the yellow pages and settle on the first company listed

Get a referral

One tried-and-true method of finding a reliable contractor is to query your friends and neighbors. Within the past few years, has anyone in your life had work done on his roof? Make a list of names, reach out to each person, and ask two questions: Was he happy with the job done and would he work with that contractor again? Testimonials provide the most accurate picture of what your experience might be with a given company, and you can count on personal contacts to give you honest feedback. Outside of your circle, you can also get leads from lumber yards and hardware stores

Do your research

If you’ve identified at least three qualified roofers, you can get started investigating each one. Start by verifying the businesses’ contact information. Next, confirm that each one is licensed and insured. Consult your chamber of commerce and the Better Business Bureau to be certain there are no red flags to be aware of. Then finally look for reports on contractor review sites, such as Angie’s List.

Meet face-to-face them

Having narrowed the field, invite the prospective contractors to visit your home and scope out the job. You’ll want to discuss roofing materials and the extent of work to be done, but don’t forget to ask about the time and manpower needed for completion. Observe the contractor: He should be enthusiastic, knowledgeable, and professional in demeanor. Certainly, you’re dealing with an authority on materials and methods, but don’t be deterred from participating in the decision-making process! Ask a lot of questions and before he leaves, remember to get a list of references (then remember to check them)


How to Roof a House

Can you roof a house yourself?

Make no bones about it—roofing is hard work. There’s no hiding from the elements. You can’t be afraid of heights and you need to be pretty fit. Before committing to this how to roof a house project, try this: Get out a ladder and climb up onto your roof. If you can’t walk around on it comfortably, hire a pro. If you passed this first test, go to the lumberyard or home center and throw a bundle of shingles onto your shoulder. Imagine yourself carrying that load up a ladder…many, many times.

If you’re still feeling positive about this how to roof a house at this point, why not give it a shot? You can skip a lot of heavy lifting by having your roofing supplier hoist the shingles onto the roof. Be sure you spread the load evenly across the length of the roof’s peak. However, don’t have the shingles delivered to the roof if you have two layers of old shingles yet to tear off—it could be too much weight for your trusses.

Windblown heavy rain and/or snow can force water up and under even properly installed shingles. Even worse are ice dams (frozen water/snow that builds up on roof edges), which can wreak havoc by allowing water to seep up under lower shingles and then drip into your house. To guard against such seepage, apply self-adhesive waterproof underlayment (“ice barrier”), which adheres tightly to bare roof sheathing and seals around nails driven through it. Buy it at roofing supply companies or home centers. In severe climate regions, most building codes require applying it 3 to 6 ft. up from the eave (minimum of 2 ft. past the exterior wall). Call your building inspector for local details.

Tear off the old shingles

It’s impossible to properly install new flashing and underlayment if you don’t tear off the old roof beforehand. When tearing off the existing shingles, be sure to remove all the old nails or pound them flat. Protruding nails will tear holes in your new shingles. If you have movable items near your house and you’re worried they might get damaged, relocate them. Invest in a few large tarps to protect your plants and landscaping and to catch the thousands of nails that will rain down off the roof. It can be downright impossible to remove old self-stick ice-and-water underlayment, but it’s OK if you have to leave it in place. And if at all possible, have the rented trash bin parked close to the house so you can toss in the old shingles right from the roof. For more information, see How to Tear Off Roof Shingles.

Install the drip edge

Metal drip edge isn’t usually required (check with a local building official), but it gives roof edges a nice finished look, prevents shingles from curling over the edge, and keeps water from running directly down your fascia boards

bookmark_borderMust Know A Little About Electrical Maintenance

How to Build an Electrical Maintenance Program

Electrical control and distribution systems are generally complex and expensive assets that need to be effectively maintained so they operate at optimum performance over their serviceable life. It is common to find that there has been significant effort applied to managing mechanical assets, with less focus on electrical equipment.

There are many reasons as to why this is the case, but the reality is that the way asset management programs are developed should be applied equally to electrical and mechanical components of the asset.

But, where do you start? You can develop your own plan, tell people what they are now going to do and watch it all happen. Wrong! If you don’t manage the people side of the improvement, there is little hope of sustained improvement.

Acknowledge your current situation

You have to believe that there is a better way of doing things. If many of the above points apply to you, then you need to know that your situation requires improvement.

Develop a vision for your electrical maintenance program.

The vision is where you want to be in the future


Helpful Tips to find the Best Electrical Maintenance Services

No matter it is residential or commercial electrical breakout or upgrades the electric system, hiring an experienced and skilled electrical maintenance Service provider is important. A qualified electrical contractor will be skilled using latest tools and identify the exact faults or repairs required instantly. With several electrical maintenance services available across the city, selecting a reliable contractor is quite challenging.

Tips to Find Best Electrical Maintenance Service

Than just finding an electrician, it is important that you hire a licensed and certified electrician with proper field experience. Here follow a few tips to help you find best and reliable electrician for your home or office works

Is the electrician licensed and certified?: Make sure that the electrician you are hiring is certified and licensed. The license will be provided only to a trained and experienced electrical contractor. It guarantees that the contractor you are hiring is qualified and skilled in all types of electrical works for home or commercial.

Timely response: Unlike plumbing or house repair, electrical repairs are dangerous and they should be responded immediately. Therefore, the electrician you are approaching should respond your call immediately understanding the seriousness of instance attention to the electrical repairs.

Find through referrals: If you are unable to find reliable electrical maintenance services or individual contractor, then try to take referrals from your friends or known people. Moreover, the feedbacks provided by your friend will increase your confidence on hiring the contractor for electrical installation or repair needs. You can also search across websites and internet portals, choose, and compare the rates accordingly. This will give you a fair idea about how to approach different companies for your exact work.


ELECTRICAL INSTALLATION AND MAINTENANCE TECHNOLOGY

PROGRAM MISSION

The Electrical Installation & Maintenance Technology program’s mission is to serve the community as a learning-centered, open door program that provides technical training to meet the demands of the electrical industry and the needs of the individual. An open-exit option allows the students to identify their career objectives and participate in program exploration

PROGRAM DESCRIPTION

The curriculum is designed to prepare students with entry level knowledge and manipulative skills for employment in the electrical industry. The program combines theory with laboratory activities as an effective means of developing the skills essential to the electrical trade

The student begins with the fundamentals of electricity and wiring of simple circuits, then progresses to residential interior wiring, three phase alternating current power, and wiring of more complex circuits and equipment. Safety is stressed as an integral part of each shop task. Emphasis is placed on wiring in accordance with the provisions contained in the National Electrical Code


What is Electrical Maintenance?

Advances in the design and quality of electrical components have made it possible for electrical systems to run for years without noticeable problems. While wonderful feats of engineering, well-designed electrical systems can lull building owners and operators into a false sense of security—right up until the moment the system fails. It’s for this reason, among others, that electrical maintenance is such an important part of commercial building operations.

Electrical maintenance covers all aspects of testing, monitoring, fixing, and replacing elements of an electrical system. Usually performed by a licensed professional with a complete knowledge of the National Electric Code and local regulation

Preventative Electrical Maintenance

Early identification of problems is a key aspect of electrical maintenance. For instance, should a back-up generator sit idle until needed, it may not start due to a number of factors. Old fuel clogging a fuel filter, uncharged starting batteries, or start switches left in the wrong mode can all prevent a smooth transition to backup power. These are basic problems, easily identified and addressed through preventative maintenance

One of the major challenges to electrical maintenance is the nature of electrical wiring. It can be difficult to pinpoint the location of specific problems as the system is built into the building. Thermal imaging has become increasingly important in the industry for its ability to identify issues with both electrical connection points and equipment operation. By catching such problems early, electrical maintenance helps reduce unexpected power outages and protects equipment from damage

What is electrical maintenance? It’s an aspect of building operations no commercial facility should be without. While large scale operations may have their own on-staff electricians, smaller facilities may find it more financially viable to contract with a licensed professional for scheduled electrical maintenance and servicing


Tips for Maintaining Your Home’s Electrical System

There are several things that every homeowner needs to know, for example, it’s helpful to know how to fix a leaky faucet or repair a small hole in the wall. One of the more important things homeowners need to know is how to properly maintain their electrical system. The hardest part about electrical maintenance is learning the process. Here are a few ideas to help you out

Work Smart

All over the internet, there are stories of electricians who were thrown across factories by electrical surges because they forgot to turn off the electrical power to where they were working. Before you work on anything that has electricity running to it, shut off power to that area of your home. You can shut off the power to one area of your home by flipping the area’s switch in your breaker panel. Next, test that part of your homes electrical system by plugging something into it or turning it on to see if it’s still receiving power, and if it isn’t receiving power, you can start working.

Replace Old and Damaged Wiring

In older homes, it is important to regularly check your power outlets. A good inspection of your home’s electrical system once or twice a year should keep you informed about any potential electrical problems. You are looking for frayed or burnt wires. Note anything that looks out of place

Buy High-Quality Electrical Parts

There are plenty of cheap solutions to every problem in life. Often the off-brand solution is just as good as the name brand. However, when it comes to home electrical systems, you get what you pay for. One of the ways manufacturers lower prices is by lowering quality. This can be a problem because lower quality parts will wear out faster. The best way to avoid this problem to buy higher quality products.

Don’t Overload an Outlet

One of the most common problems with home electrical systems is the possibility of overloading an outlet. It is important to know how much power your utilities use and how much power your outlet will allow. Toasters, microwaves, toaster ovens and other appliances should have their own outlet because they draw a lot of power. If multiple appliances are plugged into the same outlet, you may trip your breaker

bookmark_borderFind Out Good Move In Cleaning Methode

The New Home Deep Clean: What to Clean When You Move

A new house or apartment presents so many possibilities. Bare walls, an uncluttered space, and a bare canvas upon which to make yourself a home. But before you get started on the fun parts of moving to a new place, you have to take care of the basics. Namely, the new home deep clean

Whether you’re renting or buying, move in cleaning (or pre-move in cleaning, if you’ve got some lee-way with your timing) is a big necessity. The person or people who lived there before you, no matter how well-intentioned, inevitably left behind some dirt, grime, and dust that you’ll want to take care of before you really settle in. Unless you’ve just moved in to brand new construction, that blank slate isn’t quite as blank as it looks

Cleaning a house before you move in is the ideal way to go, since you won’t have the added difficulty of needing to work around a bunch of furniture and boxes. But if you have to wait until after you move that’s fine – just don’t skip the clean entirely. The same goes for if a cleaning crew came through prior to you getting the keys. This is one corner you just don’t want to cut.

Clean high before you clean low

Dust isn’t relegated to floors and countertops. Ceiling fans, overhead lighting fixtures, shelving, and other features close to the ceiling are just as prone to getting grimy, but they (a) don’t get cleaned as often, and (b) tend to sprinkle dirt and dust onto the space below them when they finally do get a scrub down. Since cleaning these high up features will inevitably lead to the area below them getting a little bit filthy too, start at the top in each room and then work your way down.

Pro tip: Ceiling fan blades are notorious for raining down dust. To minimize the collateral damage, slip an old pillow case over each blade and wipe away from the center of the fixture using the inside of the pillow case’s top layer. Most of the escaping dust will get collected in the case, which you can just clean or toss once you’re done


Move In Cleaning Ready Checklist

When most people move, they’re so wrapped up with packing and move-out cleaning that they forget their future house or apartment needs to be cleaned, too. However, you want your new home to be comfortable and tidy, so it’s important to do some move-in cleaning before you unpack all your boxes

Keep Cleaning Supplies Handy

It’s crucial that you’re able to find your cleaning products and tools when you arrive at your new home. Keep them separate from your other packing by putting them in your car rather than loading them on the moving truck. At the very least, make sure they’re in a clearly labeled box and are one of the first things you unload. Then, put them in a place where they won’t blend in with the rest of your boxes, such as under your kitchen sink or even in a bathtub. That way, when you’re ready to start your move-in cleaning, you know exactly where your supplies are

Have a Game Plan

Move-in cleaning is much easier when you’ve decided which rooms you’ll address first. For the best results, clean one room at a time. Start with essential rooms, such as the bathroom, kitchen and main bedrooms. To make this easier, consider placing all your boxes in common areas, such as living rooms or dining rooms. That way, you can do a thorough cleaning job in your essential rooms without having to work around crates and piles of boxes

Organize as You Unpack

Hopefully, you’ve already taken the time to dust and wash items before packing them away. Keep in mind that some things — like dishes — may need to be cleaned again before you use them. As you unpack your boxes, take the time to organize areas that are prone to chaos, such as closets, pantries, and so forth. When you do this up front, you don’t have to worry about coming back at a later date to more or less tackle the same chore again


How to Clean a New Home

Giving your new house a thorough cleaning before you move in your belongings will get you off to a great start. New construction can leave dust and debris in unexpected places while buying an established home will mean that dirt can lurk in many places. In the cleaning process, you might identify some things that need to be repaired or replaced. Even if you’re moving to another state or another country, you should always clean before your stuff arrives.

How to Clean the Bathroom

The bathrooms are a good place to start because you are likely to need to use one during the cleaning process

Clean the Kitchen

Once the bathrooms are in order, move on to the kitchen. The kitchen tends to be where icky and sticky things collect, and you’ll want to get rid of the former tenant’s cooking smells

How to Clean the Stove

You may need to use a heavy-duty cleaner for the oven, and may need an appliance cleaner, such as a wax or paste. Baking soda and water work well, too, along with sponges or a heavy-duty cloth.

How to Clean the Refrigerator

Now, tackle the refrigerator. It’s always a good idea to clean it well. Unplug the fridge and let it warm up before cleaning it. It will make it easier to clean. Use a soft cloth as anything harsher will scratch the surface.


Ultimate Moving House Cleaning Checklist

If moving house tops the list of stressful experiences people go through in life and cleaning house tops the list of loathsome experiences people face on a daily basis, then cleaning for moving should be a truly nightmarish experience indeed. The mere idea of scrubbing floors and washing windows after the long weeks of laborious moving preparations and exhausting moving tasks may be enough to put you in panic – after all, you have only just finished organizing the myriad details of the relocation process, putting all the required paperwork in order and packing all your earthly possessions, so you are highly unlikely to have any energy left to spare

you will want to leave your old home in top-notch condition in order to be able to get your security deposit back or to make your property more desirable for potential buyers

So, no matter how tired and how impatient to close the relocation chapter of your life you may be, you need to take the time and the effort to clean your old property before moving out and your new one before moving in. Luckily, the task may not be as difficult as it seems at first – especially if you follow our simple, yet highly efficient cleaning tips for moving house

Get hold of appropriate moving cleaning supplies and keep them at hand

There are certain cleaning supplies you can’t do without when preparing your home for moving – disinfecting cleaners, glass cleaners, baking soda, white vinegar, cleaning cloths, dusting cloths, plastic or nylon bristled soft scrubbers, different kinds of brushes, furniture polish, fabric protectors, a mop, a vacuum cleaner, a broom and a dustpan, a bucket, a step stool, rubber gloves, etc. Make sure these items don’t get accidentally loaded on the moving truck with the rest of your possessions – you’re going to need them when the movers depart from your old home and then again, before they arrive in your new property

Prepare and clean the items you are going to take with you as early as possible.

You will certainly want to give your household items a good cleaning after the move, but this doesn’t make cleaning them before the move redundant – you probably don’t want to take all the accumulated dust and dirt, stains and grime, bacteria and germs to your new home, do you? Besides, wiping your items clean before the move will make your job much easier afterwards, when unpacking and arranging your new place. So, make sure you empty and clean all the furniture pieces and household appliances you intend to relocate several days before moving day and get them properly packed and ready for shipment by the time your movers arrive


Good cleaning strategies before Moving Out

A move can be full of chaos and stress. But, if we have some tips for cleaning and organization, you will be able to carry out in an effective way

Do you need cleaning strategies before moving? We know that when we have to move from our apartment or house we suffer a lot of stress and anxiety. This feeling takes ahold of our nerves and everything seems chaotic and disorganized.

Step by step and from top to bottom

Use boxes to organize the contents of your rooms. Making sure to label them with the corresponding room. This will make it easier to unpack and find your items.

Boxes with labels

If there is one thing common to all removals, it is the feeling of uncertainty and disorder. Where will that lamp be? Where have we kept those documents? So, if you don’t want to get upset for losing something, use labelled boxes for each group of belongings

Cleaning up Memories

A move is also a time to get rid of the old and focus on the present moment

bookmark_borderFind Out How To Make Home Remodelling

CRITICAL TIPS FOR SELECTING A REMODELING CONTRACTOR

UNDERSTAND YOUR NEEDS

Yes, you want to remodel your home, but which part are you renovating? According to statistics, more than 35% of remodeling contracts involve the whole house. For this, you may need some architectural design and advice. Your design build contractor should be capable of handling your needs.

CLIENT REVIEWS

estimonials by past clients are the best place to start when looking for a remodeler. You’ll get honest customer feedback on the quality of services to expect, as well as details on how complaints on the job are resolved. Use this to determine whether the contractor is right for you or not. Your ideal design build remodeler should strive to resolve complaints as quickly as possible

SEEK REFERRALS

Yes, you must hire a competent home remodeling contractor. However, you may not have the time or expertise to find such a person. What do you do in this case, settle with any contractor that comes your way? Of course not! Seek referrals from someone you can trust. Let your friends and relatives tell you about their best home remodeling experiences.

CHECK FOR EXPERTISE

Expertise should be among the top qualities of a home remodeling contractor. A team of design build remodelers shouldn’t just be competent at their work, but also experts in it. Home remodeling contractors Montgomery County Pennsylvania homeowners trust are experts because of years of experience. Therefore, check the number of projects that a contractor has completed.

CHECK FOR EXPERIENCE

By now you know a design build remodeler becomes an expert after years of experience. Therefore, hire competent remodelers who have seen and done everything relating to home remodeling. For instance, do you want to remodel your kitchen? Then look for a remodel contractor who can assess the scope of work, time, and labor that’s required ahead of time.


How to Find a Good Contractor for Home Improvement Repairs

You’ve likely seen the story on your local news: A fly-by-night contractor swoops into town and scams dozens of homeowners out of thousands of dollars each before disappearing without a trace.

No one wants to go through such an ordeal. And yet it happens all the time, especially during the summer when more homeowners start home improvement projects.

The vast majority of contractors are honest and trustworthy, but there will always be those who are ready and willing to run a scam and run off with your money. So how can you make sure you find a reliable and reputable contractor who keeps their promises? And how do you make sure you’re hiring the right professional for the job? Let’s take a look.

Do You Need a Contractor or Handyman

Take a look at your project to-do list. Perhaps you need to replace the roof, fix the leak under the kitchen sink, re-tile the hallway floor, and install a ceiling fan in your son’s bedroom. You’d also like to build a small deck for summer cookouts.

Some of these projects are relatively easy to complete, while others are far more complex. So the question becomes: Do you need to hire a contractor, or will a handyman suffice?


Must-Know Tips for Hiring a Remodeling Contractor

Do Your Homework

This rings true for both your project itself and the individual you’re hiring. For the remodel, you’ll want to have a clear idea of what you want the end result to look like and a realistic budget of what you’re prepared to spend. For the contractor, you want to focus on individuals who can show prior experience with your type of project, preferably with testimonials and work samples. You’ll also want to find people who are both accredited and insured.

Interview Multiple Contractors

Once you have found two or three contractors that seem capable of doing the work, you’ll want to interview them. Ask them questions such as whether or not they’ve ever taken on a project of this scale, if they feel confident in their ability to pull the necessary permits for the job, and how long they envision everything will take.

Get Quotes

After completing your interviews, feel free to ask anyone that you’re still considering to provide a quote for the project. The quote should include the cost of materials for the remodel, as well as a price for the estimated number of labor hours.

Put it in Writing

Once you’ve settled on the contractor that you feel is the best fit for your job, make sure to get the terms of their quote into a legally binding contract. This contract should include items like a payment schedule and the process that should be followed for making changes to the original project terms. It should also be signed by both parties.

Be Flexible to a Point

Unfortunately, remodeling will never be an exact science. Even the best contractors will sometimes run into unforeseen problems once they open up walls or inclimate weather may slow down speedy progress. Homeowners should expect a little wiggle room in terms of budget and timeframe


tips for finding a contractor

Best time to search for a contractor before a project starts.

Renovations can be fun and we all want to rush and get it done. It’s a wise plan to do as much research as possible and have everything planned out before searching for a contractor. Projects aren’t cheap and they do take some time to finish depending on the size of the job. Write down everything you plan to change from the type of materials to a list of trades men needed. The better the planning the more you’ll get an accurate estimate.

Where to look for a contractor.

Searching for a Home renovation contractor in Victoria bc can be tough because we don’t know who will do the job right. At Realty Contracting we put together an easy source to serve our clients with the right trades. What makes us unique and trusting is we have a big reference of realtors that use our services to serve their clients with our reputable contractors. Realtors rely on their reputation, so to them having the right contractor is a valuable service to their sellers and buyers. All of our contractors in Realty Contracting are used by our listed realtors. What makes it easy is all you have to do is post your project and let a contractor find you. Get started today.

Getting the best price.

Let’s face it we all like the best deal when it comes to a big renovation investment. But it’s true, not all lowest prices are the best deal in the long run. There are a few things to keep in mind when searching for the best deal.

Have everything in writing

At this point in your project you should have everything planned out for a written contract before starting your project. A written contract should include, starting date, detailed cost, materials included, and labour involved. Not documenting your project in full detail will only lead to conflict, it’s your word against theirs. It’s normal during a project for changes to be made in a contract we call this a change in work order for an increase in cost or lowering the cost. You may want to ask a before starting, if there will be any other unexpected change in an estimate.


Tips for Choosing a Home Remodeling Contractor

When it comes to home improvement projects, you may find that many of them are not “do it yourself.” If it’s time for a home , it may be in your best interest to leave it to a professional who knows what it takes to deliver high-quality results. Choosing a contractor to lead the project is a big decision and shouldn’t be taken lightly. After all, who you hire could have a huge impact on the outcome of the project and your level of satisfaction

Experience

The type of remodeling project you’re considering can play a huge role in which contractor you choose. For example, if you’re making changes to your bathroom, you don’t want to hire a contractor that doesn’t have experience in . Whether you’re changing the look of one room or doing a major overhaul of your home, it’s best to find a contractor who has experience and expertise in many different types of remodeling projects. Ideally, you want someone who can do it all.

Project Details

Be sure you know exactly what you want to accomplish. Be specific about how you want the finished project to look. Think about the materials you want to use and how much money you have in your budget. Are you willing to compromise on certain elements if you need to? Which changes are top priority? Letting the contractors you’re interviewing know these things up front can give you an idea of whether or not they’ll be able to deliver the results you’re envisioning.

Interviews

Choosing a contractor to  your home should be taken very seriously. After all, their expertise directly impacts the quality of the project, and a remodel is a significant financial investment. As a general rule, it’s wise to interview at least three contractors for your job before you make a decision. Use that time to get to know the contractor. Try to get a feel for their work ethics, priorities, and overall dedication. Don’t be shy when it comes to asking questions. It’s better to be thorough now than regretful later. The answers you get could be the deciding factor between one contractor and another.

Insurance

Before you hire a contractor, check with your insurance agent to see what’s covered by your homeowner’s policy regarding home repairs and remodeling. Make sure the contractors you’re interviewing have insurance, as well, and that their policy has adequate coverage for your projects. Checking this out ahead of time could help save you a huge headache later.