bookmark_borderHow Do I Check The Transmission Repair For Problems

Signs of a bad transmission

What is a transmission?

The transmission is a device that is connected to the back of the engine and sends the power from the engine to the drive wheels. An automobile engine runs at its best at a certain RPM (Revolutions Per Minute) range and it is the transmission’s job to make sure that the power is delivered to the wheels while keeping the engine within that range. It does this through various gear combinations. In first gear, the engine turns much faster in relation to the drive wheels, while in high gear the engine is loafing even though the car may be going in excess of 70 MPH. In addition to the various forward gears, a transmission also has a neutral position which disconnects the engine from the drive wheels, and reverse, which causes the drive wheels to turn in the opposite direction allowing you to back up. Finally, there is the Park position. In this position, a latch mechanism (not unlike a deadbolt lock on a door) is inserted into a slot in the output shaft to lock the drive wheels and keep them from turning, thereby preventing the vehicle from rolling.


Common signs of transmission problems

Your car’s transmission has run so well for so long, it can be a shock to hear you might have transmission problems. However, the earlier you spot the signs and get it looked at by a mechanic, the better off your car and your wallet will be.

To help you stay aware of your transmission and know when it’s time to get it checked, we’re sharing five of the most common signs of transmission problems. If you spot any of these clues, it’s time to set up a service appointment.

Leaking Fluid

A leaking transmission can cause a breakdown in short order. Leaking fluid could be a result of pan gasket damage, axle seal leaks, fluid lines and more. Any component of the system that has gaps or has been damaged could be the source of the leak. While leaking transmission fluid doesn’t mean you can’t drive the car, it’s not recommended to do so. You could cause permanent damage, worsening the original problem. Get leaking transmission fluid checked right away.

Burning Smell

Anytime you smell burning when it comes to your car you should pay attention. First, check the fluid. Automatic transmission fluid is typically bright red and smells slightly sweet if everything is running smoothly. If it’s dark or has a burnt smell, you’ll likely need the fluid changed, and you should also have your transmission inspected for potential problems. The burnt fluid typically means the transmission has overheated, and this requires the attention of a professional mechanic.


Shaking or Grinding

When you start to feel some jerking, shaking, or grinding while driving down the road, it’s likely that you’re experiencing issues with your transmission gears. Automatic transmissions will typically feel like they’re trying to “wiggle” into gear instead of moving fluidly, while manual transmissions will start to grind when you engage the clutch and shift gears.

If you let the problem persist, the shaking and grinding will likely only get more violent. We recommend letting your mechanic inspect and repair your car as soon as you start experiencing these issues to minimize damage.

Gears Slipping

If your car starts spontaneously deciding it would rather be in neutral while driving down the road, it likely means that the link holding your gears in place has broken down inside your transmission. If you experience this, do not delay getting your car inspected. It’s a serious hazard!

Check Engine Light Is On

Your car’s sensors are there for a reason, and you shouldn’t ignore them. When your check engine lights flashes, it can point to many things – one of which is your transmission. While it might not seem like anything is wrong, those sensors can start detecting issues well before you can feel them.


Pay attention to your transmission fluid

It’s purely reiteration at this point, but with your transmission fluid being the core of the entire transmission system, it’s truly imperative that you must sort it out properly.

To begin with, regularly checking your transmission fluid level can indicate to the driver immediately if there’s anything wrong with the transmission itself. If there’s a worrying lack of transmission fluid, the driver would also know it before any serious transmission damage is incurred.

However, with the transmission fluid system being a closed circuit, an unusual lack of transmission fluid can quickly identify itself as a serious transmission fluid leak that must be looked at immediately.

It’s also a good habit to check the fluid level yourself after getting your fluid changed at a workshop, just in case it wasn’t done properly. Also make sure that you choose the appropriate transmission fluid for your application, which should be indicated overtly in the owner’s manual.

Since the ideal fluid level is essential to proper automatic transmission operation, it’s also important to note that fluid in good condition should be a clear, typically red, hue. If it’s cloudy, dirty, absolutely opaque or smells like rotten seafood, you should bring your car to a reputable workshop as soon as possible.

While not exactly pertaining to transmission fluid, it’s also important to ensure your cooling system is in good nick. Many cars nowadays have integrated transmission fluid coolers that relies on the engine’s cooling system itself. Any mechanical component that’s operating with less excess heat will last longer.


Maintenance

So, what can you do to prevent these problems from occurring? The most important thing is to be sensitive to the sounds and functions of your transmission so that you can notice any odd behavior as soon as it begins. The transmission is a sensitive and complex system, in which small problems can very quickly escalate into major ones. Since this system is so expensive to repair, nipping any problem in the bud will save time, money, and hassle.

Even if you don’t notice any problems with your transmission, you should still check your transmission fluid twice a year. Maintaining proper fluid levels can help to prevent problems from developing. In addition to checking the level of the fluid, check the color and odor, just as you would when checking the oil level.

Next, remember that transmission oil, like engine oil, needs to be replaced at appropriate intervals. While a complete servicing done at a dealership will most likely include a change of transmission oil, your local mechanic may not do so at every servicing. Make sure that you keep complete and accurate records of your car’s service history, including each oil change. That way, you will know if a transmission oil change is overdue. For guidelines on when such a change must be done, see your owner’s manual, which will recommend the appropriate timeline for transmission oil changes and the grade of oil which should be used. Make sure that the oil filter is changed along with the oil. Also have your mechanic check carefully for any leaks in the system when the car is serviced.

Additionally, try to avoid driving behaviors that can place excess strain on the transmission. “Rocking” a vehicle to get it out of a snow bank or rut can easily destroy a transmission in minutes. This is because this “back and forth” gear shifting causes the transmission to heat up, which will result in rubber parts “like the very important seals and gaskets” failing. The transmission fluid will also burn off, and metal parts can warp. All of this leads to a useless transmission. Towing a heavy load, driving in continuous stop and go traffic in hot weather, and racing can also cause a transmission to overheat.

Finally, towing the car with the drive wheels (front or back, depending on the car) still on the road can damage a transmission as well. Your towing company should know better, but just in case, be on the safe side and check.

bookmark_borderHow Home Builder Can Add Value To Their Homes With A Fireplace

Construction Software Buyer’s Guide

The step-by-step guide to choosing the best construction software. This is the only software buyer’s guide on the market created specifically for your needs as a home builder We want to make evaluating the right tool a little easier, because you’re working too hard to let pen and paper slow you down.

Own Your Data

Stay connected to the actionable insights you need to make smart management decisions —all while maintaining the highest standards of data security.

Standardize Projects

Align best practices and centralize workflows across each project. Learn from each build by identifying how optimizing consistent quality helps improve asset value.

Mitigate Risk

Our software helps protect yourself against surprise costs, schedule delays, and any potential disputes with real-time updates and unlimited access to historical information.

Whatever your project, there’s a construction software solution built for Groundbreakers like you.

We’ve partnered with the industry’s most innovative owners—Groundbreakers—to understand your needs and bring solutions to the table. The result is a series of products that help owners take control of their projects—no matter the type


Home Builder’s Guide to New Construction

Buying New Construction from a Home Builder

Whether you’re buying or renting, many of the homes in the housing market are older. In most cases, that means smaller rooms, chopped up floor plans, very little closet space, and parking hassles. That’s why many shoppers are checking out new construction homes because they come with features like open floor plans, large walk-in closets, and three-car garages.

Best Places to Begin Your New Home Search

One of the first things to do when you’re thinking about buying a home is the location. The area has some of the best places to live. But before you start shopping for new construction

besides setting a budget, you’ll need to decide how close you want to be from:

Your work – How important is a short commute? Is convenient public transportation essential? Would you be willing to have a higher mortgage for a shorter commute?

The beach – Do you love to surf, play volleyball, or relax at the beach? If so, consider how close the best beaches are.

The airport – If you travel a lot for either business or personal, living close to the local airports like LAX could be crucial.

Your family – Even if your family doesn’t live in the area, you can still live near an airport to make visiting easier.

Your friends – If entertaining is on the top of your list, then make sure you live close to where your friends live and hang out.

Riverside has several new home communities to check out.

Cloverdale Estates in Eastvale is centrally located and counties with convenient public transportation. There are designs and floor plans to meet a variety of new homebuyer needs. Buyers find luxury homes built for entertaining to designs perfect for growing families, and even floor plans specifically for multi-generation families.

Reflections at the Lakes is a gated community offering plenty of space with playgrounds, sports fields, and parks as well as trails for jogging and biking. Home designs come in both single and two-story. If you’d love to be part of an active neighborhood community, you should check this out.

New communities in Valley are close and this family-friendly area has top schools nearby and offers both single and two-story floor plans.


Residential Design & Construction Guides

Mobilizing Building Adaptation and Resilience (MBAR) is a multi-year, multi-stakeholder knowledge and capacity building project led by BC Housing, with participation and contribution from over 30 organizations, including national, provincial, and local agencies; and industry partners.

Mobilizing Building Adaptation and Resilience (MBAR) helps people protect their homes and buildings in the face of climate change. Pilot projects get access to resources and expertise about renovations and building design to help buildings remain comfortable, safe, and resilient even with heavier rainfall, hotter summers, wildfires, flooding, and windstorms.

MBAR addresses climate change impacts on buildings and neighborhoods. Knowledge created by the MBAR initiative can help building owners address and minimize the impacts of climate change on buildings and people living in them. Our easy-to-read one-page resources are designed to help your design team plan renovations or design a new building, providing guidance on:

Site strategies

Design strategies

Operations strategies

Community benefits

Potential design conflicts

Costs and impacts

Contaminants such as mould, major roads, and building materials, from inside and outside a building can affect indoor air quality. Climate scientists expect an overall increase in wildfire smoke and summer ozone. Exposure has been linked to short and long-term health effects.

Extreme temperatures and storms trigger high energy use to cool, heat, or otherwise maintain safety and comfort, especially in buildings with inadequate thermal resilience. High demand can overwhelm the power grid, while storms and floods can damage powerlines and transfer stations.


Home Builder Grant: The Definitive Guide

This is a complete guide to the new $25,000 HomeBuilder Grant in 2020. In this all-new guide you’ll learn:

If you will qualify for the HomeBuilder Grant

The exact criteria you need to meet to receive $25,000.

If permanent residents can qualify for the HomeBuilder grant.

Lots of advanced tips, strategies and common questions.

HomeBuilder Basics

Let’s start off things with a quick review of the basics. Specifically, I’m going to share what the HomeBuilder Grant is, and if you will qualify for the scheme. You’ll learn who will qualify, and who won’t qualify for this scheme in 2020.

What is the HomeBuilder Grant?

HomeBuilder is a government grant of $25,000 payable to eligible homeowners that either build a new home, or substantially renovate an existing home in 2020. Eligible homeowners need to build a new home valued under $750,000 or spend between $150,000 to $750,000 on renovations of a property valued up to $1.50M.

Do I qualify for the scheme?

The HomeBuilder scheme does have several qualifying criteria, including the type of property, your income and who you use as the builder

To be eligible for the HomeBuilder grant you must:

✅  Be earning below an income cap, if you are applying for the grant as an individual your ‘2018-2019 tax return or later’ must be below $125,000 or if you are applying as a couple the combined income on ‘your 2018-2019 tax return or later’ must be below $200,000.

✅  Sign a building contract after 4th June 2020 and before 31st December though a licensed or registered builder, so you cannot be an owner builder or use a contract from earlier in the year even if construction hasn’t started yet.

✅  Be building a new property that you will live in as your home, where the total value of the property (house and land) is not more than $750,000. So you cannot use HomeBuilder on an investment property.

✅  Be buying an off the plan apartment or townhouse that you have signed a contract to buy on or after 4th June 2020 and on or before 31 December 2020 and construction needs to start on or after 4 June 2020 (and no later than 3 months after the contract is signed). So if you are wanting to buy an off the plan property, and the construction started before 4th June 2020 – even if you signed the contract after 4th June you will not be eligible.

✅  Substantially renovate the existing home that you live in, and spend between $150,000 and $750,000 on a renovation contract where the value of your home (house and land) is not more than $1,500,000. The renovations need to “improve the accessibility, livability and safety” of your home and cannot be used to build things outside of your home like a swimming pool, tennis court or sheds.

✅  Begin construction of your new home, or renovations within 3 months of the building contract date. So if the contract is dated 1 October 2020, your builder needs to have started construction on or before 1 January 2021.

✅  Own, or be buying a property in your individual name and not a company or trust.

✅  Be an Citizen, unfortunately the scheme is not available to non residents, permanent resident’s


A guide to choosing a builder right for you

There are several important factors to take into account before choosing a builder for a new home.

Choosing a builder for a new home can be time-consuming but it’s time well spent when you consider the amount of money involved.

Price and budget are major considerations. There are specialist builders for first time buyer homes, mid-range project homes, top end custom designs, and for the very high budget there are luxury builders. There is little point approaching a first home builder to build a custom home because their budget, repeat design, business model will most likely prevent them from being able to be competitive in a one-off build. In a similar way a luxury home builder just won’t want to build a small home where there is little or no comparative margin to his more luxurious product.

Reputation and references are also key to getting the best builder for you. Many clients want the perceived security of a household name to build for them based on the company’s built-volume to guide their choice. It is very important to read reviews and speak to past or current clients building with a company before you choose to sign up with them. A good builder will have no issue letting you speak to customers and they should be able to supply good, verifiable references.

Financial stability is crucial in today’s highly competitive market. Builders are cutting prices to keep busy and whilst that looks good on paper, cut prices are not sustainable in the long term because every business needs profit to build stability for the future. You may have got the best price in town but if the builder is not around to build for you it’s a very hollow victory! Credit references can be sourced from any number of online agencies and whilst they are not a guarantee to performance, they are the best source of information about how strong a company is. Pay particular care to check if the company pays its suppliers on time and if it has a good solid rating in the industry

Home style and type preference matter too. If you are very eco-friendly and want a lot of sustainable features look for a specialist builder who has experience in that area. If you are building a complicated under croft thre- storey home don’t go to a small project home builder who builds stunning single storey display homes. They probably won’t have the staff or trades to move on to a complex construction. Likewise, many builders specialise in certain styles. If you want to build a farm house style home on a big acreage, it’s probably best to avoid the cubic modernist styles that some suburban builders are producing solely in line with popular trends. The key is to find the right fit for your home build. Ask how many homes are built of a type or style by the builder. They may have a beautiful portfolio of drawn designs but have never built the one you want!

bookmark_borderWays To Shoot Video Like A Pro Camera Operator

How to become a wildlife cameraperson

This highly glamorised job offers incredible opportunities to travel the world and document the marvels of natural world and wild places. It is however, a highly challenging and demanding job that is often not quite as glamorous as is made out. However, for adventurers and explorers who want to embrace the ups and downs of this career and want to become a wildlife cameraperson, I humbly offer some guidance

What is the job? – the good and the bad

The initial consideration is that it is only one of many jobs within the wildlife filmmaking industry. More importantly, the wildlife cameraperson only works during one section of producing a wildlife documentary (thereby only having earning potential during that phase).

A wildlife documentary production involves (a) pre-production, (b) production and (c) post production. Now, strictly speaking the role of the camera operator is limited to the production phase of project. This is the phase where the crew travel to a (usually) exotic location and collect the media content for a wildlife documentary. During the planning phase, a camera operator may be asked to supply stock footage for the pitch or be asked advice on where and when to capture content; but has no formal revenue earning role in this part of the production. Similarly when the producers, editors, sound engineers, narrators and director are pouring over the footage during post production, the camera operator has no definitive revenue earning role.

In my opinion it is vital a specialist camera operator should accept that their revenue earning potential is directly related to the number of days away from home they are willing to sacrifice. Whilst this is wonderful for single, young students, when you have a family and children, this can put many additional pressures on you. As a result many camera operators  ‘moonlight’  in the corporate and commercial fields. This enables them to work around their family commitments and the desire to be at home more often. Alternatively, they develop diverse skills that allow them to contribute to the pre-production and post-production phases of a documentary (e.g. researcher, director, editor, producer etc.). With this in mind, here is an outline of the ‘good the bad, and the ugly’ (with apologies to Sergio Leone) of a wildlife camera operator’s job.

The Good – The wildlife cameraperson’s job is to collect the media content on a documentary using one or more cameras. This means they are constantly near the action and using the various functions of the camera to collect sharp, stable, focused video images of the entire show. This further means that the camera operator will travel to where the action is, and will be the highest priority crew member (in addition to the talent) to view and observe the wildlife during shooting.


Camera operator tip

I’m out filming today and I have some time before the next interview starts. So I thought I’d write a little two-part tip for people who are new to filmmaking. This tip is about working as a camera operator when you have a client, director or journalist acting as the interviewer.

The first photo above is today’s setup. This is what the interviewee sees when they’re being filmed (minus the interviewer of course). It feels scary having that kit pointing at you. So the first part of my tip is – I try to keep the amount of kit I use to a minimum so as not to be too intimidating.  For example, if one light is enough for a good shot, I won’t set up three more to get a slightly better shot and terrify the interviewee.

The second part of the tip, is that one of the most intimidating things pointing at the interviewee can be.. well… me – the camera operator :D. So to help with this, ahead of filming I always chat with the interviewer to see how much experience they have with interviewing for camera. If they’re new to it, I give them a few tips about interviewing and explain that I feel my job for the day is to help people feel as relaxed as possible, and keep things running smoothly. I’m not there as a second interviewer or director, stepping on toes and confusing the interviewee about who to talk to.

Later, when the interviewee arrives, I introduce myself in a friendly way, but also make it clear that the interviewer is in charge of the filming – it’s their room and they know what they’re doing. They are the person who is going to look after the interviewee and get them through the shoot – and hopefully even help them enjoy

This is helpful in a number of ways. Firstly, it lets your interviewer know that you trust them. This helps your interviewer feel more confident and that helps your interviewee relax. It also helps the interviewee know who to focus on during the interview, where to look and who to be talking to and asking for direction during the filming. It also gives the interviewer space to connect with the interviewee and build rapport.


Understanding the Different Types of Camera Operator Jobs

Television is a visual medium created by many, but we so often give the majority of credit to the people on the screen, namely the reporters, on-air talent and analysts, without truly appreciating the storytellers holding the camera.

Let’s get the lingo straight first

No one in the industry calls anyone a camera operator. It’s too long and by nature television people talk fast and react even faster.

How to use Shooter in a sentence:

Reporter: “I’m headed to Town Hall and I need a shooter in the van with me in 5 minutes!” Screaming for a Shooter does not mean they want someone to pack heat for the drive; that would be bad. Nope, their request is for a camera operator to get their gear ready and get in the van.

How to use Photog in a sentence:

Assignment desk editor trying to organize the stories for the day: “I’ve only got two photogs on today and I have three major stories happening at the same time!” (Yes, this sort of panic is also common, whenever you have two photogs three stories break in different parts of town.)

And Now…The Actual Roles

You may think that all camera operator are created the same but that is not the case. There are different specialties. Let’s start with the most entry level of positions that hold or operate a TV camera: studio camera operator.


Hire a Solid Camera Operator

Solid Camera Operators are paramount when it comes to capturing an event. Even if the set and event look spectacular, you still need a skilled camera operator, with steady camera operation, to really catch the beauty

Live multi-camera shoots are are a fun and exciting way to live stream or broadcast your event to a much larger audience. Simply cutting between camera angles is an exciting and creative method of building engaging content on video. Most modern television audiences are used to seeing a different camera angle every 3 seconds.

The three most important things for making a nice multi-camera video are

1) Good equipment (cameras, sensors, lenses, scalers, switchers, encoders),

2) Professional lighting

3) A nice looking set. Remember, the video will only look as good as the backdrop and lighting, no matter how nice the video equipment is.

Nice equipment is fun, but you’ll want a Camera Operator who knows what they’re doing!

The technology behind multi-camera video production has improved a great deal over the last decade especially. regularly harnessing equipment that didn’t exist 5 years ago to launch a new video game to 4M viewers, or live stream a TEDx talk, or host a team building all-hands meeting to select employees and stakeholders.

Combined, the technology we have is perfect for a live sports broadcast, TED talk, news studio, and live gaming e-sports. Using crystal clear audio in com headsets, the entire production crew can collaborate on genlocked and synced signal sources, while show callers manage the show flow, technical directors are leading the charge in the crew, and you, the client, are basking in the glory of an excellent production


A Day In The Life: Behind The Scenes With TV Camera Operator

“If you had told me in college that I was going to be a cameraperson, I would have told you you were out of your mind,”

“It’s the first big bowl game for my crew, it’s exciting,” says. “I’m proud for our crew because we work really hard, and we try to nail everything.”

There are not a lot of women who do what I do at this level. There are runners, graphic operators and stage managers. But not many camera operators. One of my first jobs, I walked into the truck and one of the guys tosses me his keys. “Can you go move my car?” I said, “Sure. You might not get it back, but I’ll move it for you.” He’s like, “Are you the runner?” I said, “No, I’m a camera operator.” We are on the same crew this year.

I tell people we’re like movers. We arrive, unpack the truck, set everything up and then pack the truck up again and move on to the next city. Football is a busier day, and a longer day, than other sports.

get in about six hours before the game starts, but for the Sugar Bowl, I’m actually here a day before most people. That’s because I set up the broadcast booth on Wednesday. For this game, I have about 30 boxes, cases of gear, monitors and lights. A robotic camera that shoots back at the announcer that the director can control. It’s a whole set. They put me in an empty room and we build the announce booth from scratch.

bookmark_borderChoosing A Custom Home Builder

The Benefit Of Using A Custom Home Builder

Building your dream home can be an exhilarating experience. By working with a custom home builder, you can create a home exactly to your specifications. Plus, you’ll finally have the perfect space for you and your family!

Your comfort isn’t the only benefit of building your own custom home. You will also be able to build the home on your dream location, and with plenty of custom perks, like energy efficient appliances and privacy. You may even save money down the road from having fewer repairs or remodeling projects than an older home.

Here are a few other benefits of using a custom home builder:

Seamless Design/Build Process

Custom Home Group’s design/build process means a seamless transition from concept to structure and a smooth, easy process for you from start to finish. Instead of separating each step into separate processes or dealing with different parties, Custom Home Group handles it all! Design, budgeting, and construction is all one process and is all handled by the Custom Home Group team. This integrated design/build process controls job costs and delivers quality construction, all while ensuring you get the dream home you’ve always wanted.

Finally Have Your Dream Home

A custom home builder works tirelessly to create the home you’ve always wanted. When working with a custom home builder, plan as many details as possible so nothing is forgotten or ignored. You should also make sure you to have a specific timeline. Then, if there are any hiccups you will be prepared – and can continue construction as scheduled.

Live on the Lot You Want

If you have a lot that you love, a custom home builder can do everything possible to make sure your dream home is there. Work with your realtor and builder to make sure your dream lot has everything it needs before you build.


Designed To Your Specifications

House hunting in many ways can be akin to the “needle in a haystack” approach to finding the perfect home. You might find what you need and want, but chances are you’ll have to make modifications to make it the home perfect for you. With a custom home builder, you can make all the decisions about your wants and needs even before breaking ground, so the home is built exactly to your specifications. By the time the home is finished, it’s already exactly what you were looking for.

Special Design Options

Do you need a special space designed in your home that others might not want or need? Do you need a music studio, or perhaps want a theater room? These features may or may not be available in an existing home, but your builder can work these options into a new home construction much more easily so the home works for your specific needs.

Energy Efficiency

New homes often mean new appliances. Almost all newer appliances are energy efficient, which can save energy, and money, in the long run. If you’re going to choose new appliances, look for the EnergyStar logo so you know your purchase is a good one.


Saves Money

Although a custom home is often a large initial investment, it can save you some serious money in the long run. By investing in a custom home, you will create the exact dream home you want. No messy home installations, fewer basic repairs, and no additions are necessary. From the beginning, you and your builder will design the home together. Your ideal space, realized!

Privacy

You can ensure privacy for you and your family by choosing certain lots. By picking the right piece of land, behind a copse of trees, or set beyond a hill, you’ll feel like you’re in a world all your own. Be sure to visit and discuss each possible lot with the builder to find the best location for you. Your contractor will also be able to show you an array of fences to ensure your privacy.

Less Maintenance

Because custom homes are brand new, there will be less maintenance throughout the first 10 to 20 years! Unlike an older home, there will be less to watch out for – like old water heaters, chipped bathroom tiles, or uneven foundations.


High-Quality Materials

When buying an already built home, you can’t be sure about the quality of construction materials used. Custom builders work with trustworthy vendors who provide high-quality materials and work. When building a custom home, you can rest assured that only the best brands, products, and materials are being used.

Budget Control

Many people believe that building a custom home is much more expensive than buying an existing home. This isn’t necessarily true. When building a custom home, you decide how your new home is constructed within the limits of your budget. You can control the price point of every single thing that goes into your new home, from construction materials to special features.


Express Yourself

A custom home is a blank canvas waiting to be filled with your unique ideas. By collaborating with an interior designer and an architect, you’ll get a chance to design a home that reflects your taste, personality, and style. For instance, if you have a large collection of art pieces, you can have specialized lighting and big gallery walls. If you like having your morning coffee outside, you can put in a big deck with a covered area and some comfy outdoor seating.

Maximize Functionality

Instead of struggling with a pre-existing floor plan and ending up with a semi-functional home, a custom home builder will help you maximize every inch of usable space. Whether you want a custom library wall, a staircase in the middle of the house, separate rooms or an open floor plan, your home will be adapted to your personal lifestyle and needs.

bookmark_borderSteps To Finding The Best Chiropractic Doctor

FALL FLINGS AND CHIROPRACTIC THINGS – CHIROPRACTOR IN LITTLE ROCK AND BENTON

Great news: the Arkansas weather we love is back! Cooler temperatures are here and we’re looking forward to the festive fun that the holiday months bring. Your Little Rock and Benton Chiropractors

With the start of the fall season, you may be getting your checklist ready with things to do around the house, outdoor projects you’ve been wanting to save for cooler weather and active outings with the family. But before you jump in, it’s smart to take a minute to remember your health as you prepare for the twisting

turning and bending you’ll be doing as your fall activities ensue:

Remember your feet. Supportive shoes can prevent back pain later on. If you’re going on evening walks with the family or working in the yard, shoes with strong arch support should be your go-to.

Remember to take breaks. If you’re working in the garden, raking leaves or mowing the lawn, it’s a good idea to stand straight and assess yourself throughout the day. If you notice irritation or pain early, you could save yourself from potentially injuring yourself.

Remember your knees. If you’re lifting or heaving, bend at your knees rather than your waist or using your back. This protects your spine and muscles from unnecessary strain.

Remember to stretch. It may seem silly at the time, but stretching before an after any kind of lengthy strenuous work will help your muscles avoid injury.

Remember to switch sides. So that you can balance the use of your muscles, switch sides every fifteen or thirty minutes.

Last but certainly not least, remember your chiropractor. Chiropractors offer natural approaches to keep you injury-free. Routine chiropractic care can help prevent injury or alleviate any pain you might be experiencing.

As you enjoy the cooler Arkansas weather and the many fun flings that come with the fall season, remember yourself and take care of your health. To talk with your local chiropractor or schedule an appointment for care


Did a chiropractor really break a baby’s back? things parents must know

Do babies and chiropractors mix?

paediatrician Chris Pappas told the newspapers he cared for a four-month-old baby last year after one of her vertebrae was fractured during a chiropractic treatment for torticollis – a wry neck – which is usually harmless in babies. He said the infant, who was rushed to Monash Medical Centre for treatment, was lucky to make a full recovery.

Do babies ever need to see a chiropractor?

“No alternative therapies have scientifically sound benefits, but many have potential risks and major costs to the benefit of the purveyor,” says “Most delay the child’s access to legitimate medicine.”

What a spine surgeon says about chiropracters

“There are those who tend to be younger, who are struggling to define their art form in terms of evidence and reproducibility.  They tend to encourage sensible evidence based principles, concentrate on strengthening the spine, and treat spine-related symptoms.  They are to be encouraged, because it is through them that chiropractors may gain some credibility in the medical community.

“Now let’s talk about the others – the ‘straights’; the vitalistic, intuitive, metaphysical practitioners who remain separate from the mainstream community, and who are determined to remain that way.”

things parents should know if they seek non-medical treatment

That’s not to say that alternative therapies don’t have a place, but it’s crucial to seek medical advice before embarking on any alternative or complementary treatment, particularly when involving babies or children.


Things You Didn’t Know Your Chiropractor Can Help With

Chiropractors are very talented and we sometimes forget all the things they can do to help our body, mind and lifestyle. When we think of paying a visit to the chiropractor, we might believe that there must be a problem with one of our joints and it’s causing unwanted pain. Although joint pain is a great reason to see a chiropractor, you should really be going on a regular basis to prevent lots of different things from happening to your body. Continue reading to learn the 5 things you may not have known that your chiropractor can help with.

Not just for joint pain

You can use your continual chiropractor visits to prevent pain from happening and correct your bad posture. They can also help prevent certain medical conditions such as; allergies, asthma and headaches. Your chiropractor can actually also prevent or help you through different behavioural disorders such as ADHD. Although your body and mind feel great, visiting your chiropractor annually is still a good idea and you shouldn’t wait until something is wrong. Chiropractors can adjust your central nervous system which could help with the negative symptoms of anxiety and depression. Chiropractors can actually give you fitness and nutrition tips to help you live both a happier and healthier life. If you’re unsure of all the benefits that your chiropractor can provide for you, ask us today!

Chiropractic care is ageless

Adults are not the only ones who can benefit from chiropractic care, children actually can too. Did you know that newborn babies are actually able to seek relief from a chiropractor? Many newborn babies have unwanted pressure felt on their necks which can be treated by a chiropractor. There are so many other ways babies can get relief from a chiropractor

It’s not scary

Chiropractors are very gentle and they don’t push you past your comfort zone. At Taylor Wellness, we use an activator instrument adjusting tool which is an alternative to manual adjusting and cracking of joints. It is a light force spring loaded adjusting instrument which feels very relieving to your joints. Although, for some, alignments may be scary, then again, so are scary movies but nothing will ever harm you

Did you get into an accident?

Unfortunately, accidents do happen and car accidents are more common than we would like to admit. These accidents are life-threatening most times and if you’re lucky, they just take a hard toll on your body while you leave the vehicle scratch free. One of the first people you should see is your trusty chiropractor.


CHIROPRACTOR

Do you have chronic back pain? Are parts of your body producing so much discomfort that you feel unable to function normally? Perhaps you even feel as if your immune system is not working as it should be. You might have seen various medical doctors for this, that, and the other only to be prescribed strong painkillers or recommended treatment or surgeries that you’re not comfortable with. If you can relate to a similar situation, please consider speaking with a chiropractor, residents know and trust.

Chiropractor Who Treats A Broad Range of Conditions

Chiropractors treat men and women of all ages, and some also treat children and adolescents.Contrary to what you may think that a chiropractor only handles back pain, these medical doctors can actually address various conditions including back pain, joint pain, ear infections, allergies, and more. Chiropractors understand how the body operates and the way it is supposed to move.

What a Chiropractor

has to offer, such as one from Mid-Atlantic Spinal Rehab & Chiropractic, treats various patients from all backgrounds and ages who are in pain and not ready to turn to temporary fixes; such as painkillers. A chiropractor will try to uncover the reason for your pain through conducting different tests. Some of these tests may involve you lifting your leg in a certain way, bending your back, or walking. Once the reason for your pain is known, an adjustment may be recommended. Depending on the diagnosis, you may need 1-6, or more, adjustments

Chiropractors have successfully treated people who were suffering from:

Back pain

Hip pain

SI joint pain

Pelvic pain

Neck pain

Shoulder pain

Headaches

Migraines

Joint pain

Whiplash

Joint popping

Pain after pregnancy

Sports injuries

Allergies

Ear infections

Some immune disorders that are related to the nervous system functioning

Along with chiropractic treatment, your chiropractor, residents turn to for relief might recommend complementary therapies; such as, herbal tinctures, exercise, heat, ice, massage, acupuncture, and more.


How to Become a Chiropractic Assistant

If you are interested in becoming a Chiropractic Assistant and possess strong communication and administrative skills, then find out all you need to know about how to pursue this career choice here where you will learn all about the training, job duties and other requirements.

What Does a Chiropractic Assistant Do?

The main job of a Chiropractic Assistants is to help chiropractors with their daily duties. Some of their duties include checking patients in and out, doing medical billing and coding, and answering phone calls. They need skills in organization and technology, together with a basic understanding of healthcare and medical terminology.

Seeing that most chiropractic offices only have one licensed chiropractor, a Chiropractic Assistant must be ready to take on a number of roles. Chiropractic Assistants mainly help Chiropractors in two ways: that is patient management and office management.

An effective Chiropractic Assistant needs to have a good understanding of computer programs, filing techniques, knowledge of medical paperwork, and great customer service skills. They may be asked to greet patients, manage patient files, juggle scheduling, manage claims, instruct patients and monitor equipment and supplies. Some other duties may involve collecting money, billing insurance companies and answering phones.

Patient care duties that a Chiropractic Assistant may be responsible for would be to conduct patient interviews, educate of the patients, recording vital signs, performing certain exams, taking x-rays, etc.  There are some practices that require the Chiropractic Assistant to administer physical therapy techniques.

bookmark_borderDUI Lawyer Rates

What percentage of DUI cases get dismissed?

Research found that statistics taken around DUI, OUI, DWI, and the like, varied greatly if they could be found at all. Most rates were based on convictions.

The first step in seeking a defense to get the charges dropped or the case dismissed is … call a DUI lawyer. This is your first line of defense. At least consult with an attorney. An initial consultation is usually free.

Statistics in California for the period between 1997 and 2006 was between 75 percent and 85 percent conviction rate. In 2006 in California, 90 percent of DUI arrests ended up with convictions. Another site offered up a PDF that cited statistics from various counties across the US. Some conviction rates were as low as 63 percent while several were 85 to 95 percent. Actual dismissals of charges occurred at rates, when stated, of around 1.5 percent. One country cited about a 10 percent dismissal rate. Rhode Island cites a rate of about 67 percent convictions. From 2000 through 2011 Connecticut cited a 50 percent climbing to a 70 percent dismissal rate, but only from allowing 1st time offenders to take a course whose completion got the charges dismissed. Washington State cites an average of 32 percent dismissal.

The reasons for dismissal are many, but a few stand out. One of the biggest reasons that a dismissal occurs is the reason that the police officer had for stopping you in the first place. This is known as “probable cause”. Every state in our Union requires that a police officer must have a very solid reason for a traffic stop, unless it is a legal roadblock where every car is stopped. In court at the DUI hearing, the police officer must testify, if asked, what the reason was for the original stop. The reasons for stopping a vehicle are also many, and not necessarily directly tied to drinking. If someone in the car discards trash onto the road while observed by a police officer, the officer can stop the car for that reason, then, smelling a distinct odor of alcohol, had probable cause for DWI or DUI. The rest is the tests and possible arrest. (nice rhyme, yes?) Another typical reason is if the police officer does not appear for the hearing, there is a possibility for immediate dismissal, or another hearing date. Most states have a time limit between the arrest and the hearing. If that time limit is exceeded, especially with an extension, the case could be and should be dismissed.


How often do DUI cases get reduced? How often do DUI cases get dismissed?

How often DUIs are reduced or dismissed is not really quantifiable. The result of most cases depends on the quality of representation and the facts your lawyer has to overcome. The most ideal approach to get the best result is: hire a DUI lawyer to defend you and spot holes in the State’s case against you.

Explanation:

Truth be told, experienced DUI lawyers “win” most cases for first-time offenders when there is no proof of an accident or terrible driving.

The expression “win” is in quotes here on the grounds that win may mean having the charge lessened to an alternate offense or generally getting a plea deal that prevents a conviction. Like most court cases, when fighting DUI and DWI charges, the best thing a lawyer can accomplish for a person is to arrange a plea deal; a less serious charge that comes with less serious punishments.

Lessened charges or dropped charges?

However, as a result of dropping a DUI arrest to a less serious offense, a driver will then consent to enter a guilty plea to the lesser charges in court. Realize that the judge won’t effortlessly consent to lessen your DUI charges, notwithstanding for a first-time offense. This is because new laws for drunk driving (and the general public opinion) have expanded in seriousness in each state. Numerous prosecutors are influenced to seek a full conviction under the costly new laws.

This is the reason the prosecutor will require a strong motivation to reduce the charges. An aggressive RI DUI lawyer will know how to fulfill this in the wake of evaluating the facts of interest. A talented lawyer will know how to discover the shortcomings in the case the prosecutor has, which will open them up to the thought of a plea deal. This can fundamentally lessen the charges against a driver from the serious offense of what they were initially confronting.

The recipe for success is to research comprehensively. Interview and disclose all information to your Rhode Island DUI lawyer and move the case forward; utilize evidence and procedural movements skillfully; and display an effectively thought out, choreographed trial with expert witnesses, character witnesses, and other time tested strategies for a strong defense in criminal cases.

My experience with DUI as a prosecutor

As a previous prosecutor, I manage DUI cases every day. When I worked under the Attorney General, I assessed all my cases and realized that each case is distinctive and that not each case was a good case for the State.

Now and then, the state is confronted with evidence issues. For example: a breath test machine that was breaking down or a defendant with a low blood alcohol level. Different cases included proof that was corrupted by police misconduct. For example: an officer making the person stop without reasonable justification, an awful DUI checkpoint, an officer who did not read the Miranda Rights, or when an officer unlawfully stopped the individual and kept him/her without reasonable justification.


How DUI Cases Get Dismissed

The low percentage of DUI cases would be higher if drivers retained the services of defense attorneys who can evaluate the circumstances that resulted in an arrest and the potential shortcomings of prosecutors. Law enforcement officers are expected to follow certain procedures in their DUI investigations, which must include respecting the legal rights of drivers. Skilled lawyers will look at how evidence was collected by police officers and how prosecutors present the case. Probable cause must be properly established, and prosecutors have a burden to prove guilt beyond reasonable doubt.

Although dismissal of DUI charges is ideal, another strategy that can be pursued is a reduction of charges, which can be negotiated with prosecutors who prefer getting at least a conviction on lesser charges than facing the risk of their cases being systematically disassembled during a trial.


Common reasons charges are dismissed in DUI case

Each criminal case is different. DUI cases generally depend on the police following proper procedures and on the results of any chemical tests.

DUI charges should be dropped:

  • If the police did not have proper grounds to stop your vehicle. The police can stop you if they reasonably believe you have committed a traffic violation such as speeding or running through a red light. They can also stop you if they see that your driving poses a danger to others – such as weaving in and out of lanes. If you were following the laws and driving with the flow of traffic – then normally the police don’t have the right to stop you.
  • Illegal searches and seizures. Police cannot search your vehicle for signs of alcohol containers or evidence of drinking unless they have probable cause or unless they obtain a warrant. Most offices don’t obtain warrants in DUI arrests – so whether they had probable cause to search the vehicle is a critical issue. Illegal searches and seizures violate the Fourth Amendment.
  • Illegal field sobriety tests. There are specific field sobriety tests officers should give and specific ways they should give them. If the tests are invalid, the arrest may be invalid.
  • Illegal chemical tests. While drivers generally consent to blood or breath tests, officers still need to explain what rights a suspect has. Testing machines must be inspected regularly. The chain of custody of the test and test results can’t be broken before trial.
  • Failing to advise you of your right to speak with a lawyer. Defendants are entitled to be told they can speak with an attorney after they’ve been arrested.
  • A stop or search was unconstitutional or illegal for other reasons. For example, roadside sobriety checkpoints are supposed to alert drivers to where the roadblocks will be ahead of time.


The Results Of A Blood Test Are Not Evidence Of Impairment

If the arresting officer concludes that there exists sufficient evidence or probable cause to believe you are under the influence of a drug, then you will be asked to take a blood test. If you refuse, you risk suspension of your driver’s license for at least one year with no opportunity to obtain a restricted license before the suspension period ends. Other penalties include increased jail time if convicted among other penalties.

Will The Presense of THC In My Blood Test Cause A DUID Conviction?

The presence of a drug in your blood is not conclusive proof that you were under the influence. THC metabolites, found in marijuana, remain in your system from 28 to 45 days.

How Long Is Cocaine Present In My Blood?

If testing for cocaine, the test will screen for benzoylecgonine, a metabolite of cocaine, that is detectable in your body for several days.

How Long Can Meth Stay Present In My Blood?

Methamphetamine can remain for 2-10 days depending on several factors. In any case, the effects of these drugs would have dissipated long before you drove.

Is There A BAC Level For Drugs?

There is no accepted metabolism rate for a drug as there is for alcohol as it is affected by the person’s age, gender, tolerance, general health, and how the drug was ingested.

As a result, no one can testify as to what the drug concentration level was at any time you were driving.

bookmark_borderProtecting A Garage Floor With Epoxy Flooring Concrete Paint

How do you maintain an epoxy floor?

Maintenance guide for epoxy floors, caring for the epoxy floor.

Epoxy floors are a tough, resilient and very durable type of floor coating used in multiple applications; garage floors, sunroom floors, high traffic hallways and walkways or warehouses. Areas, where machinery and other large tools are being used, a durable epoxy surface makes a great choice for a flooring surface. Even when these heavy objects are being shifted around on the floor continuously, the epoxy floor surface will maintain a very high luster. Epoxy floors are pretty easy to maintain as long as you follow some ground rules.

How to care for your epoxy floors.

You will want to provide at least minimal maintenance for an epoxy floor to keep it in top shape. Even though they are low maintenance, common sense should prevail in caring for them. In this blog, we have listed the best practices in caring for your epoxy floors.

Keep the surfaces dirt and grit free.

Especially if you are moving machinery or vehicles on and off the floor. Dirt and grit will embed or scratch an epoxy floor if allowed to remain there. It’s a good idea if you remove all sand or dirt on a regular basis because even though Epoxy floors are tough they can start to show the damage from multiple scratches over time. Best way to do that is to use a shop vacuum with a soft brush attachment. How often you vacuum depends on how much dirt and grit are tracked onto the floor. When it comes time to move heavy machinery across the floor, take extra precautions to ensure the surface is dust and grit free.

Avoid using soap-based cleaners.

Soap-based floor cleaners leave a haze on the epoxy flooring that builds up over time. Epoxy floors do not need soap, warm water, and a good mop or deck-scrubbing brush should be just fine. If you need extra scrubbing power use something like soft soap to aid you with the tougher spills.

Spot Cleaning.

Often you only need to vacuum or sweep a small area of the floor where something has been spilled or tracked in. The liquid that has been spilled needs to be vacuumed up along with any dirt and grime with a shop vac and then clean the area with a mop and warm water. Epoxy floors are highly water resistant and very easy to clean when liquid spills occur.

Heavily soiled epoxy floors.

The best way to clean up a dirty epoxy floor is as follows: Sweep and vacuum the entire area carefully. Remove all items in the way to get to the floor. Once you have removed all the surface dirt, grime, and grit, use a hard foam mop and warm/hot water to get rid of all the built-up dirt. After that, you can use a clear ammonia/water mix (at 2-3 ounces ammonia per gallon of hot water) for second mopping.

Stains

Some stains, such as rust, need to be lightly scrubbed with a kitchen scrubbing sponge or a soft deck brush and warm water. Avoid using steel wool or harsh chemicals like comet, they are too abrasive. Use soft-scrub and a moderately abrasive scrubbing pad or brush. Don’t ever use any cleaning compounds with citrus or acid in them. Citrus cleaners and vinegar will break down the epoxy catalyst and must be avoided.

Oil, car chemicals and other chemicals.

Wiped up antifreeze, oil and other car-related chemicals with shop towels or a paper towel and dispose of properly. The important thing about car spills is to not allow them to sit on the floor surface for too long. Even engine oil has chemicals that could be potentially hazardous to an epoxy floor. Clean up spilled gas immediately, because it will damage the surface of an epoxy floor if allowed to sit for too long. Paint, household cleaners and other abrasive liquids need to be cleaned up immediately. To clean, wipe them up with shop towels as soon as the spill occurs.


How to Clean Epoxy Floors

Epoxy floors are not hard to maintain. In fact, many people choose epoxy floors for their garages because they are so easy to care for. However, there are some guidelines for keeping your epoxy floors clean. By performing general maintenance, doing a deep cleaning every few months, and removing stains as needed, you can keep your epoxy floors in excellent shape.

Performing General Maintenance

Dust mop once a week. The best way to maintain your epoxy floor is to run a soft dust mop over it once a week. This removes dirt and dust gently, which prevents scratches and protects your floor.[1]

For floors with an anti-slip aggregate coating–such as aluminum oxide–a soft bristle push broom may be more effective than a standard dust mop.

Vacuum any joints once a month. If you have visible construction joints or saw cuts, you should use a vacuum to clean these out. For best results, use your vacuum attachment hose with a crevice tool. Vacuum these joints about once per month.

If you do not have a vacuum, you can try to clean any joints/cuts with a stiff bristle broom.


Durability & Life

Depending on the level of traffic and usage, most floors will require the occasional touch-up or recoat. However, appropriate care and upkeep will ensure your polymer flooring will last a long time. A simple, quick routine of easy maintenance can keep your no-wax, high performance floor looking showplace-new for years, saving you time and money in the long run. General Tips for Caring for Your Floor Every floor is different and requires adequate care in order to preserve its appearance, performance and life. Your professional polymer flooring installer can offer the correct method and procedures to maintain your particular flooring system. However, here are general tips on caring for your floors:

Sweep Your Floors Daily

Use a soft-bristled broom or mechanized sweeper to sweep your floors daily. This will remove any foreign objects and prevent safety hazards. Additionally, daily sweeping helps extend the life of your floor.

Wash Your Floors Weekly

Generally, weekly mopping of your floors will be sufficient to keep your floors performing and looking great. High-traffic and heavy-duty areas may require additional attention. Use a soft bristled mechanized floor scrubber if needed.

Clean Spills Immediately

Not only do spills present a potential safety hazard, they can be damaging to your floor depending on the substance and nature of the liquid spilled. Depending on the chemical resistance of your flooring, acids, caustics and harsh solvents can damage your floor coating and should be cleaned immediately.


How to Take Care of Indoor Epoxy Floors

Epoxy floors, also called terrazzo, contain chips of marble or stone suspended in mortar bed. Older versions used cement mortar to suspend the marble chips, but more modern varieties use a durable, easy-to-maintain and lightweight epoxy resin. Epoxy floors resist staining and scratches, making them an attractive and damage-resistant option for high-traffic areas within the home. With proper cleaning and care, an epoxy floor can last a lifetime or longer.

  • Sweep the floor daily in high-traffic areas and at least once a week in lower-traffic areas of the home with a dust mop. Remove rugs and sweep beneath furniture to remove as much grit as possible. Although durable, grit on the floor can cause scratching and wear to the epoxy and stone surfaces.
  • Mix a neutral nonalkaline, nonacidic floor cleaner or a cleaner specifically formulated for epoxy floors with hot water. Follow package recommendations for the amount of cleaner and water needed.
  • Mop the floor with the cleaner at least once weekly. Kitchens and entryways may require more frequent mopping due to traffic and spills.
  • Allow the cleaning solution to sit on the floor for approximately 5 minutes. Mop it up with clear water before the solution dries on the floor.
  • Wipe the floor dry with a dry mop or large towel. Drying the floor prevents streaks and dust lines on the epoxy.


Tips for Preserving Your Epoxy Flooring

Epoxy flooring can be a great option for food and beverage flooring, healthcare flooring, and industrial flooring. This type of flooring has been used for decades — in fact, polymers have continuously been used on top of concrete for more than 35 years. With its slip-resistant and durable features, epoxy coating is a popular choice for those industries that need a long-lasting, reliable floor. While epoxy is durable, it’s not invincible. So after your flooring is installed by epoxy coating specialists, it’s important to perform routine maintenance in order to ensure your epoxy coating lasts as long as possible. With that being said, this article will give some tips and tricks for maintaining your epoxy flooring.

  • Routine maintenance should be done with a soft bristle broom or commercial dust mop. In order to make sure your flooring remains free of debris, it’s best to sweep or mop daily.
  • Heavy duty cleaning is best done after sweeping away any debris. You can use a hard foam mop, hot water, and clear ammonia. This mixture will remove any spills or stains that have made their way to the floor. Additionally, an epoxy floor can simply be hosed down and squeegeed dry.
  • When choosing cleaning products, it’s important to remember not to use any products that contain acids or soap-based cleaners. These cleaning products can leave a residue on the flooring that can cause it to become slippery when wet.
  • Staining may require light scrubbing with a scrubbing pad. Epoxy coating specialists do not recommend using abrasive cleaning chemicals on the flooring.
  • To reduce damages caused by snow or water from shoes, welcome mats should be placed in front of any doors in the facility. Additionally, “pretreatment” winter compounds can leave a hazy film on the flooring. In order to remove this, hot water and a deck brush should be used and extra rinsing will keep the compounds from drying onto the floor.
  • Heavy equipment may damage flooring over time when continuously dragged or placed in the same spot. Because of this, it’s important to ensure all areas are clean prior to lifting heavy loads with rolling jacks and remember to place pieces of plywood under jack stands when they’re holding heavy loads.

bookmark_borderMetal Roof Vs Tile Roof

How Missing Roof Tiles Lead to Serious Leaks

Tiles protect the roofs’ waterproofing barrier, the underlayment, from the elements, like the sun (an especially harsh element in Phoenix) and underlayment exposed directly to the sun’s harmful UV rays will quickly deteriorate. Deteriorated underlayment from a cracked and tile on your roof. Once it’s deteriorated, there’s nothing stopping water from getting into your home and causing serious damage!

Common Reasons Tiles Fall Off Your Roof

Shoddy Installation

How tile is attached to your roof depends on the slope of the roof, the manufacturer of the tile and the type of tile installed. It could be that when your tile roof was installed, it wasn’t installed as it should have been. If your home or tile roof is new (less than 10 years old), this is the most likely cause.

What to do: If your roof is still under warranty, contact the builder, installer or roofing manufacturer. They should be able to make it right.

If you’re outside of the warranty period, contact a trusted roofer to fix the missing tiles and make sure there aren’t any other problems with your roof. (Most new homes come with a 2-year warranty).

Walking on Your Roof

When you walk on a tile roof, you can crack the tiles and/or cause them to work loose from the nails that hold them to the roof. If you have a clay tile roof, you should never walk on it! Clay tiles crack easily. Concrete tile is more forgiving, but you still need to be careful.

What to do: Replace the missing tiles on your roof and avoid walking on the roof more in the future.

Extreme Weather

Most Arizona tile roofs aren’t built to withstand extreme weather; we just don’t get that much of it. So when it does happen, the extreme wind can catch a tile and blow it off the roof. Tiles on the ridge and eaves of the roof are especially susceptible to wind.

What to do: Contact a professional roofer to assess the damage of the roof. Even though it might just look like a few missing tiles, there could be more damage than you can see.


Does My Tile Roof Need to Be Replaced?

Are you noticing that there are more than a few problems with your roof? If you have leaks in several places, terrible air circulation in your attic, and are noticing some cracked, damaged, or even missing tiles in multiple locations, you’re probably facing one of the toughest questions that a homeowner will ever have to face: is it time to completely replace my roof or can I simply repair it and keep it going a little while longer.

Let’s face it: replacing your roof is a huge expense, and it’s not one that most people look forward to having to take on. A new roof costs thousands of dollars, and that’s a lot of money that many people don’t exactly have sitting around. So, logically, you want to get the most you can out of the roof that’s over your head already before having to fully replace it. But how do you know when it’s the right time to actually make the jump and get a full replacement? To help you make that determination, here are a few questions you can answer about your roof and what they say about whether you should consider replacing or repairing it.

Roof Age

The first and most important question as to whether you should repair or replace is how old the roof over your head is. If your roof is still within its normal average service life, then you can probably get away with repairing it, especially if the issues aren’t seriously jeopardizing your roof’s integrity. Generally, your roof’s average service life depends on the type of material it’s constructed from—clay or concrete tiles can usually last 20 to 30+ years, and potentially even longer as long as they’re well-maintained and small problems aren’t allowed to sit and grow.

Visible Condition

A brief inspection of your roof can tell you whether or not you should consider replacing or repairing your roof. First, take a quick look from the outside, which you can usually do from the curb right in front of your home. Do you see any tiles which are cracked, badly damaged, or even missing? These are signs of a serious weakness in your roof that could be jeopardizing the materials underneath. If this kind of damage is in several spots, then you probably need to replace your roof, especially if these spots have been exposed for several months and seen rainfall.

Future Plans

There’s one last thing to consider when deciding whether or not you wish to replace your roof: are you selling your home anytime soon? Potential homebuyers will be extremely concerned about the condition of your roof, and nothing kills a deal or drives away interested buyers quicker than finding out the roof over a home needs significant work or replacement. Even if the home is priced extremely low and positioned to sell, you’ll find it really difficult to sell your home if the roof is in bad shape.


Roof Tile Installation and Repair

Installation and repair of tile roofs is best left to professional roofers with local experience working with tile. Under normal circumstances, tile roofs are virtually maintenance free. However, the ultimate longevity of a tile roof depends on the quality of all elements of the roofing system. For example, many leaks are caused not by tile failure but by damaged or inferior underlayment or flashing. If this occurs, qualified tile roofers can remove the roof tiles, address the cause of the problem, and then replace the tiles intact.

Walking on a tile roof can damage tiles, if not done properly. Even though tile is one of the most durable roofing products available and hardens with age, walking carelessly on it can cause breakage.


Benefits of Tile Roofing

Tile roofing is one of the oldest roofing methods in existence. With proper maintenance, tile roofs can last over 50 years, in addition to these incredible benefits:

  • Tile is weather-resistant
  • Tile will withstand high winds
  • Tile resist hail strikes
  • Tile is pest-resistant
  • Tile has the highest fire protection rating possible
  • Tile helps reduce energy costs
  • Tile requires minimal maintenance
  • Tile is environmentally friendly
  • Tile has many style and color options


Common Tile Roof Repairs

Slipping: Delaminating / Sliding

Tile roofs with a #30lb felt paper base and a #90lb hot asphalt installed underlayment system is installed and the tiles adhered using mortar add extra weight to the system. During our hot months, the roof temperature rises above 160 degrees and softens up the asphalt adhesive. With extra tile weight and without enough fasteners to hold the tiles to the deck, the roof system could slide, especially on high-pitched roofs. There is no way to repair this issue – it is a sign that replacement is near.

Backwater Laps

When installing a roof system it is important to always start at the lowest point and proceed upward toward the roof’s peak. This ensures each layer of materials overlaps the previous. Even on flat roofs, this principle is important. As water travels, whether on a pitched or flat roof, if two seams are lapped in backward a backwater lap occurs. This can “cup” water and force in under the layers, causing leaks.

Off Ridge Vents not Angled

Vents are installed on the roof to allow for attic airflow. These vents should not be longer than four feet in length and should be installed at an angle. As water flows down the roof it often is blocked behind the vent creating a small area of water ponding. Ponding water is water sitting on any asphalt roofing material longer than 48 hours without run-off or evaporation. As the water sits it magnifies the sun’s rays and works on breaking down the sealant and underlayment used to seal the vent to the roof. The correct way to fix this issue is to install a new vent.

Flashing Seams Separating

Flashing seams must be overlapped correctly and an adequate amount of sealant placed in between the overlap area to ensure proper waterproofing at the ell flashing transition area. Here, Ell flashing seams were separating and in need of additional sealant. The correct way to repair this area is to replace the flashing with new. That is the only way to ensure the flashing detail area will not leak.

Tile Roof Cemented

Tile used to be installed using a single patty of mortar cement placed on the roof and the tile embedded therein. Although installation techniques required each tile to be submerged in water prior to installation, this was rarely ever followed. Each tile was set in place and left to dry. Over time and movement, the tile breaks loose from the mortar and does not re-adhere. The temporary solution is to lift each tile and spray roof tile adhesive under it to create a new bond. However, this is labor-intensive. If not repaired, the roof tiles may easily dislodge and become airborne during a high wind event.

bookmark_borderThe Best Kitchen Garbage Disposal

How to Properly Use Your Garbage Disposal

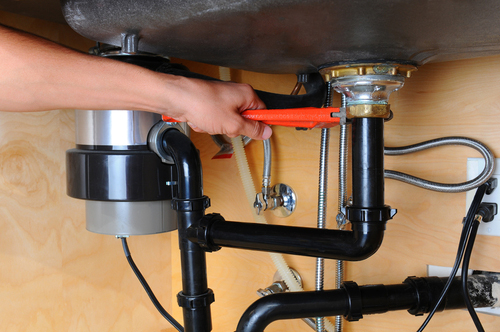
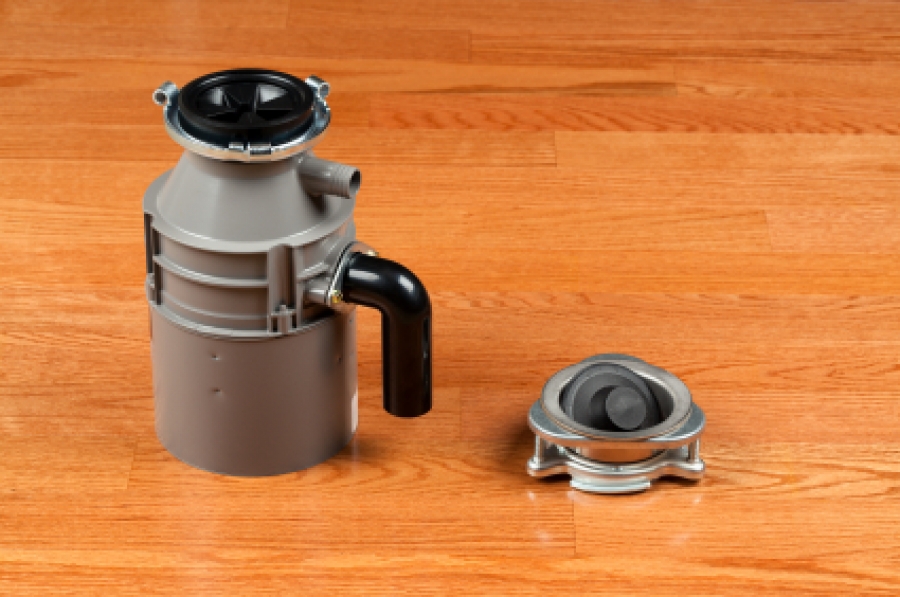
First of all, while it may not seem too picky, your garbage disposal is made for biodegradable food only. Remember – when using your disposal, run water the entire time and for at least 20 seconds after you turn it off. Feed food slowly into the disposal and avoid dumping large amounts in at one time. Also, be sure to read the manual carefully and avoid things that are known to cause problems. If you find yourself with a clog, know that unclogging your garbage disposal doesn’t have to be draining.

How to Quickly Clean your Garbage Disposal

Having a wretched odor emanating from your sink is a surefire tip-off that your disposal is in dire need of a good cleaning. Don’t worry – there are plenty of thrifty ways you can resolve this issue. No need for special cleaners or chemicals, you can eliminate this problem with a variety of items you have laying around the house:

  • Ice
  • Ice and rock salt
  • Baking soda and vinegar
  • Citrus
  • Borax
  • Hot water and dish soap
  • Dish soap and baking soda
  • Boiling water

Know When It’s Repair Time

You gave it your best shot. You tried a variety of troubleshooting tips and still, the issue persists. Here are some telltale signs that it’s time to replace your garbage disposal:

  • It clogs frequently even though you are taking good care of it
  • You have to press the reset button a lot
  • You can’t get rid of odors
  • The blades have become dull
  • You have a leak that can’t be easily fixed


Garbage Disposal Maintenance Tips

Garbage Disposal Daily Maintenance: Normal use is enough to help reduce accumulation as the garbage disposal is rinsed with soapy waste water after washing dishes.

Garbage Disposal Weekly Maintenance: On a weekly basis, the garbage disposal should be flushed with cold water. Fill the sink with clean cold water, pull the drain stop and allow the water to drain. The flushing action of the water leaving the sink through the drain will purge the drain line of any loose food waste.

Garbage Disposal Monthly Maintenance:

  • Once a month empty a tray of ice cubes into the sink and turn on the garbage disposal to grind up the ice cubes. After the ice cubes are ground into a slushy mixture, rinse with a light stream of cold water. The ground ice will clog the drain line and water will backup into the sink, however after a few minutes the ice will melt away and the water will drain. Grinding ice helps to sharpen the shredding blades and remove the accumulation of food waste.
  • If you have a removable drain baffle, remove it and clean the surface thoroughly with an old toothbrush, water, and detergent. Be sure to place the baffle back in it’s original location prior to operating the garbage disposal.
  • Place a half cup of baking soda and one cup of vinegar in the grind chamber. Allow the mixture to foam and fizz while you boil a pot of water. Once the water has boiled, pour it down the drain. In lieu of baking soda and vinegar, you can also mix one gallon of water with one tablespoon of liquid chlorine bleach and slowly pour the mixture into the grind chamber. Allow it to sit for several minutes and then flush with cold water. These mixtures will sanitize the garbage disposal and remove any foul odor. If you would prefer to not experience the smell of bleach or vinegar emanating from the garbage disposal you can freshen the smell with citrus rinds. Lemon, lime, orange, and grapefruit rinds can be placed in the garbage disposal and ground-up to provide a fresh citrus scent.


Using a Garbage Disposal Correctly

Run cold water into the disposal as you turn it on.

Before you put any food in, turn the disposal on and let cold water from your sink flow into it. Keep this going for about 30 seconds to lubricate the blades inside of the disposal first.

  • Always use cold water, not hot, when using your disposal to avoid melting any fat or grease on the food as you dispose of it.
  • Keep the cold water running the entire time you use your disposal.

Avoid pouring grease, starch, or non-food items into your disposal.

Garbage disposals are made for food scraps only, meaning you should never pour anything inedible down them. Similarly, grease and fat can solidify inside of the disposal, causing it to clog or jam. And, starchy foods like corn husks, artichokes, and large amounts of vegetable peels can also cause clogs and jams. Foods to avoid putting down your disposal include:

  • Oyster shells
  • Clam shells
  • Large amounts of egg shells
  • Coffee grounds
  • Expandable foods, like pasta
  • Grease or fat
  • Animal bones
  • Corn husks
  • Celery stalks
  • Onion skins


Put bite-sized pieces of food down the disposal.

Garbage disposals are meant to handle food scraps, not full pieces of food. If you’re trying to dispose of anything larger than bite-sized, use a sharp knife to cut it up until all the pieces are about 1 in (2.5 cm) long.

  • If you can’t cut up your food, consider composting it instead.

Drop the food down the disposal slowly.

Grab your food scraps and drop them into the disposal one handful at a time. Try to avoid overloading the disposal, as that can clog the blades and cause expensive repairs.

  • Wait until you stop hearing a grinding noise in the disposal to drop another handful in.

Keep the disposal on for 30 seconds after you’re done putting food in.

Once you’ve put your last handful of food scraps in the disposal, wait for about 30 seconds to let the disposal finish working. If you don’t, you could leave food scraps in the blades, causing it to jam up the next time you use it.

Turn the disposal off, but let the water run for 15 more seconds.

Flip the switch to turn your disposal off, but keep using cold water from your sink for a little bit longer. This will help to flush out any remaining food that might be stuck in the disposal.

  • Remember to always use cold water, even when the disposal is off, to avoid heating up any grease or fat stuck on the blades.


How to get rid of garbage disposal smells:

If you have a nasty smell coming from the disposal, there could be two causes: the drain and/or the rubber splash guard.

To clean the garbage disposal drain: Pour a ½ cup of baking soda into the drain, add a cup of hot white distilled vinegar (just heat it in the microwave), then watch it foam, says Reichert. “Let it sit for a few minutes, then pour a quart of boiling water down the disposal to flush everything down the drain. That will leave the chopping part of the disposal lovely and fresh!”

To clean the garbage disposal splash guard: Cleaning the rubber splash guard takes a bit more work, but it’s worth the effort. Slime and gunk that accumulate on the underside of the splash guard are a major source of odors and a breeding place for germs. To tackle the chore, you’ll need rubber gloves, an old toothbrush and hot, soapy water.

  • For removable splash guards: While wearing gloves, remove the splash guard, then scrub the top and bottom of the rubber guard with a toothbrush and soapy water. Rinse and replace.
  • For non-removable splash guards: While wearing gloves, first scrub the top side of the guard. Rinse. Then, lifting up the rubber guard a section at a time, scrub the underside of the splash guard until all slime and gunk are gone. Rinse.


Ice Cubes And Salt

Ice cubes with salt is used to remove tough sludge and debris that is stuck to the blades and other elements of the unit.

What you need: 2 cubes of ice cubes and 1 cup of rock salt/sea salt

Time: 7-8 minutes

Directions

  • Turn on the garbage disposal and pour the ice cubes into it. Follow it with 1 cup of rock salt. You could improvise and use sea salt
  • Run some cold water and let the the salt and ice get crushed by the blades
  • The ice and salt will loosen the grime and dirt that is stuck to the impeller blades
  • Continue to run the water for a few seconds after the noise from the machine stops

The combination of ice and salt not only cleans the unit but it also removes any unpleasant odor that stems up from the garbage disposal.

bookmark_borderA Bit About Mold Inspection

How to Know if Mold Is in Your Walls

Mold often grows out of sight in wall cavities due to water problems like flooding or leaks. Before you know it, it creates a toxic environment in your home, compromising the indoor air. The good news is that even hidden mold leaves behind clues. You can find out if mold is growing in your walls in several ways.

Here is how to spot mold that grows inside your walls.

Moisture

If your home has suffered severe water damage, mold will grow in your walls if the water wasn’t removed within 24-48 hours. If water reached drywall, the best practice is to cut it one foot above the water line.

Other water problems like leaking pipes may also trap moisture inside your walls. Even in these cases where leaks are visible, moisture can get inside walls, providing mold a place to grow. Be aware of signs that drywalls are moist such as:

  • water stains
  • dark rings
  • discoloration
  • deterioration like peeling, bubbling or cracking of the paint or wallpaper

Moreover, if the walls are bowed, bulging or warped, they most likely contain moisture. Another clue is if the surface of walls feels wet or damp.

Visible Signs of Mold

First of all, if the wall is rotting, it likely has mold underneath it. In less severe cases, mold might not be that noticeable. Inspect the walls and check for mold on walls behind furniture and along baseboards too.

Mold can have different colors and textures, so be sure to recognize them. Mold can be black, green, gray, white, or brown. Mold can even appear orange, pink or purple when it grows behind vinyl wallpaper. Another sign of visible mold is discoloration of walls, even if it has been painted over. If the water damage inside the walls persists, mold will show signs on the surface.

Musty Smell

If you don’t see signs of mold but you can smell it, it may be hidden in your walls. A musty smell is a good indicator that mold is growing in your home. The smell of mold feels earthy, like rotting leaves or decaying wood in a dense, damp forest. If you think there’s mold in your walls, get on your hands and knees and smell the electrical outlets. This might sound silly, but it may help you sense mold if it’s growing within walls. Outlets have better access to the area behind walls. Thus, smelling them can help identify the mold problem.


Mold Warning Signs: Allergies and Other Health Issues

When someone has mold in their home, they usually show allergy-related symptoms. If you’re not sure whether your allergy-like symptoms are caused by mold in your home, then consider this question: do your symptoms get better once you go outdoors or leave your home? If so, then there is good chance that mold is the culprit.

Symptoms of mold allergies include:

  • Coughing
  • Sneezing
  • Sore, itchy throat
  • Congestion and runny nose
  • Sinus headaches
  • Wheezing and difficulty breathing
  • Itchy, watery eyes
  • Irritated, itchy skin

Some forms of household mold are toxic, causing serious, life-threatening illness. These highly-dangerous molds might cause symptoms such as bleeding, internal organ damage, mental impairment, cancer, and even death.


Are Home Mold Test Kits Reliable?

Mold is a common problem that most homeowners have to deal with from time to time. In a bid to rid their houses of this menace, some people result in using DIY home mold test kits. That being said, the question that bothers most people is how effective home mold test kits are. The truth is that a home mold test kit is not reliable since it only reveals the presence of mold in the house but fails to give you detailed information about the problem. Among the information that the kit will not provide you with is the source of moisture, the type of mold present, where the mold is located and what you can do to remediate and prevent future mold infestation.

Mold Type Information

There are two types of mold: harmful mold, which is mostly the black mold, and the non-harmful mold that grows on food that is spoiling. A home mold test kit will only confirm the presence of mold in your house, but will not tell you what type it is. This limited information can cost you lots of money since you may invite a professional to remove the mold, only to discover that the mold is not harmful. On the flipside, you may be tempted to think that the mold is the non-harmful type, only to find out that the mold is the harmful black mold, a time in which, it might be too late and the damage is too much.

Source of Moisture Information

Mold thrives where there is moisture and warmth, hence the need to identify the source of moisture. Unfortunately, home mold test kits do not identify the source of moisture, which is the start to mold remediation process. Contrary to a professional who goes to the root cause of the mold problem, home mold test kits only confirm the presence of mold in the house but do not tell the cause of the mold. For this reason, you have to call in professional mold services so that they can identify the source of moisture. This is a bit expensive since these are two different costs.


Levels of Mold

A home mold test kits is simply a dish that traps mold spores that are hovering in the atmosphere. Regardless of the high number of mold spores trapped in the jar, this does not tell how much the infestation is. The jar has to be transported to the lab where a professional analyses the spores to determine the levels of mold infestation. The analysis comes at an extra cost, rendering this type of mold test expensive. Failure to know the levels of mold is risky because you may never know how much damage the mold has caused, and by the time you realize, it might be too late.

Remediation of the Mold

Contrary to a mold professional who identifies the mold and goes ahead to remove it, a home mold test kit does not do this; it only confirms the presence of mold. After collecting the mold spores in a jar, the kit is transported to a test lab for analysis. You then have to find professional mold removal services at an extra cost. Foregoing a home mold test kit presents you with one package; testing and removal, something that saves you money and inconvenience of looking for a good professional. Most importantly, a professional does effective testing to uncover the location of the mold and the source of moisture.

Preventive Measures

The best thing with hiring professional mold removal services is that on top of removing the mold, they will offer expert advice on what you should and not do to prevent future infestation. By using the DIY home mold test kit, you miss a chance of getting this important piece of information. Without this information, you will spend so much on the remedying process and after a short while, you will spend even more money when the mold grows again. Only that this time around, the damage may be even worse than the previous time.

Although the role of a home mold test kit is very limited, its effectiveness cannot be ignored. However, for someone working on a budget, professional mold services are your best bet since they present you with testing and remediation as a single package. Even as you do that, vet the mold experts by checking for their customer reviews and rating. Mold is very risky to your health and can cause massive structural damage and so you do not want to chances.


How are mold allergies and exposure diagnosed?

There are no proven tests that show when or where you may have been exposed to mold. However, your doctor may check for mold allergies by reviewing your symptoms and performing one of the following tests:

  • Blood test. Your doctor takes a blood sample and then sends it to a laboratory to measure the number of certain antibodies, which can indicate your immune system’s sensitivity to different mold species.
  • Skin prick test. Your doctor takes small amounts of mold and applies it to your skin using a tiny needle. Your skin will break out in bumps, a rash, or hives if you’re allergic to that type of mold.