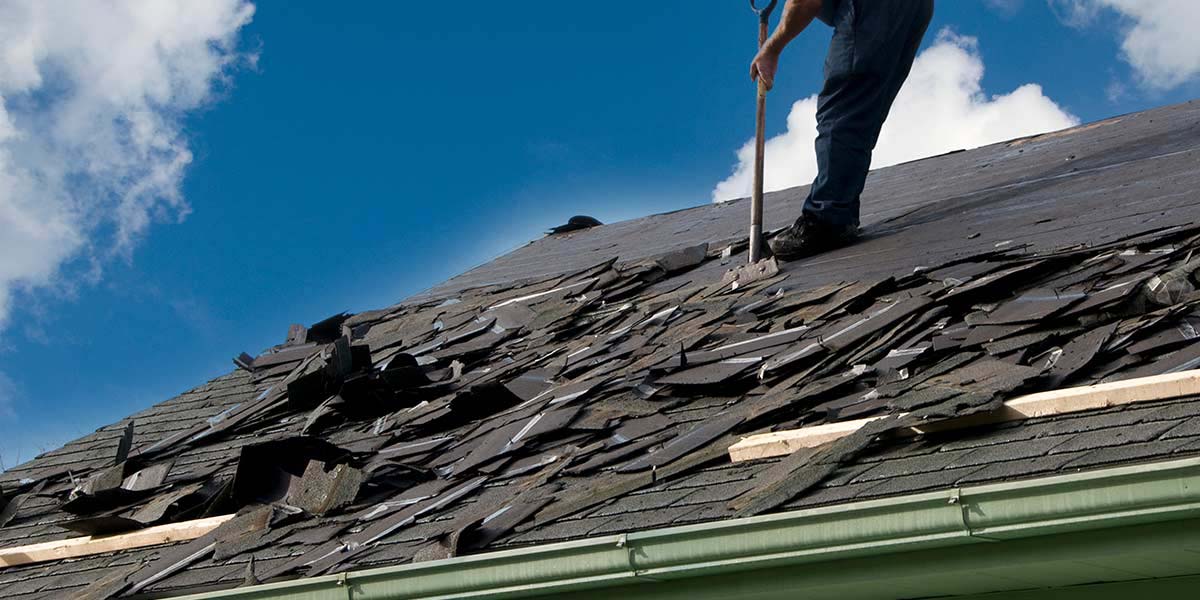
bookmark_borderTips To Choose The Best Shingles Roof

The Hottest Trends in Exterior Colors

Sky Blue

Airy and bright, this gorgeous pastel goes best with shingle colors that pick up on the blues, from light to dark grey and dark blue. Neutrals such as black, white and beige can also be used.

Earth Tones Combo

Owners of two-story homes are mixing it up by using two different but complementary colors of siding for each story. Choose a shingle color that goes well with whatever color siding is being used directly under the roof.

Bright Yellow

Sunny and vibrant, this strong shade of yellow will look best when paired with black, charcoal or dark brown shingles. If you dare, opt for a dark blue or green.

Opal

There’s an ephemeral quality to this greenish grey hue that’s further enhanced by choosing lighter-colored shingles, such as light grey, beige or perhaps a dark green or grey for contrast.

Smoky Red

This is a color that commands attention, so consider complementing it with black, green or dark brown shingles.


Tips for Choosing Asphalt Shingles

What Can Your Roofer Do?

Here’s the truth – most major shingle brands are comparable. They all have their drawbacks and benefits, but one major brand is not head and shoulders above the rest. Rather than reviewing brands, ask your local roofer what they’re certified to install. Choosing a certified roofer to install your shingle will give the best overall product.

HOA

If you’re in an HOA double-check on what type of roof materials you can install. Your HOA might have a pre-approved list which can drastically shorten your shingle search.

Brand

Like any other products shingle brands range in quality. Talk to your local roofer about different brands of shingles, what they like to install, and why. Many shingle brands are comparable but there are differences.

Warranty

There are several different shingle warranties, but you must choose a shingle with the right warranty for your house. Look into upgraded warranties for more confidence in your roof’s lifespan. Warranties have lots of fine print so take your time when researching them.

Depth

The thicker the shingle is the more depth it provides. Triple-laminate asphalt shingles are among the thickest which means they create the most depth and shadows. Depth is necessary for regal style homes.


How to Choose the Best Shingles for Your Roof

Make an Informed Decision when Selecting New Shingles for Your Roof

You should now have what you need to choose your shingles, estimate their material and installation costs, and start planning a whole new look for your home. A trained, professional roofing contractor can help you put this plan into action.

Keep the right tools on hand for your upcoming roofing project. A roll off roofing dumpster, combined with our expertise in the roofing industry, can help you get rid of old shingles quickly and easily.

Durable Roofing Materials

When you want your roof to stand the test of time, consider materials valued for their resilience.

Stone and Slate Tiles

The classic and timeless look of flat stone shingles can bring a sense of elegance and strength to any home. They have the added bonuses of durability and fire resistance. The downside is that slate shingles tend to be pricey and heavy. They also usually require specialist installation to be fitted properly. In addition to material costs, it may be difficult to find a qualified installation company depending on your location. Careful upkeep is important for slate roofs, including routine gutter cleaning and replacement of any damaged tiles.

Stylish and Contemporary Roof Shingle Types

If you want to make a statement, there are several options for roof shingles that’ll catch the eye.

Metal Roof Panels

Shingles made of metal are a smart consideration if you live in a fire-prone area. Plus, these materials are built to last, surpassing wood and asphalt in terms of lifespan. Metal can also be cut in a flat, panel form or in smaller, shingle-like shapes. On the other hand, you’ll likely need to pay extra for this especially durable material.

Cost-Efficient Shingle Materials

If keeping the budget for your new roof low is your main concern, there are cost-effective options to help you realize your vision without breaking the bank. Keep in mind that local market factors can impact how much you’ll pay for different roofing materials.


Tips for Choosing the Best Shingles For Your Roof

Understand the Warranty

Whether you’re on the verge of selling your home or commercial property or not, a warranty can be your best friend. Without the right roof warranty, you won’t have the liability protection you need.

Too many home and owners believe they are getting an iron-clad warranty with their shingles. Unfortunately, they don’t understand until it’s too late that there are a variety of warranty types for their shingles.

Combining Products for the Best Shingles

Homeowners spend more than $327 billion a year on home renovations repairs. While these numbers continue to climb they don’t always get the best value for their investment.

With roof repairs replacement, it’s just as important to combine the best shingles with the best installation. Unless installation is done properly you may void a warranty.

Consider Color

When replacing their roof or performing repairs many home owners are already set on a color scheme. They aren’t aware that changing the color of their shingles can alter the aesthetic qualities of their building dramatically.

You need to study your building as well as the surrounding elements. Warm tones are perfect for helping your home with a more classic casual feel.

Code Restrictions

Before settling on any specific type of roof you need to take into account code restrictions. This is another reason it’s wise to employ a trusted local provider.

Consider Overall Value

Asphalt shingles are often used because they are less expensive. But they won’t necessarily offer the same boost to the curb appeal of your home in every .


How to Choose the Perfect Shingles for Your Roof

Choose the Right Type of Shingle

One of the first things you’ll have to decide is what type of shingles you want for your roof. Herb Lodde & Sons installs laminate roofing as well as cedar shakes and shingles.

If you prefer an asphalt-based shingle, it’s important to understand the differences between 3-tab and laminate shingles, two of the most popular kinds available for residential homeowners.

Select the Style of Shingle and Features That Will Be Best

Factors to take into account include:

Appearance: How much dimension do you want your shingles to have? Architectural shingles are designed to provide a shadow effect that gives your roof an ultra-dimensional look.

Find the Ideal Colour

After you know the type and style of shingle you want, it’s time to choose the colour. It sounds simple at the start, but don’t be surprised if this is the hardest part of the process:

Think about Your Home’s Aesthetics: While one type of shingle might work on a Tudor-style home, you might find that it clashes with other fashions (like Ranch or Colonial).

bookmark_borderThe Best Tips To Make A Packing Services

Reasons you should hire a professional packing service

The main advantage of using professional packers is the options that are availed to you. You can either choose to let the professionals take care of everything or hire them to only take care of specific items like pianos or super heavy appliances.

DO I NEED A PACKING SERVICE?

The answer to that question is always going to be a ‘Yes.’ It is no hidden fact that you can pack and move all by yourself too. Thanks to all the packaging utilities available easily in the market, you might think that it is easy to DIY the whole procedure. However, there are professional Bay Area packing services available for a reason. You might find all the supplies easily, but how do you go about it?

Here are a few reasons we think you should consider calling in the professionals;

There is the provision of packing supplies

While moving, safety is one of the most important factors to be considered. The benefit to hiring professionals is that they bring along their packing materials such as new moving boxes, bubble wrap, packing paper, tape, markers and anything else that will be required to facilitate the moving process. The materials come in adequate supplies so you will not have to worry about them running out before the work is completed.


RISKS INVOLVED IF YOU DECIDE TO PACK AND MOVE IT YOURSELF

There are various risks involved if you do not seek help from professional packing services for your needs:

  • It is very time-consuming to manage it all by yourself. Bay Area packing services have a team that handles the procedure quickly and efficiently.
  • You are liable for your stuff. All the damages are upon you, and no insurance cover is there for anything.
  • Improper packaging will be there as you are no expert in the field!


YOU WILL SAVE TIME (AND EVEN MONEY)

As mentioned above, the stress of a move is no joke. There can be an overwhelming number of things that need to be done before settling down in a new home. It would make sense for people to wish that they could make clones of themselves just so they can get everything done before the move! In a sense, our packing service can act as your clones. Our professional movers will come in and pack up your stuff — no problem, no stress.

The amount of time this frees up for you can make a huge difference. It can open up time on your schedule to run other errands for the move, from going to the post office to meeting with the real estate agents. This is an important consideration for people when thinking about the cost of a moving company. For a lot of people, the need for packing might require them to miss work, which is money out of their pockets. The ability to stay at work while we do the packing can end up saving you money in the long-run. Saving money or not, it will certainly save you lots of time.


Movers and packers are exponentially faster than you and your buddies.

Whether they’re loading up furniture or packing boxes, moving crews are efficient. It’s what they do, day-in and day-out.

Grabbing a couple of friends, on the other hand, can make your move take days. And that’s if you can get help at all. Most people find that their friends suddenly have “important plans” once your moving day actually rolls around and very few are available over the several weeks it takes to help pack everything you own.

Professional movers are fast and reliable. Depending on your house size, professional packers can have you in the truck and on the road before you can find 100 boxes.


You Just Want to Sit Back and Relax

Why bother packing yourself when you can get someone to do it for you? Sometimes it’s all about convenience. When you know you’ve found the best moving and packing company, you know you can trust them with your belongings and you know you are in the right hands. When you get a full packing service, you basically don’t have to lift a single finger (except when you dial our phone number). You can sit back and relax, have a cup of coffee while your packing team carefully and professionally packs away your belongings. This is a good time to focus on things that are important or priority to you.

bookmark_borderThe Best Way To Do Residential Cleaning

Benefits of Residential Cleaning

A residential cleaning service specializes in things around your home such as cleaning floors, bedrooms and bathrooms. A commercial cleaning service cleans things such as offices, buildings, or retail stores. There is a big difference in the way that you clean a retail store versus someone’s home. A residential cleaning service is going to be much more detail oriented and thorough. Specializing in the type of mess you would find in a home, they are better suited to clean your home.


Major Differences between Commercial and Residential Cleaning

  • Services Offered

Residential: Housekeeping, as the name suggests, is what you call looking after the house in terms of cleaning, cooking, etc. Depending on what company you hire, services could range from cleaning to maintaining the house. When hiring a residential cleaning service, you will need to talk to the technicians to find out what are the services they offer.

Commercial: Commercial cleaning, on the other hand, is specifically designed for workplaces, offices, and organizations. Some companies only provide commercial cleaning services, many offer both commercial and residential.

  • Timing

Residential: Most residential cleaning services are performed during the day, when residents might be at home. This is because not many people are required to clean a house and the work can be finished within a few short hours without the need to move everyone out of the house.

Commercial: This kind of cleaning is mostly done in the evenings or nights because the service providers prefer working when no one is around. This allows them greater freedom without causing any kind of disruption. There is almost always a team of cleaners that work at any given office so that the work can be managed in the best possible manner.

  • Cost

Residential: Residential cleaning services charge depending on the work they cater to. For example, if they are only vacuuming and cleaning windows then the price will be less. The more work there is, the more money will be involved.

Commercial: Commercial services are mostly priced based on packages. These range from carpet cleaning to washing blinds, bathroom services to mopping and graffiti removal, etc. Packages are based on how much work is involved and range from affordable to pricey.


Why Residential Cleaning Services is More Affordable Than You Think

In this article we’ll explore some key points about how you can still prosper financially while still be granted the luxury of being able to hire a household cleaner.

  1. Time & Productivity: Make wiser investments with your time
  2. Tools & Equipment: Free up valuable household space & expenses
  3. Attention-to-Detail: Rushing a household clean simply isn’t worth it
  4. VIP Treatment: The first-class cleaning experience


Questions You Should Ask When Choosing a House Cleaning Service

Choosing a house-cleaning service is different from picking someone to mow your lawn or clean your gutters. It is more intimate than most business relationships because in many cases, house cleaners have the key to your house.  House cleaning services are responsible for caring for your belongings, dusting your family portraits and cleaning valuable heirlooms.  For those reasons, there are many items that one should consider when choosing a house cleaning service.

Here are six questions, you should consider when Choosing a House Cleaning Service.

  1. Is the company a member of the Association of Residential Cleaning Services International (ARCSI)
  2. Is the work guaranteed?
  3. Can I get references from other clients?
  4. Can I get an in-home, written estimate?
  5. What are the costs involved?
  6. Can I get proof  or documentation of background checks of the cleaning technicians who will work in my home?


Benefits of Residential Cleaning

Some may think that it is a luxury to get residential cleaning as a service. But when you are working and have a family, there are many obligations to fulfill and it becomes very hard to make time for cleaning. Time is important and most people don’t have time to do house cleaning tasks, so the hiring of cleaning companies or getting maid service can offer you the best thing in the time, and that is time. There are many benefits of hiring professional house cleaner for your residence. Let’s look at the top 3 benefits.

  1. Peace of Mind
  2. Time Saving
  3. Don’t have to worry about supplies

bookmark_borderThe Best Way To Make Bathroom Remodelling

MUST-KNOW BATHROOM REMODELING TIPS

PLAN YOUR BATHROOM

Before you even call a remodeling company for your bathroom remodel, you should first talk with everyone who will be using the space. Try to have a discussion about the fixtures and finishes you are supposed to use and how much of a budget you’re willing to shell out. As you plan for your budget, it’s important to have a little extra, because you never know if there will be some unexpected problems that will increase the cost later on.

How to Design Your Bathroom?

A lot of homes usually have at least one bathroom with a sink, toilet, and bathtub. Then, there are optional extras, such as the shower, and in some cases, a bidet. An extra sink is also a popular choice for most people, especially in households where the bathroom is often used by more than one person.

Customize Your Bathroom

Similar to a standard bathroom, a customized bathroom is filled with a number of suite fixtures. The difference is that the final design usually has a matching countertop and built-in cabinets around a certain area of the room.

Wet Rooms

These are the type of bathrooms that comes with a shower, minus the enclosure, and the water runs away through a drain installed in the floor. That’s why it’s important for the whole room to be waterproofed.

En Suite Attached Bathrooms

Due to the proximity of the bedroom to one’s bathroom, noise is usually an issue for most homeowners. If there aren’t any windows attached to the bathroom, an exhaust fan should be installed as it can help in removing moisture. Likewise, if you want to reduce the noise made by your toilet tank while it’s being refilled, then you should install a modern inlet valve.

Most en suite bathrooms are attached to the master bedroom, but there may be exceptions depending on the layout of your home.


Design Tips to Know Before Remodeling Your Bathroom

Know What a Bathroom Remodel Costs

Before you begin any project, it’s important to put your expectations into perspective when it comes to how much money you’re willing to invest. The size of your bathroom, the quality of materials you want to include and whether you’re planning to do some of the labor yourself all can affect the cost of a remodel.

Don’t Make the Toilet the First Thing You See When You Open the Door

Ask a bathroom designer what his or her best tried and true tip is, and this is what you’re likely to hear. The reasoning is simple. Oftentimes bathroom doors get left open, meaning that you or any guest in your home walking by will see the toilet — which, come on, isn’t the most aesthetically pleasing thing to look at. If you’re hoping for a spa-like vibe, putting the john front and center in the design can sort of kill the mood as you’re transitioning into the room. So, what should you make the focal point? Anything but the toilet.

Consider Leaving Those Vintage Finishes

The point of your bathroom remodel might be a fresh, new look, but some things are easier to replace than others. For example, in older homes, wall tiles may have several coats of concrete and maybe wire lath. The difficulty in removing these can cause labor costs to skyrocket. Instead, you might want to keep the vintage tiles and spend your time and money elsewhere. Besides, vintage finishes such as tile can be a cool feature.

Plan a Lighting Scheme

The best approach to a well-lit space is to incorporate layers of task, accent, ambient and decorative lighting. Consult with your bathroom designer or lighting specialist about getting your lighting right.

Understand Standard Bathroom Dimension

Knowing a few key measurements, like the size of a typical bathtub and how much space is needed for a toilet, will help you plan your remodel more efficiently.


tips from the experts to help you remodel your space

CHECK MATERIALS ARE SUITED TO A BATHROOM ENVIRONMENT

Always choose materials that can withstand the conditions of a bathroom. From appropriate bathroom flooring to waterproof paints and sealed wall tiles, there are products designed to withstand high volumes of water.

REMEMBER TO INCLUDE PLENTY OF STORAGE

Nothing can ruin a nice new room faster than clutter, so don’t forget about bathroom storage – our feature is full of handy solutions. Use storage furniture and baskets to keep everything out of sight (apart from your posh toiletries of course).

A BIGGER SPACE WILL NEED MORE HEAT

If you are extending the bathroom space, don’t forget that this will mean a larger area to heat. Re-assess existing heating and upgrade the heat output if needed with a more powerful towel heater or radiator. You could also take the opportunity to include underfloor heating. At the same time, check that the water pressure isn’t affected by the addition of new sanitary ware.

INVEST IN ONE STATEMENT FEATURE FOR A LUXE LOOK ON A BUDGET

Choose one feature that will give your bathroom a standout, luxe feel. This might be a freestanding bath – take a look at our pick of the best rolltop baths for traditional homes – or splashing out on some really fancy taps. Or, if you’ve found tiles beyond your budget, use them on a statement wall with a more affordable complementary tile elsewhere.

DON’T GO OVERBOARD WITH LIGHTING

Opt for pendant lighting — a single central fitting will prove much cheaper than individual downlights or wall lights. Check out multi-bulb fittings that only require a single power cable, for a flexible scheme.


How to Remodel Your Bathroom From Start to Finish

How Much Does a Bathroom Remodel Cost?

According to List, the average total cost of a bathroom remodel is between $10,000 – $15,000, with labor costs taking up at least 20% of the budget. By going the do-it-yourself remodeling route, you can expect to save as much as a few thousand dollars.

Establish Your Bathroom Makeover Design

Before you do any bathroom remodeling yourself, you should settle on a new design that fits your vision, as well as your skill set. There are so many different ways to approach a bathroom makeover, ranging from swapping out the vanity to gutting the space and starting over from scratch.

Gather Your Remodeling Tools and Supplies

Of course, you may need a few things outside of your essential homeowner tool collection, but the exact tools required will vary based on your renovation plans. But these are a few essential tools to have on hand for any bathroom renovation.

Install Your New Shower or Tub Basin

After you’ve gutted your bathroom, its time install your new fixtures. For a shower or tub replacement, you’ll want to pick a pan or basin that fits your new decor, as well as the space where your current tub sits.


Tips for Remodeling a Bathroom

The best place to start with any remodeling project is the budget. Not only will it have a big impact on the type of materials you select for your bathroom renovation, it will also help you set the boundaries of your design. Knowing what you can really afford to spend will make it a lot easier to decide what items you want to replace and where you need to get creative!

Going “green” is not only good for the environment; it’s also good for you. Green products have great design, tend to function better, which lowers utility bills, and they’re also chemical-free, making them better for your health. Having an eco-friendly approach to remodeling isn’t just about buying new products, doing something “green” can be as simple as painting a cabinet instead of tossing it in a landfill.

Want to save some big bucks remodeling your bathroom? Consider refinishing existing items such as your bathtub, shower, sink or tile. With refinishing, you’ll only pay a small fraction (as little as 10 percent) of the cost of replacement. Your bathroom won’t be torn up for weeks, you’ll avoid the big renovation mess and you’ve put one less big ol’ tub in the landfill

Don’t want your budget to skyrocket? Don’t move your plumbing. On the surface, switching your sink and toilet around may look easy enough, but the problem lies underneath and all the costs involved in moving that plumbing. Besides, if you spend less money on moving fixtures, you’ll have more to spend on that new sleek shower system or vanity you’ve been eyeing.

Be brutally honest about your DIY skill level. Assess which projects to do yourself and which are better left to the pros. You could save yourself a ton of money in the long run if you don’t have to call someone in to fix a project you’ve messed up. The best way to find a good contractor — seek referrals from friends, family, neighbors, co-workers and others who have had remodeling work done.

bookmark_borderChoose The Best Wedding Photographer For Your Best Wedding Memories

TOP TIPS FOR CHOOSING A WEDDING PHOTOGRAPHER

Image quality/style

The quality of a photographer’s portfolio should be the first thing that captures your attention. A good photographer should be able to offer clients a variety of styles, capturing the personalities of the bride and groom and showcasing the happiness and fun of the day. Be clear on what style you would like and make sure the photographer can provide this in their portfolio.

If you are drawn to a particular photographer, make sure you ask to view all of their images (not just the favourites they pick for their websites!) so that you can check the image quality is consistent throughout.

Be aware that photographers have different editing techniques. If an image is heavily edited then chances are this will be a common theme within their photography portfolio and is usually an attempt to try to cover up poor quality.

Above all, the style of the images should say something about you both as a couple. Whether you are looking for relaxed and informal photography or you would like to go for a more adventurous and contemporary style, be sure to do your homework and shop around.

Personality

As a bride and groom, you put a lot of trust and faith in your wedding photographer. In order to get the best images and a true account of the most important day of your life, it is imperative that you feel comfortable and relaxed in their presence.

You can usually tell within the first 5 minutes of meeting someone, whether you feel a rapport or connection. First impressions are key and if you instantly strike a bond then you are on to a good thing. If you feel uncomfortable around your photographer for whatever reason then this will become very apparent in your wedding photos.

Also, think of your guests. If your wedding photographer is approachable, friendly and down to earth, your guests will be at ease allowing the photographer to blend in and capture the day as it naturally unfolds rather than a forced and posed account.

Remember, a true smile is impossible to fake so choose wisely and ensure you meet with your photographer a couple of times before confirming your booking.

Value for money/cost

This can often be a deciding factor for a lot of brides and grooms and although it is a vital element, it should not be the basis for your decision. High-end prices do not always guarantee the highest quality but likewise, reasonable pricing does not always depict low quality.

A photographer should be open about their pricing structures and in turn, you should be clear on your budget. Neither one of you wants to waste any time so a clear dialogue right from the beginning will resolve this.

Your photographer should offer a variety of packages to suit all and should always be flexible with pricing and what is included within each package. Your photographer is providing a service and each couple will have different expectations and requirements so do make sure that your photographer can tailor make a package to suit your needs.

Always remember to ask about any hidden extras. Some photographers charge an additional fee for editing, VAT, creating artwork for an album or even travel and food expenses. You should always ensure that all costs are detailed in a quote before entering in to any contractual agreement.


Steps to Finding a Great Wedding Photographer

Settle on a Style

Before you begin researching photographers, you’ll need to first decide what type of photography style you prefer, as that will help determine which kind of photographer you’ll want shooting your wedding. Get inspired! Spend time pouring over any kind of imagery you love, from décor shots to a fashion blogger’s Instagram feed. Once you have a good collection of inspiring photographs, try to narrow in on what draws you to them specifically and dissect what feels most authentic to you and your partner. Maybe that’s formal-posed portraits, a classic photography style or a lifestyle, photojournalistic feel. If you love sharp and contrast-y shots, perhaps a photographer with a flair for the dramatic is the right choice for you. Remember that you don’t necessarily need to narrow in on one style in particular, since many wedding photographers can do a blend of portraiture and documentary-style shots, a mix of black-and-white and color images and so on. But if there’s a special style you love, make sure to focus on photographers who specialize in it.

Do Your Homework

Start your search by reading reviews from recent newlyweds and browsing local listings. Carefully review potential photographers’ websites and blogs to check out photos of other weddings they’ve shot, which will give you an idea of their style. How do they capture the moments important to you, like a mother bustling her daughter’s gown or an emotional first look? The design of the website may also have clues about the photographer’s personality and sensibility. Check out their Facebook, Instagram and Twitter pages too, if possible. Is the feedback from clients positive? How does the photographer respond? How do they interact with their Instagram followers, do they seem friendly and personable? You get the idea.

Set Up Interviews

This is not a decision that can be made on looks alone—you must meet your potential photographers in person. If you like what you see on their site—and their fees are in your ballpark range—call to see if they’re available for your wedding date. If available, go ahead and send an introductory email with a bit about you and your soon-to-be spouse, you event and the vision for your day, and feel free to attach five or so of your very favorite photos from your research so they know what you love. If the photographer is already booked on your date, you may want to see if they have an associate or can recommend another shooter with a similar style. Set up in-person meetings with three to five potential photographers who are available on your wedding date to look at more of their work and assess whether your personalities mesh. Be prepared to talk about your venue, wedding style and what you envision for your photos.

See a Few Full Wedding Albums

Don’t base your decision solely on what you see in a photographer’s highlights gallery or album. For good reason, photographers show prospective clients a portfolio of their best pictures, all from different weddings, so you’re seeing the best of the best. The problem with that is you won’t get a well-rounded idea of their work. Ask to see two or three full galleries from real weddings they’ve shot (not someone else at their company) so you can get a better idea of what your complete collection of photos might look like after the wedding. If you see that the full gallery photos are just about as good as the ones chosen in the highlight gallery (that is, they’re all so good it’s impossible to choose!), you’re on the right track. And ask to see at least one or two complete albums of weddings that are in similar settings to yours. For example, if you’re planning an indoor affair with dark lighting, don’t just look at weddings shot outdoors in natural sunlight. And if you’re planning to say “I do” on a beach at sunset, you’ll want to see examples of that.


HOW TO CHOOSE A WEDDING PHOTOGRAPHER

Classic

The classic style is the most well-known and timeless photography style, which was most likely used for your parents’ or even grandparents’ wedding album. A classic wedding album usually has clean, carefully composed photos with perfect lighting. If you just love those classic wedding moments—like the first look, wedding kiss, and bouquet toss—and would like yours captured in the same way, then you should look for photographers with this style.

The downside of this style is that it can make your wedding album look “too similar” to other wedding albums. To tackle this, you can ask your photographer to add a certain twist to the pictures, so the photos can look more modern and less predictable. Another thing you can do is to let loose and have fun. Let your positive radiance shine through every frame.

Photojournalistic or documentary

These types of photographers are inspired by photojournalism and capture moments as they happen. They usually shoot pictures from a slightly different perspective than traditional wedding photographers, focusing on candid and spontaneous moments instead of posed portraits. If you don’t enjoy posing in front of a camera, this style might be a good fit for you. The photos also give you documentary coverage, which will make you relive them easily in the future. However, this style might not be suitable if you want to take perfectly posed portraits.

Fine art or artistic

Fine art wedding photography is actually a bit hard to define, as the definition of art lies in the eyes of the beholder. The easiest way to tell a fine art wedding photograph is to take it out of the wedding context. Would the photo still be beautiful as a stand-alone piece of art? A fine art photographer usually has an artistic background and applies elements such as blurring or silhouettes into the pictures. With this kind of style, your wedding photos will surely be beautiful and won’t look like anyone else’s. The downside of this style is how it can get too artsy and abstract that it doesn’t tell a wedding story like a wedding album normally would. One way to tackle this is to hire another, more conventional wedding photographer as backup.

Lifestyle

Lifestyle photography is more or less a mixture between documentary and classic wedding photography. Candid moments are mixed with of direction and styling. As a result, you can get relaxed and relatable photos. This style is increasingly popular these days, as a lot of couples wants to have candid pictures but also want the assurance that their photos will look good. Another important thing to consider is the format. Film photography is having a comeback in the wedding world thanks to its beautiful tone and colors, but it’s not for everyone as it can be costly and more time-consuming to edit. Carefully research the perks of both digital and film photography before you make a decision.


STEPS TO CHOOSING THE RIGHT WEDDING PHOTOGRAPHER

It pays to have the best

While you can get a good deal with a photographer who’s new to the industry, you do need to find someone you trust to get it right. Perfection comes with experience.

“It sounds obvious but nail down your photography budget before reaching out to wedding photographers.” Says Jay Rowden.

“Be prepared to break the bank if you find a photographer whose work you really love”.

Browse your photographer’s portfolio

Look through the portfolio of any photographer you’re considering. You won’t just be looking for examples of the weddings they’ve captured. You’ll also be looking at their different styles and approaches. When you find the photos that resonate with you, you’ve found your style and photographer.

“Before you meet your favourite photographer, ask them to bring along a few sample albums of their work,” Says Jay Rowden.

Decide on the right style

A professional photographer distinguishes all the subtleties of shooting a wedding. They’ll know exactly when to photograph your groom as he first sees you walking down the aisle, how to achieve the perfect confetti shot, and what to do in the event of rain. A creative and flexible approach often results in the most breathtaking and brilliant wedding photographs.


TIPS FOR PICKING THE PERFECT WEDDING PHOTOGRAPHER

Book early

Top wedding photographers in the UK can be booked not just months in advance, but years. Many will be taking bookings for one to two years in advance – popular summer weekends in peak season will be quickly booked up. If you are planning your wedding and have your date set, then now is the time to find your wedding photographer and get them booked as quickly as possible. Don’t be left disappointed by finding a photographer who you love, but are already booked up on your wedding day. Once your venue and wedding date is confirmed, get straight onto your wedding photographer and get them booked.

You would recommend them

A great way to know if you have found your perfect wedding photographer is to ask yourself ‘would I recommend them to a friend?’ If the answer is yes, then get them booked. If you have any doubts then consider the reasons you wouldn’t – if you wouldn’t recommend them to a friend then why would you hire them yourself?

Ensure you pick a wedding photographer that you love, someone you trust and someone you know will capture the day how you want it captured and will present it beautifully.

You trust them

Knowing you can trust your photographer and leave them to do what they do best is so important. After meeting them, make sure you leave feeling confident and happy, ensuring they answer any questions no matter how silly they may be. Go with your gut – if something doesn’t feel right then perhaps go and meet another photographer you like too.

You don’t want to be worrying about them on your day, or making sure they capture certain shots or directing them around. Speak to them about formal family shots you may want before hand, then just let them get on. They have had years of experiencing doing this, let them do what they do best. When it comes to creative fun shots with you and your partner, go with the flow, have fun and trust your photographer.

Ask to see a complete wedding

When looking at different photographers they will show a range of different photos that represent their best work. If you love their work and meet up with them then make sure you ask to see two or three completed wedding albums that were given to the couple. You are looking for consistency –  you want a whole album that’s amazing and tells a beautiful story, rather than just four or five impressive photos.

bookmark_borderMake A Good Setting Of Toilet Installation

How to Install a New Toilet

TOOLS

  • hacksaw
  • slip-joint pliers
  • putty knife
  • rubber gloves
  • adjustable wrench
  • rag
  • plunger

MATERIALS

  • wax seal
  • toilet

INTRODUCTION

Disconnect the Supply Line

After turning off the water at the shutoff, flush the toilet to remove most of the water from the tank and bowl. A little water will be left in the bowl. Use a force-cup plunger to force it down the drain line. Remove the remaining water from the tank with a sponge and a bucket.

Disconnect the supply line from the base of the tank.

STEP 1

Remove the Old Toilet

To remove the old toilet, pop off the trim caps at the base of the toilet. Next, loosen and remove the nuts and washers on the closet bolts securing the bowl to the floor. If the nuts are rusted, you may need to cut them off with a hacksaw.

Note: If you’re working alone, disconnect the tank from the bowl before disconnecting and removing the bowl. Lifting the two pieces separately will be a lot easier.

Now that you’ve removed the nut and washer on each side of the bowl, gently rock the toilet back and forth until you can lift it free. Once you’ve removed the toilet, there will be an open line to the sewer system. Stuff a rag into the hole to prevent sewer gases from backing up into your home and to prevent tools from falling into the hole.

STEP 2

Install a New Wax Seal

Use a putty knife to pry up and remove the old wax seal (Image 1). Inspect the flange beneath the seal to make sure it’s not cracked. Once you’ve inspected the flange, remove the rag from the hole. If the flange is damaged, get help from a plumber. If the flange is OK, remove the rag from the hole and take the closet bolts out of the flange. Install the new wax seal, and hook the new closet bolts into their slots on the flange (Image 2). Important: Remove the rag before installing the new wax seal. Leaving it in is a common and costly mistake.

STEP 3

Attach the Tank and Bowl

With the closet bolts and seal in place, you can attach the tank and bowl to assemble the new toilet. Slide the tank bolts through the opening in the bottom of the tank. Line up the shank of the bolts with the holes in the bowl, and drop the tank into place. Secure the tank to the bowl by tightening a nut onto each tank bolt. Evenly tighten all the nuts until the tank rests firmly on the bowl.

STEP 4

Secure the Toilet and Finish Installation

Set the assembled toilet onto the flange assembly, making sure that the closet bolts protruding from the floor line up with the holes in the base. Lightly press the toilet in place to form a good seal with the wax ring.

Place a couple of washers and a nut on each bolt. Secure the nuts with a small wrench, but don’t over tighten them. If the bolts extend too far over the top of the washers and nuts, cut off the excess with a hacksaw.

Pop the trim caps in place to cover the ends of the bolts.Secure the new seat and lid to the bowl with mounting bolts.

Use slip-joint pliers to reconnect the supply line to the bottom of the tank.

Pro Tip

Keeping toilets in good repair will save you money. Even a small leak may waste as much as 40 gallons of water per day.


Why You Should Caulk Your Toilet to The Floor

It seems that caulking your toilet to the floor has drawn quite a debate among clients, plumbers and DIYers of the like. Is it smart to caulk your toilet to the floor, or just leave it be? Turns out, caulking your toilet to the floor is actually smart.

The debate has to do with leaking water. According to Structure Tech, people will bring up the argument that not caulking a toilet to the floor can help you identify a leak. These clients say that caulking around the base of the toilet would trap water from a leaking toilet, causing damage below and around the toilet since it has no place to leak onto the floor.

Although that theory makes sense, it is, in fact, a false statement. A toilet would actually never leak right onto the floor. If there is any leaking that occurs in a toilet, it would happen through the floor and not on the floor. Toilets tend to leak below (typically into a basement), and seeing cases where a toilet is actually leaking on to the floor is quite rare. Plus if you’re dealing with a leaking toilet, simply wiping up the leaking mess won’t do it. There’s so much more that goes into repairing a leaking toilet.

However, this doesn’t cover the reasoning behind caulking a toilet to the floor in the first place. There are two important things to consider when it comes to caulking a toilet to the floor.

Caulk prevents smell

Yes, the bathroom is a place to get clean, but it can easily be a place to trap some pretty foul smells. If you don’t caulk a toilet to the floor, you could find yourself smelling leftover residue from smelly mop water, tub water, or even worse, the remnants of your son’s potty training.

Caulk keeps the toilet secure

Didn’t think you needed to worry about the toilet moving around? Think again! Caulk keeps your toilet secure the floor, and avoids any chance of injury or toilet malfunctioning.


5 Signs Your Toilet Is Leaking

A leaky toilet is the last thing you want, but it can happen at any time. A leaky toilet can cause water damage in your home. If it goes undetected, it can end up costing you extra money on your water bill. Many leaks don’t show signs at all, but there are still a few indicators that your toilet needs repair. Many of these signs can be the result of multiple problems but they are all common in leaking toilets.

There are a few easy ways to determine whether or not you have a leaking toilet.

  • Your Toilet Makes Noise

If your toilet makes noise after you flush it means that the water is still running. This can often be the result of a slight disruption in the tank. There could be a problem with the toilet flush or fill valve in your tank, and it could be the result of a leak.

  • The Floor Is Stained Around The Toilet

If you notice a yellow, brown or grey stain around the base of your toilet, it could be a sign that there is a leak. Generally, if there is a stain, it is a sign that the leak is older, and there has been water damage over time.

  • The Toilet Leaks From The Bottom Of The Tank

If you notice water collecting at the base of your toilet, it’s likely that you have a leaky toilet tank. This often occurs in older models or toilets that are used heavily.

  • The Floor Is Damp Around The Toilet

The easiest way to determine whether or not your toilet is leaking is to feel for signs of dampness. If there is rippling or stains around the base of the toilet, accompanied by dampness, it’s a sure sign you have a leak.

  • There Is A Smell Of Sewage

A general smell of sewage is a clear indicator that there is something wrong with your plumbing. Your toilet bowl could be leaking. Additionally, the pipes could be leaking as well. Often the smell does not come from leaking raw sewage as many suspect, but rather a leak in the vent pipe behind your toilet. It can release the natural gasses from the sewer into your home. This type of leak should be dealt with immediately by your plumber, as some gasses from sewage, such as methane can be harmful.


Installing Peel-&-Stick Tile Under a Toilet

Peel-and-stick vinyl tile is an inexpensive and easy way to change the look of your bathroom. These tiles have glue applied at the factory; all you have to do is remove the plastic backing and press down on the tile. Working your way under the toilet takes a little trial and error, because the base is curved, but it’s a project that any novice do-it-yourself homeowner can tackle.

Vinyl Advantages

Vinyl flooring is an affordable and fast way to update your bathroom flooring. Installing vinyl tile doesn’t require mortar or special trowels like ceramic tile does. It cuts with a utility knife or tin snips; there’s no need to buy or rent a tile cutter. Some types are forgiving as well; if you put it in the wrong place or need to remove a damaged tile, heat it for a few minutes with a hair dryer to loosen the glue, then peel it off the floor. Vinyl is also easy to clean and maintain.

Removing the Toilet

With peel and stick tile, there’s no need to remove the toilet. You can tile under the toilet bowl all the way to the edge of the base, then edge it with silicone caulk to create a waterproof seal. Some harder flooring materials, such as ceramic tile and hardwood, make bathroom floors more difficult. They aren’t as easy to cut into rounded shapes as vinyl tile is, so they often require that you remove the toilet. Removing the toilet opens the door for problems such as breaking the porcelain base, not securing the water line properly leading to later leaks, or reinstalling the toilet so that it’s not level and wobbles. It’s better to leave the toilet where it is and work around it if you can.

Using a Template

Tracing paper or old pieces of cardboard can help you cut your tile under the toilet to the right shape. If you lay several pieces around the base of the toilet, you can trace the base’s shape and tape the pieces together in an open section of your floor. Once you’ve laid as many whole tiles as you can close to your toilet, measure the open spaces on the floor or trace them on more tracing paper or cardboard. Use the measurements or the tracings of open spaces together with your tracing of the rounded base of the toilet as a guide to cut your remaining tile to fit around the base. You can lay the cut tile beside the toilet before removing the backing to make sure the tile matches one of the open spaces. Even with templates, it may take a little trial and error to make every piece fit. It’s best to buy a few extra tiles at the beginning in case you ruin a few while cutting; most stores let you return unused tiles with a receipt.

Waterproofing

Toilets occasionally drip or leak, so it’s important to waterproof next to the toilet. Run a bead of silicon caulk along the base of the toilet where it meets the tile. If there’s a small gap between the tile and the toilet, fill in the entire gap with caulk. The caulk can be clear or white, or it can match the toilet or the tile color. A downside of peel-and-stick tile is that it’s difficult to make a true waterproof seal between each tile like you can with ceramic tile or vinyl sheeting. However, if you press the tiles as close together as possible, not much water is likely to get through. Some peel-and-stick tile is designed to be used with grout. If you’re expecting large amounts of water on your floor, this variety might be a better option for you.


Is my toilet leaking without me knowing?

Toilets are notorious for leaking. However, a leaking toilet often goes unnoticed until a water bill shows up that is higher than usual. The first thing that many people do when they have a higher water bill is think about using the dishwasher and clothes washer less to save money on the water bill.

Most people don’t realize it, but a leaking toilet is the most common cause for a water bill that gets out of control. There are a number of signs that a toilet needs some repairs, but many toilets still leak without any obvious signs of trouble. This is what makes a leaking toilet problematic for homeowners.

Most homeowners will notice if there is water around the base of the toilet, but here are some signs to look for if you have a larger than normal water bill because you suspect that you may have a leaking toilet:

  • If you have to jiggle the handle to make a toilet stop running.
  • If you have any sounds coming from a toilet that is not being used.
  • If you have to hold down the handle to allow the tank to empty.
  • If you can see water trickling down the sides of the toilet bowl long after it has been flushed.
  • If a toilet turns the water on for 15 seconds or so without you touching the handle, you may have what is known as a phantom flusher.

The problem with leaking toilets is they can eventually result in outrageous water bills. This is especially true if you aren’t home a lot or aren’t paying attention to your plumbing. In effect, some of these kinds of water bills can run up to 300% higher than your average monthly bill. Leaking toilets are easy to fix, and the cost for a plumber to assess the situation and repair it is usually much cheaper than letting the problem go on and then pay for an-out-of-control water bill.

bookmark_borderThe Good Way To Install Ceiling Fans Installation

How to Install a Ceiling Fan

A ceiling fan is a stylish and functional addition to any room. If you are planning to install a ceiling fan in a room that already has a ceiling outlet, wiring a ceiling fan is the same as wiring any ceiling fixture. If the room doesn’t have an overhead box, hire an electrician to install the box and fish the wires through the walls and across the ceiling. Save the fun of installing the actual fan for yourself.

If you can access the ceiling on which you want to attach the fan from the attic or from an overhead area, you have several choices in the type of box you install. If you can’t get to the area above the box, you have to use an adjustable hanger bar designed for installation through the hole left by the existing ceiling box.

To replace a ceiling fixture, follow these steps:

  1. Turn off the power at the fuse or circuit panel.

You may find several pairs of wires in the ceiling box. Some may be wired to circuits other than the one that the fixture you’re working on uses. Be safe: Use a circuit tester or turn off the power to the whole house before attempting to install a ceiling fan. That’s the only way to be sure that all wires in the box are dead.

  1. Remove any light bulb cover and bulbs from the fixture and then unscrew the screws or nuts holding the fixture base to the ceiling box.

Because ceiling fans are so heavy, the National Electrical Code (NEC) prohibits attaching a ceiling fan to a standard ceiling box. Before you purchase the fan, check the manufacturer’s installation instructions and purchase an approved electrical ceiling box.

  1. Lower the fixture base and remove the electrical tape or wire nuts.

The wires come in two or three colors: black (hot), white (neutral), and, if present, green (ground) wires.

  1. Disconnect the wires to the existing ceiling box and remove it.

First, loosen the cable clamp screw that secures the incoming cable to the box. Then remove the box, working from above, if possible. Otherwise, remove any accessible fasteners (nails or screws) that attach it to the framing or push it up into the cavity to pry it from the framing or bend its hanger bar, depending on how it is attached.

  1. Follow the manufacturer’s directions to install the adjustable hanger bar and ceiling box.

You install most hanger bars by pushing them through the hole in the ceiling left by the old electrical box. When you have the hanger bar completely through the hole, rotate it until it’s perpendicular to the ceiling joists. The bar expands until it engages the ceiling joists. The ends of the hanger bar are equipped with sharp steel pins that dig into the wood joists when the hanger bar is expanded. You then attach the special ceiling box to the hanger bar, locking it in place to provide a secure base for the fan.

  1. Assemble the fan according to the manufacturer’s instructions.

Ceiling fans are heavy, so they require support while you attach the wires. Most models provide a way for you to suspend them below the ceiling box while you attach the wires. If yours doesn’t, get a helper to support the fan assembly while you attach the wires.

Wiring schemes differ slightly from fan to fan, depending on whether they’re equipped with a light or speed control. The basic installation of a ceiling fan is no different from that of a standard light fixture. Use wire nuts to attach the fan’s black or colored wire and white wire to matching wires in the ceiling box. If the wiring has a green ground wire, attach it to the green or bare wire in the box.

  1. Complete the attachment of the fan assembly to the ceiling box.

This should just involve a few screws.

  1. Install the trim and fan blades according to the manufacturer’s directions.

Turn on the power and test the installation.
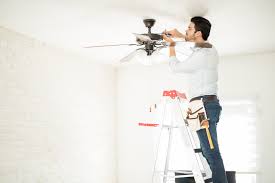
 

Ceiling Fan Capacitors- Diagnosis and Replacement

Most ceiling fans use a type of motor known as a “permanent split capacitor motor. These motors havetwo coils, a start and run winding. A capacitor is connected in series with the start winding to insert aphase shift, but once the motor is up to speed it becomes an auxiliary winding. In order to reverse themotor, the capacitor is applied to the run winding which then becomes the start winding. In some casesthe windings may have taps to provide different speeds, in others the value of the start/run capacitor islowered to provide different speeds. Other designs will have additional capacitors wired in series withthe motor as a whole to regulate speed.

Signs of a bad capacitor in a ceiling fan include:

  1. Fan runs slowly or not at all on all speeds
  2. Fan will not start but will spin if started by hand
  3. Certain speeds are slow or do not work
  4. The motor hums and turns freely by hand but will not spin

The capacitor is usually a black box inside the switch housing of the fan. If the case appears burnt or

melted in any way, that is also the sign of a bad capacitor and it should be replaced. Keep in mind thatthere may be other components in the circuit with the defective capacitor. These should also be

properly checked and replaced if found defective. Not doing say may simply render the replacement

capacitor defective upon power up.

How to Replace a Ceiling Fan Capacitor

Prepare by opening the case. Make sure you have the necessary tools, including a voltage tester, a

screwdriver that matches the screws on the fan, wire nuts, wire cutters and wire strippers. Switch offthe power to the room that contains the fan by opening the breakers at the electrical panel or removingthe corresponding fuses. Place a stepladder under the fan and make sure it is high enough for you toreach the fan without having to stand on the top two steps.

Replacing the actual capacitor is usually straight forward but first you need to determine the correct

value. If the marking on the case of the original part is obliterated or unreadable you should consult withthe fan manufacturer or check the schematic to determine the original value. Otherwise determine if 2wire or 3 wire. Two wire capacitors are easy as they only contain one capacitance value. Capacitorvalues are measured in “microfarads” (uf), ex: 4uf is a 4 microfarad capacitor. Fans that have more thanone speed will often use more than one capacitor for speed regulation. To save space quite oftencapacitors that contain more than one value will often be used. Three wire capacitors are a bit more difficult as they contain two different values. For example a three wire capacitor may contain a 2uf and a4uf capacitor in the same case with one common wire. One wire goes to the 2uf side and the other goesto the 4uf side.
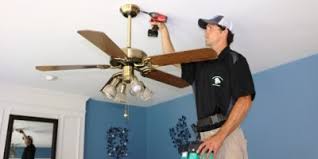
 

Are Ceiling Fans Hard to Install?

One of the best ways to make your home an investment is to improve the property in simple but significant ways. The best projects to tackle are the ones that will bring more value to the home than the actual cost of completing the project. One fantastic DIY home improvement project to consider is installing a ceiling fan. Many have asked if ceiling fans are hard to install, and the answer is generally, no. This post will briefly cover the main steps for installing a ceiling fan in your home. It should be noted, however, that the process can differ slightly for each home and each ceiling fan.

  1. REMOVE THE LIGHT FIXTURE THAT IS THERE

The first step will be to take out the light fixture that is already there. You will need to remove the cover and take out the bulbs and brace that are there. Make sure that the power to that room is off before doing this. If it is dark in the room, use flashlights or lamps hooked to another circuit to aid you.

  1. INSTALL THE SUPPORT BRACKET

Most ceiling fan kits will come with their own support bracket, but some do not. Look at the box and check the section that lists all of the contents. If you do not see a support bracket there, purchase one that will work for that model. It should be listed on the box. If you have any questions, be sure to ask someone who works at the store you are at. They will be able to help you.

  1. PUT IN THE FAN MOUNTING DEVICE

In your ceiling fan kit, there will be a mounting device. This bracket needs to be put in place before any of the wiring can be done. The instructions will differ depending on the fan, so follow the instructions that come with the kit you purchased. You will be working kind of upside down to get this done, and it can help a lot to have someone else there to hold up the bracket while you screw it all in.

  1. HOOK UP THE WIRING

Now you will connect the wiring from the light fixture to the wiring in the fan. Again, there will be some clear-cut instructions in the fan kit. If you are still a little wary, try looking at some YouTube videos. These can give you a good visual of how it should all look. This is another step where it will be much easier to have someone supporting the fan so you can focus solely on the wiring.

This is the step that scares most people, but it really is a very simple process. Don’t be discouraged. It is safe and easy if you can follow directions.

  1. PUT ON FAN BLADES AND OTHER DECORATIVE PIECES

Now that you have everything in place, it is time to finish it off with all the little decorative pieces. This will change depending on which kit you buy but usually involves putting on the fan blades, attaching the light fixture, and hooking up the pull strings.

The final step will be to enjoy the new and useful feature in your home. The process is simple but can have a lot of great dividends in both the aesthetic and practical worlds.

How to Wire a Ceiling Fan When There Is No Ground Wire

If you like working with your hands, installing a new ceiling fan can be a fun and rewarding task. However, there are always safety precautions that you must take. Always make sure that the electricity is turned off before working with electrical wiring. Grounding is another safety mechanism that reduces the risk of serious electric shock. Most modern homes are equipped with a grounding system integrated into the electrical system. Some older homes may not have ground wires present in the electrical boxes. Assuming that you have already removed the old light fixture we’ll go straight to options for wiring the fan with no ground.

  • Step 1

Make sure that the junction box in your ceiling is one that is rated for a ceiling fan. If it isn’t, you could be setting yourself up for a bad accident if the ceiling fan falls.

  • Step 2

As far as the ground wire is concerned, there are two solutions to this problem. The first solution, which is the better one but may turn out to be costly, is to have your home rewired, replacing all of the wiring with ROMEX® wires that include a ground wire. Also have a ground rod installed outside of your house. The second solution to the problem is to wire the ceiling fan without the ground. The ground wire doesn’t carry any electrical current (unless there is a problem in your electrical system). The ground wire carries displaced electricity away to reduce the risk of electrical shock if, let’s say, the metal parts of the ceiling fan or any other appliance or part attached to your electrical system becomes accidentally charged with electricity. So if you wire your fan without the ground wire, it will still work properly. However, the added safety of the ground wire will not be present. If you decide to wire your fan without the ground proceed to the next step.

  • Step 3

Mount any brackets necessary to hang the ceiling fan.

  • Step 4

Assemble the fan according to the manufacturer’s instructions and hang the fan (without the blades) from the mounting bracket.

  • Step 5

Wire your fan using wire nuts to connect the white wire from your fan to the white wire in your ceiling. Next connect the two black wires in the same fashion. Don’t worry about the ground wire for now, but having your electrical system grounded should be a priority.

  • Step 6

Continue assembling and installing your ceiling fan according to the manufacturer’s instructions.
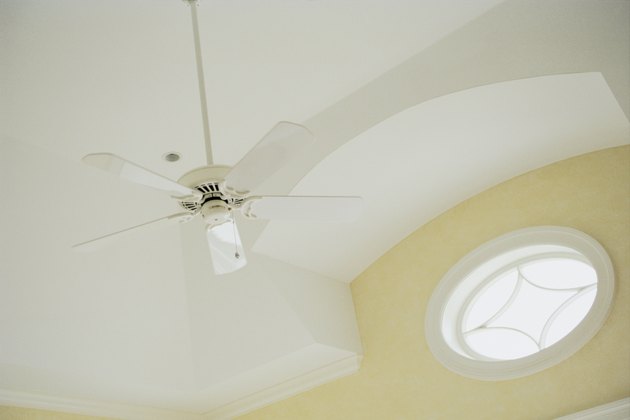


Ceiling Fans: Fact or Fiction?

As much as most of us love summer, there’s one big downside that comes with the heat: more use of air conditioning and fans equals higher utility bills.

If you have central air, you probably already know that the air conditioner is one of the most energy-hungry appliances in your home. It costs, on average, $0.36 per hour to operate – which accounts for about 25 percent of all home energy consumption.

So, what about using ceiling fans? Do they really help cool the home and lower air conditioning costs, or do new ultra-efficient HVAC systems make such fans unnecessary?

Let’s take a closer look at the benefits and drawbacks of ceilings fans.

Fact or Fiction: Ceiling Fans Are Low Cost

Fact. Compared to air conditioners, ceiling fans are downright cheap. The average cost of running a ceiling fan is about one cent per hour—a fraction of the cost to run an air conditioner.

So, it’s true, but…should you compare these two types of cooling? The answer is, no. That’s because ceiling fans don’t actually cool a room. Instead, they create a wind-chill effect that can make it seem cooler. They can also lower humidity levels, which makes the room more comfortable without actually lowering the temperature. Unfortunately, if the room is hot in the first place, a ceiling fan will do little to change the temperature.

Fact or Fiction: Ceiling Fans Make A Good AC Supplement

Fact. Ceiling fans can help save energy costs and increase comfort if they’re used in conjunction with an efficient air conditioner. With both your ceiling fans and AC operating, you can increase the thermostat by four degrees without losing any comfort. In turn, the air conditioner will come on less often, so your energy bills could be lower overall.

Fact or Fiction: Fans Are Not Just A Summertime Tool

Fact. (Sounds odd, but it’s true). As long as you have ceiling fans with reversible motors, ceiling fans can help save money in the wintertime. With the flip of a small switch found on the side of their motor housing, most ceiling fans can rotate in the opposite direction (clockwise). This reverse motion creates an updraft in the room, moving the hot air around without the wind-chill effect.


Fact or Fiction: Ceiling Fans Without LED Lights Aren’t Worthwhile

Fact and fiction. While it’s true that in general, ceiling fans can help lower energy use in your home, they can also require considerable energy to operate. How much depends on how the fans are used and the type of lights the fans include. Some fan lights can use more electricity than the fan motors themselves. In fact, the type of light a fan uses can account for up to 80 percent of your potential savings from a more efficient model. Be sure to select an ENERGYSTAR® LED lighting fixtures if you want to get the most energy savings out of your ceiling fans.

So, Are Ceiling Fans Worth the Investment?

Let’s do the math. An air conditioner costs $0.36 per hour, and a ceiling fan only $0.01 per hour. If air conditioning costs are lowered even by a few cents per hour, fans could still be worth it. On average, ceiling fans can help save four to eight percent on cooling costs when combined with an air conditioner.

If you live in a climate where you can use fans instead of air conditioning on marginally hot days, then ceiling fans could be a very worthwhile investment.

While ceiling fans provide better circulation of cool air and a wind-chill effect, they can still amount to wasted money and energy if no one is enjoying these benefits. For example, don’t:

Install fans in rooms that aren’t used very often;

Keep fans running after everyone leaves a room; and

Turn on fans whenever the lights are on, even if the fan is not needed.

bookmark_borderA Safe Pest Control For Rodent

Rodent

Rats and mice are two of the common rodents that home owners have to deal with. As the leading mouse exterminator in San Jose and San Francisco, we at Planet Orange strive to educate our customers about rodents and the dangers of having them in the home. The following information will help you understand more about rats and mice, and how important it is to contact a mouse exterminator.

Mice will eat almost anything. Generally, they like to eat grains, seeds, or any material that is sweet tasting. They are small animals, measuring approximately 1-2 inches, excluding the tail. The house mouse will have a pointed nose, and large ears in comparison to the size of the head. Mice can multiply very rapidly, when an adequate supply of nutrition is available. They become sexually mature in 2 months, and can produce about 8 litters each year, with 5 or more pups in each litter. An adult mouse weighs about an ounce, and can eat about 10-15% of its own body weight each day. They are particularly active at night. They are extremely mobile, being able to run up vertical surfaces and jump more than 12 inches from the floor to a raised surface.


Rodent Proofing Experts

Bay Area Rodent Solutions, based in Campbell, CA has been specializing in rodent proofing inspections, exclusion repairs, and rodent sanitation for over 12 years. We serve the entire Bay Area from San Francisco to Monterey and as far east as Walnut Creek. If any travel charges apply, we will tell you up front.

Rodent exclusion requires extensive knowledge of rodent behavior and capabilities. It also requires a keen understanding of typical construction practices in order to make the best use of rodent proof materials.

No other company in the Bay Area offers our level of expertise or our signature approach to rodent exclusion. Most pest control and extermination companies simply don’t have the specialized knowledge and skill required to protect your home from invasion by rats, mice, squirrels, raccoons and other wildlife.

Bay Area Rodent Solutions Exclusion Inspections

If you see, hear, or smell any signs of rodent infestation, it’s a good idea to call Bay Area Rodent Solutions for a professional rodent proofing inspection. We charge $150 to inspect an average-size house and we’ll be happy to quote you a price for inspecting larger homes over 2,500 square feet, apartment buildings, and commercial structures.

Rats, mice, and squirrels are remarkably smart and resourceful. They will use any entry point they find. They also have the ability to gnaw through soft materials to get into your home or business. While Raccoons are not rodents, they can enter your home using some of the same entry points.

Our rodent inspector will come out to provide a complete top-to-bottom inspection of your home or business to identify any openings where rats, mice, squirrels, raccoons or other wildlife may be getting in.

This includes:

  • The entire exterior perimeter
  • The entire exterior perimeter
  • Crawl spaces
  • Basements
  • Under attached decks
  • Garages
  • Roof tops

Interior living spaces where evidence is found


Rodent & Rat Infestion Removal and Control

Rodents and rats can be problematic inside of any structure or home. Both rats and mice enter the home looking for food and water, enjoying the protection from the elements. Homes plagued with rodent problems will hear scratching noises coming from the attic or walls at night, and often complain of odors that just won’t go away. Rodents’ ability to chew through almost anything not only gives them easy access, but can cause thousands of dollars in damage if not handled immediately. Rodents also transmit a number of dangerous diseases, and typically leave droppings of excrement throughout the home.

How To Tell If You Have A Mouse Infestation

Before we get into the problems mice cause, let’s talk a little bit about how you can know if your home has been invaded by mice.

When mice invade homes, they leave some tell-tale signs behind. For instance, every living creature has to poop, right? Mice are no different. If mice are wandering around the inside of your home while you are sleeping, they are sure to leave droppings behind. Some other signs of a mice infestation include holes chewed through baseboards, lights or outlets not working, and gnaw marks throughout your home.